Hubspot and AWeber Integration: Automatic Subscribers Adding
Hubspot is a powerful platform for managing and automating business processes. AWeber is a popular email service provider. Do you use both of these tools? Then read our article to learn how to quickly and without outside help set up the Hubspot and AWeber integration. Add new contacts to Hubspot CRM and the ApiX-Drive online connector will automatically add subscribers to your AWeber list.
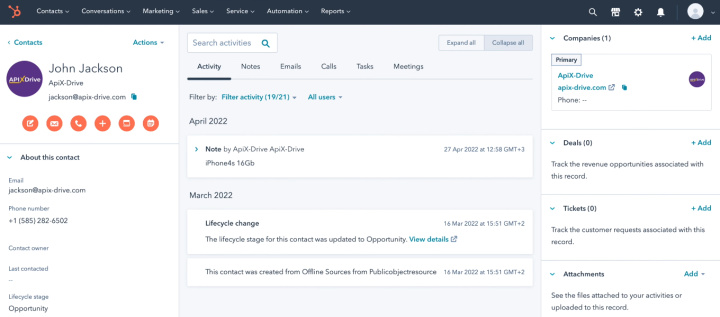
The Hubspot platform provides a wide range of tools for managing sales, marketing strategies, and customer service. Service users get the opportunity to efficiently store and process contacts, deals, companies. Contacts is one of the main sections of Hubspot CRM. In the contact card, you can add notes and tasks, set up reminders, link companies and deals, make calls, track activities, etc.
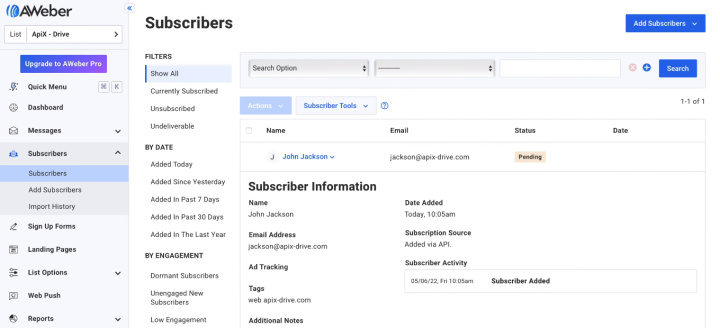
Email marketing services are often used in conjunction with CRM systems. For example, the AWeber platform. This service is suitable for small and medium businesses. With the help of AWeber, you can organize your contact database, segment subscribers by various parameters, create registration forms, track subscribers' actions, automate campaigns, etc.
If you use Hubspot CRM and AWeber, then there is a need to transfer data from one system to another. This can be done manually if there are multiple contacts. But if you transfer data from Hubspot to AWeber on a daily basis, then it is better to think about automating this process. If you set up communication between services using the ApiX-Drive online connector, then subscribers in AWeber will be automatically created based on new Hubspot contacts.
How to setup Hubspot and AWeber integration
To solve the problem, we will use the ApiX-Drive online connector. This is a simple tool for setting up integrations and automating business processes. The online connector monitors changes in the data source, downloads the required information, and initiates a certain action in the receiving system. This automated process can be set up in just a few minutes. Special knowledge and skills are not required.
We will set up Hubspot CRM as a data source, and connect the AWeber service as a receiver. Repeat the steps below and get rid of the chore of transferring data from Hubspot to AWeber. But first, register on our website and go to your personal ApiX-Drive account.
How to setup Hubspot CRM
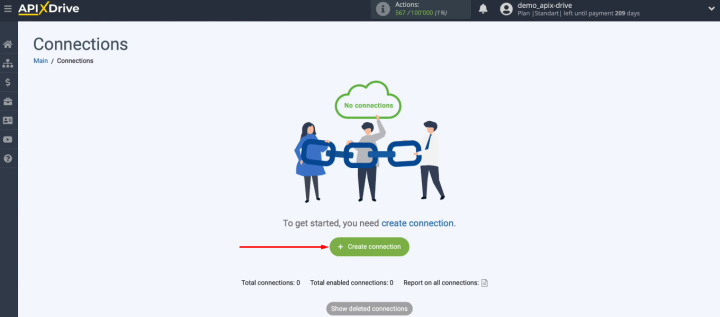
For Hubspot setup Click "Create connection".
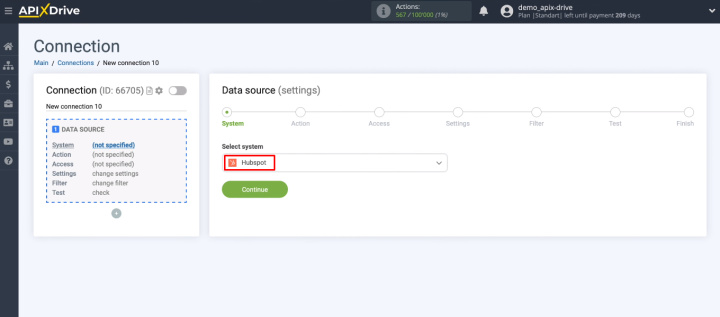
Select the data source - Hubspot.
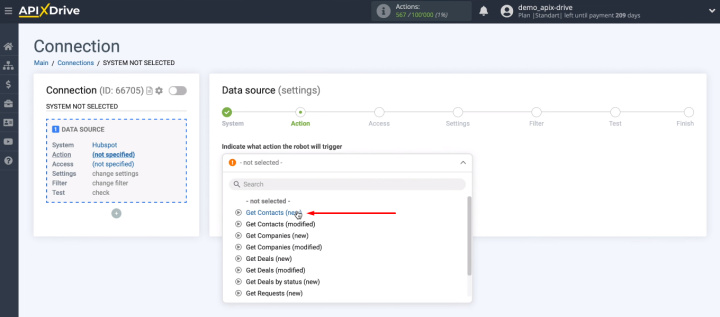
Choose an action - Get Contacts (new).
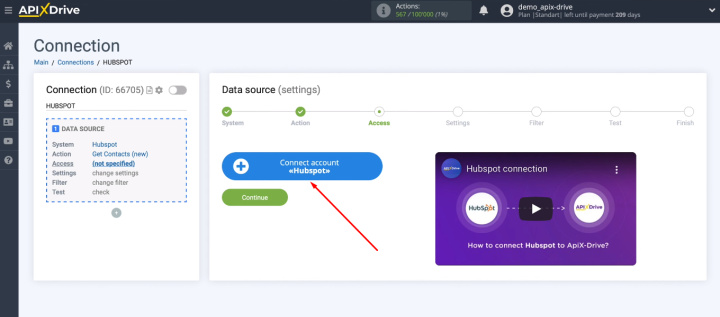
Click “Connect account Hubspot”.
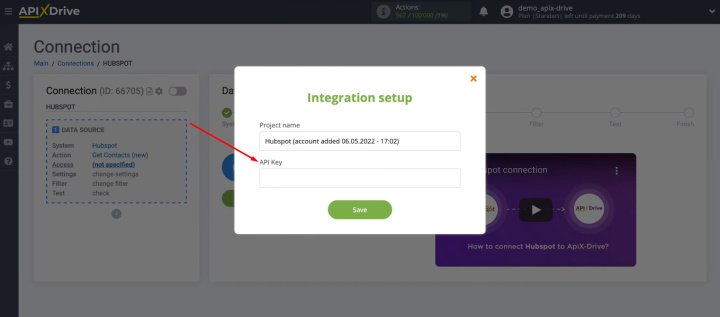
To connect your Hubspot account to the ApiX-Drive system, you need to fill in the “API Key” field.
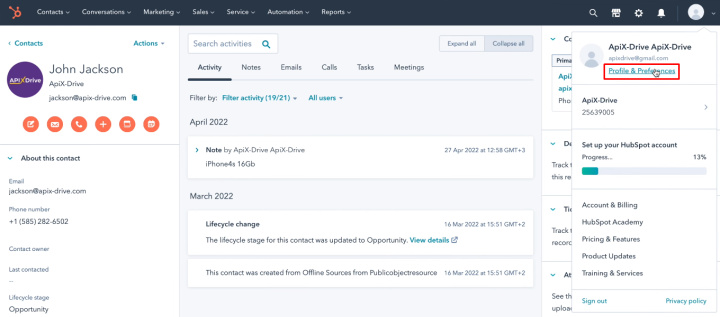
Go to your personal Hubspot account and go to your profile settings.
In the "Integrations" section, find the "API Key" tab and go to it. Click the "Show" button next to the active API key and copy it.
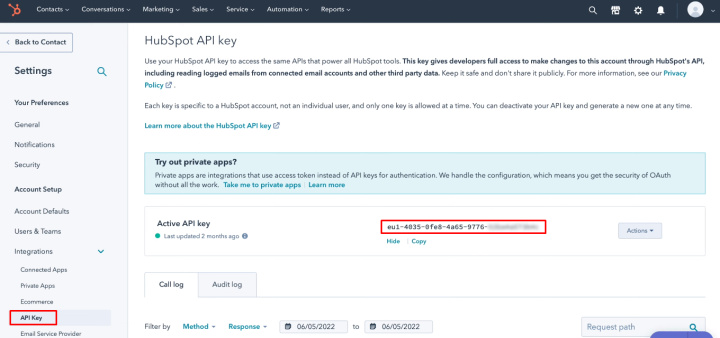
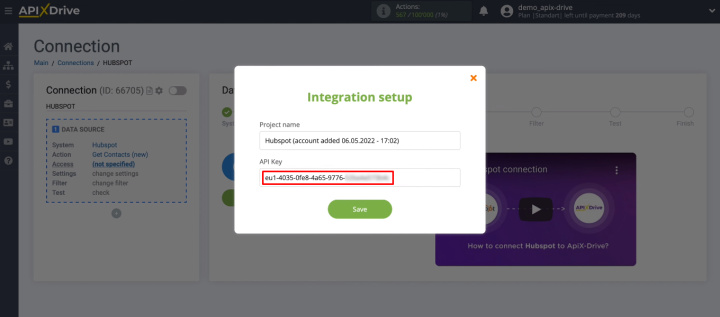
Return to the ApiX-Drive system and paste the copied value into the “API Key” field. Click "Save".
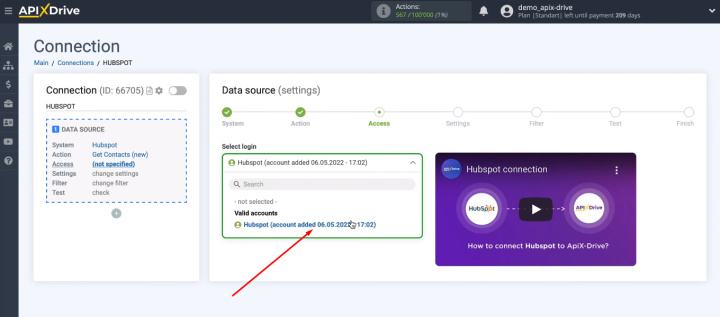
Select connected Hubspot account and click "Continue".
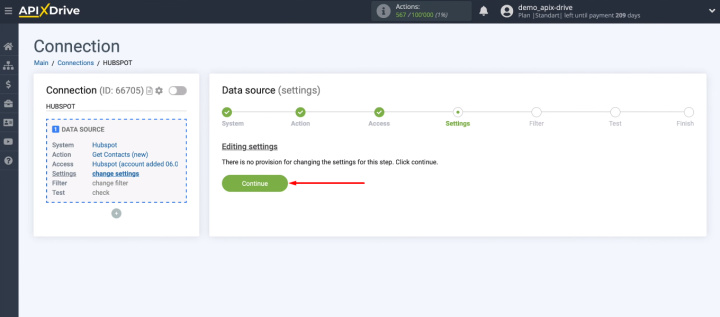
Skip the "Settings" step - click "Continue".
The next step is to add filter conditions for the incoming data. Why might this be needed? For example, not all Hubspot contacts may have an email, and we want to transfer only those contacts to AWeber that have a mailbox address. In this case, you need to add a condition to filter out contacts where the “Email” field is empty.
- Automate the work of an online store or landing
- Empower through integration
- Don't spend money on programmers and integrators
- Save time by automating routine tasks
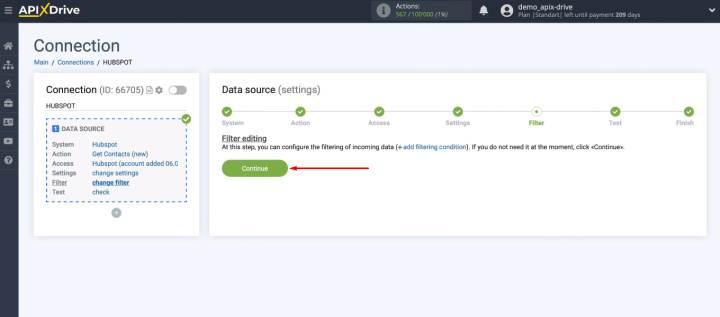
In our example, we will transfer all Hubspot contacts to AWeber, so at the “Filter” stage we just click “Continue”.
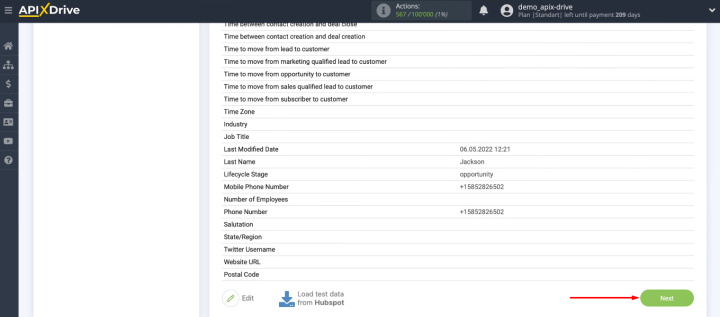
In the next step, check the test data and click “Next”.
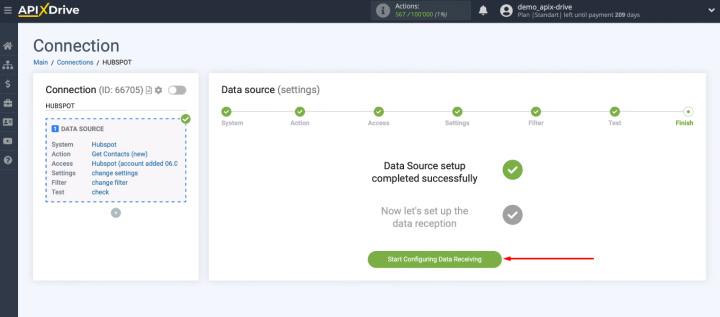
Hubspot CRM has been successfully configured as a data source. We continue to work with the receiving system.
How to setup AWeber
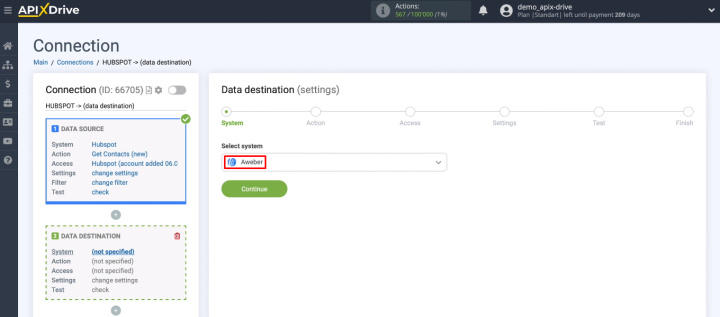
For AWeber setup select this service as the receiver.
Choose an action - Add/Update Subscriber.
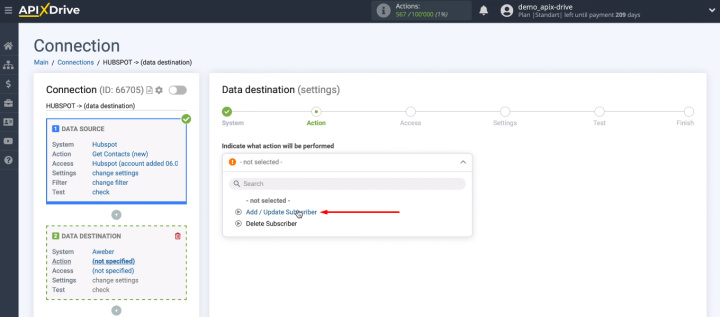
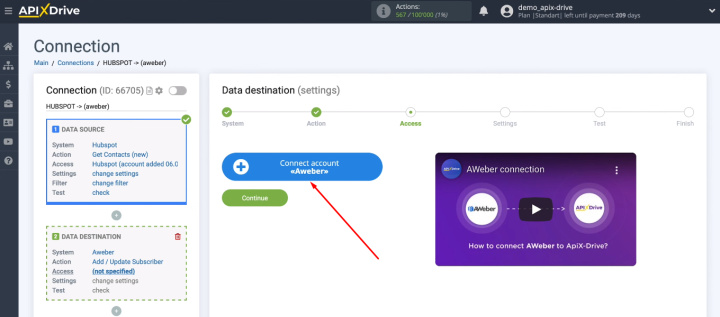
Click "Connect account AWeber".
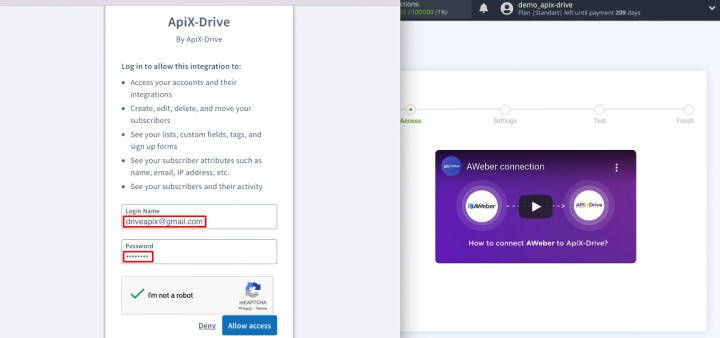
In the window that opens, enter your AWeber account login and password. You also need to grant access to the ApiX-Drive service to work with your AWeber account - click “Allow access”.
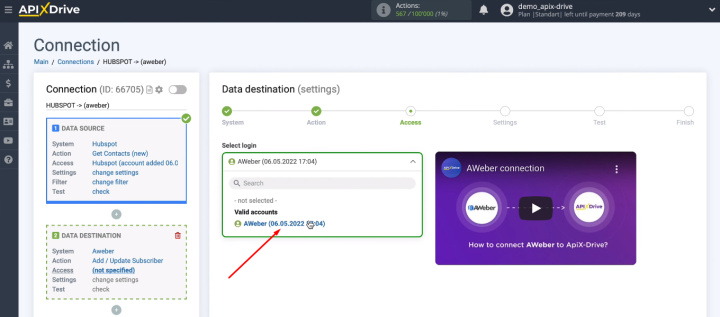
The connected AWeber account appeared in the list of available logins. Select it and click "Continue".
Select an account and a list where new subscribers will be added.
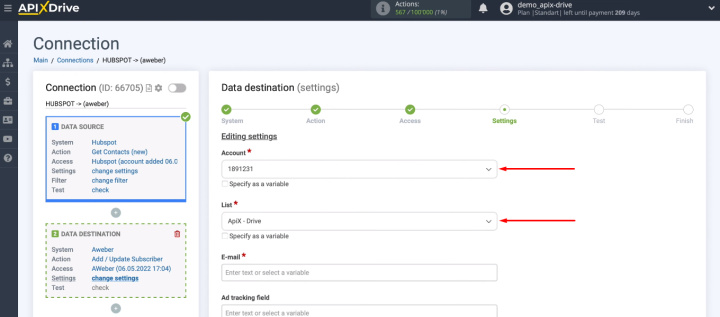
Set up AWeber fields, the data from which will be used when adding new subscribers. To assign a variable, click in the field and select a value from the dropdown list. You can use the search bar to find the desired variable.
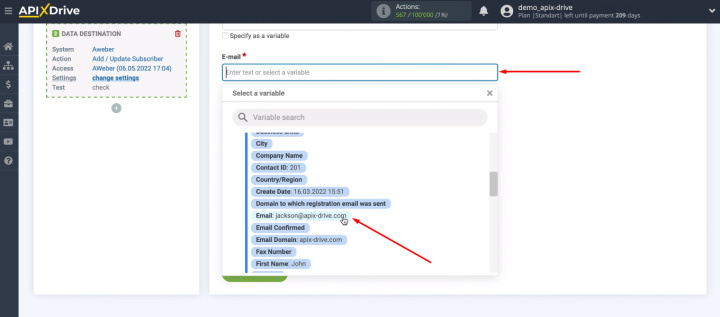
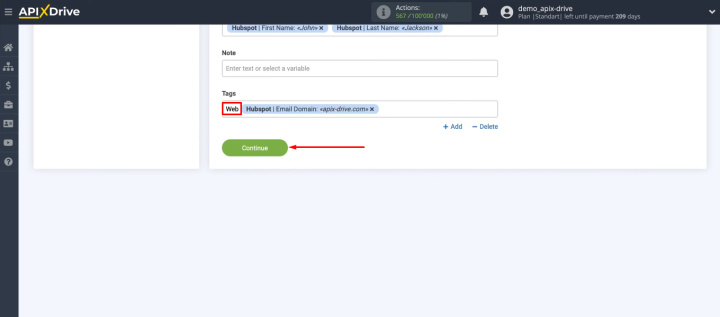
You can use more than just variables. If necessary, enter the text manually. When the AWeber fields are configured, click “Continue”.
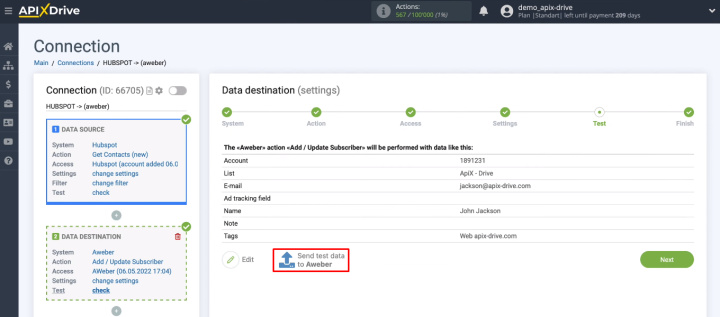
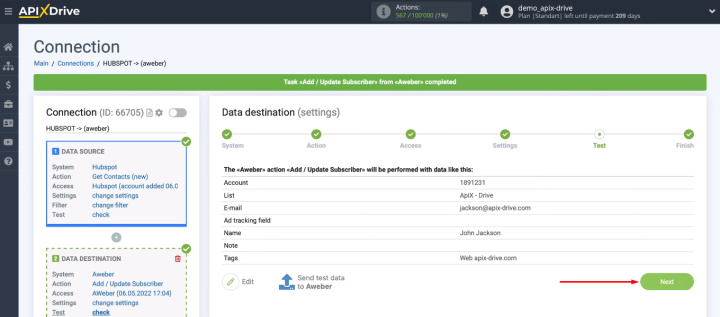
In the next step, check the sample data that will be used to create a new subscriber in AWeber. To make changes, click "Edit". If everything suits you, click “Send test data to AWeber”.
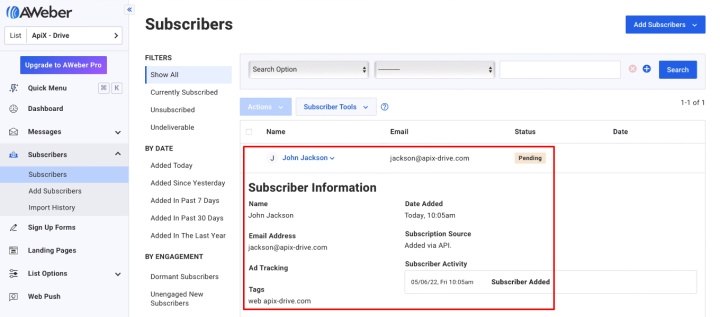
Go to AWeber and check for a new object in the “Subscribers” section.
Return to the ApiX-Drive system, click “Next”.
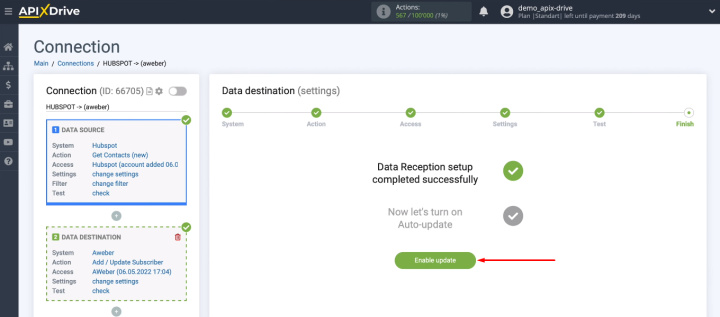
Enable auto-update
To activate the integration, you must enable automatic data refresh. Click "Enable update".
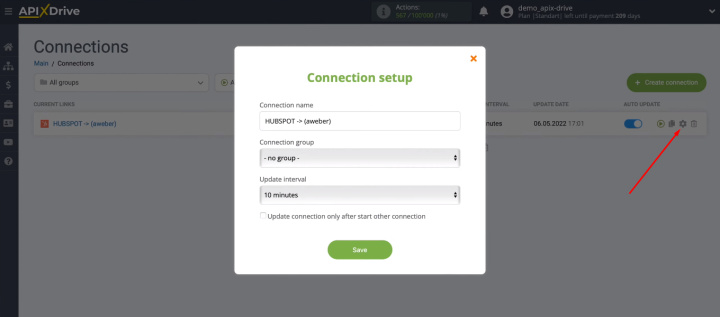
The created integration appeared in the “Connections” list. Here you can enable/disable auto-update, copy and delete the connection, run the integration manually. In the settings menu (“gear”), you can change the name of the integration and select the appropriate communication interval.
Connect Hubspot and AWeber – results and benefits
We set up the Hubspot and AWeber integration using the ApiX-Drive online connector. The result of our work is the automation of the transfer of contacts from the CRM system to the email service provider. Now you do not need to transfer data manually, it is better to spend working time on really important tasks. Data migration automation ensures that the task is completed quickly and errors that often occur due to human error are minimized. Set up integrations with ApiX-Drive and improve the quality and efficiency of your workflows.
