Paperform and Gmail Integration: Automatic Data Transfer
Paperform is a full-featured service for collecting user data through forms. Companies, entrepreneurs, and marketers use it to improve lead generation and conversion rates. In addition, this tool is great for collecting user feedback on a product or service and introducing elements of interactivity into interactions with customers. In our article, you will learn how to set up Paperform and Gmail integration to automate data transfer between these services.
The Gmail and Paperform platforms are relevant and in-demand solutions among those involved in marketing today. The intuitive interface and solid set of tools in Paperform's online builder allow you to create forms that resemble landing pages. They are displayed correctly both on a personal computer and laptop, and on a mobile device. Unlike other constructors, here you do not have to limit yourself to dragging and dropping form elements, placing them in strictly designated places. In Paperform, you can add additional fields with questions, stylized text, pictures, videos anywhere on the page. Each form gets its URL, so it can be distributed separately, without a website.
Gmail is Google's largest email service with advanced tools and functions for exchanging emails, which has long been known to many users. There is obviously no need to list its capabilities. Let's consider a situation when there is a need to connect Gmail and Paperform with each other. The main purpose of such communication is to ensure that data from submitted forms automatically enters the mail service for instant sending of letters to potential clients.
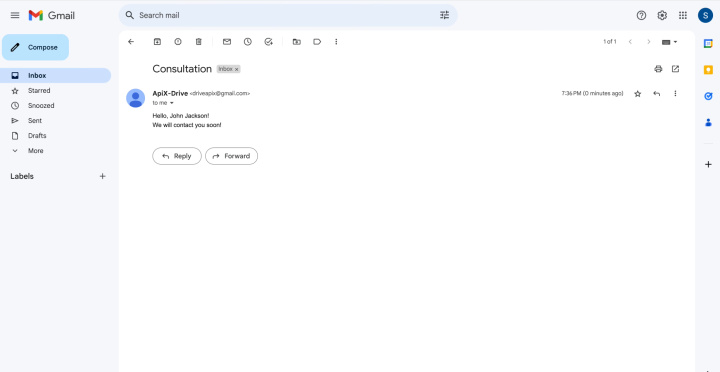
How to Set up Gmail and Paperform Integration
So, we need to automate the transfer of data from forms created in Paperform to the Gmail email service. To achieve this, we will use the ApiX-Drive online connector. With this no-code tool, you can quickly and easily set up cross-platform integrations. ApiX-Drive has hundreds of ready-made solutions for Google services, chatbots, instant messengers, CRM and CMS systems, email and SMS services, marketplaces, task managers and more.
Action plan:
- We create a form for the task we need.
- Using ApiX-Drive, we connect and configure the data source – Paperform.
- We connect and configure the data receiver – Gmail account.
- We start the auto-update mode.
As a result of Paperform Gmail integration, we will receive complete automation of data transfer from each submitted form to the Gmail mail service with subsequent sending of a letter to a potential client. We won't focus on the process of creating the form (it's easy, and you probably already know how to do it). But let's look at the next steps in detail.
Setting up the Data Source – Paperform
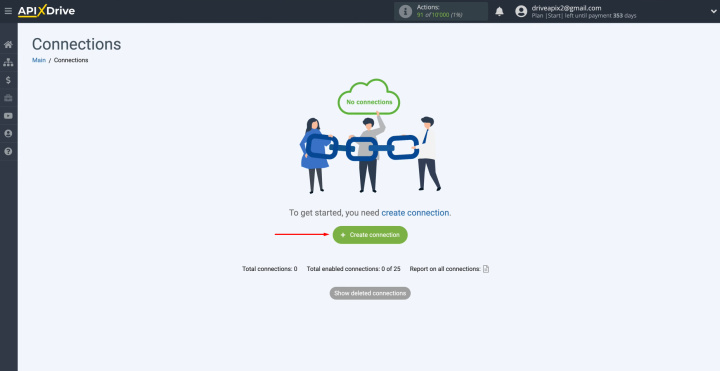
To set up Paperform integration with Gmail, you have to create a new connection. Click on the green button.
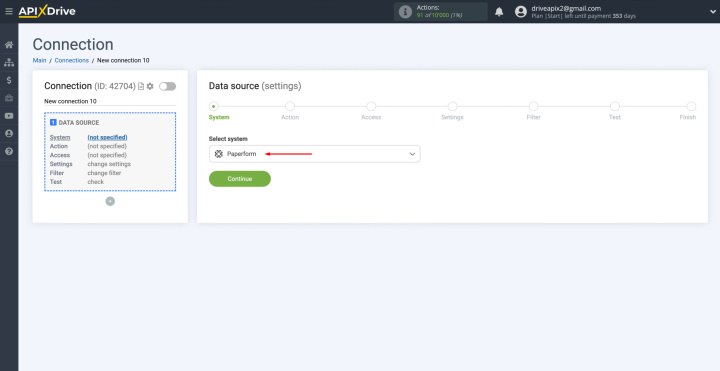
Select Paperform as the data source. Click “Continue”.
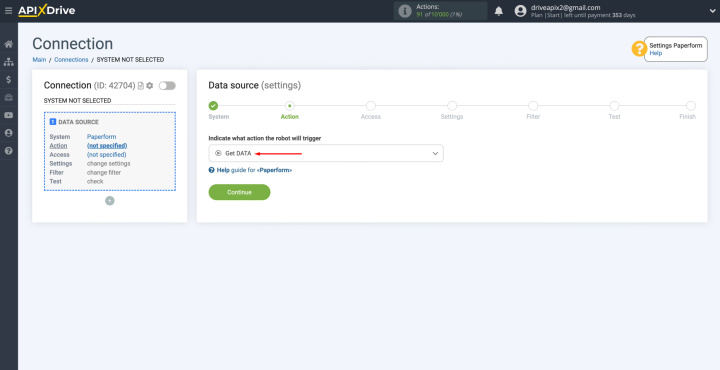
Select the action “Get DATA”. Click “Continue”.
Connect your Paperform account to the ApiX-Drive system. Click on the blue button.
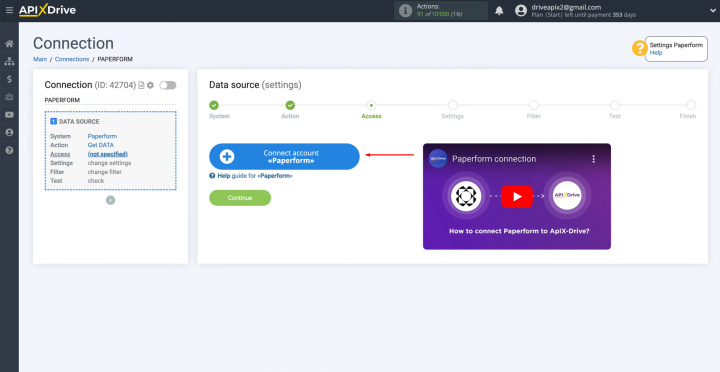
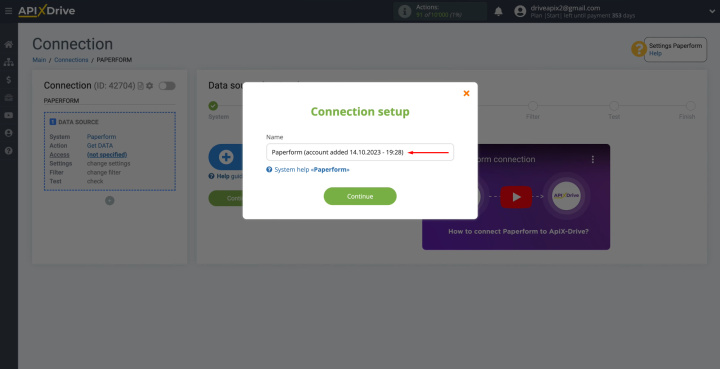
Give the connection a name, or just click
“Continue”.
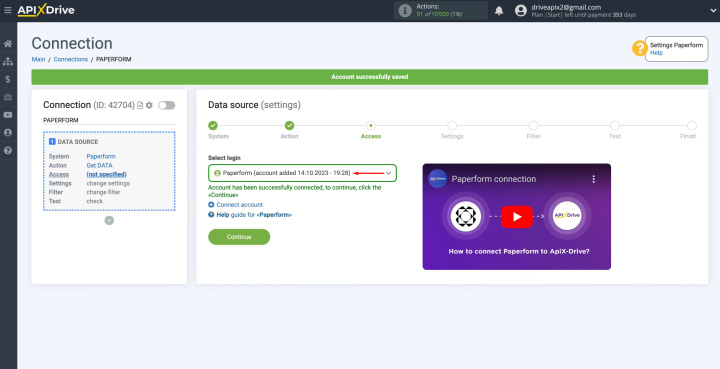
When the connected account is displayed in the list, select
it and click “Continue”.
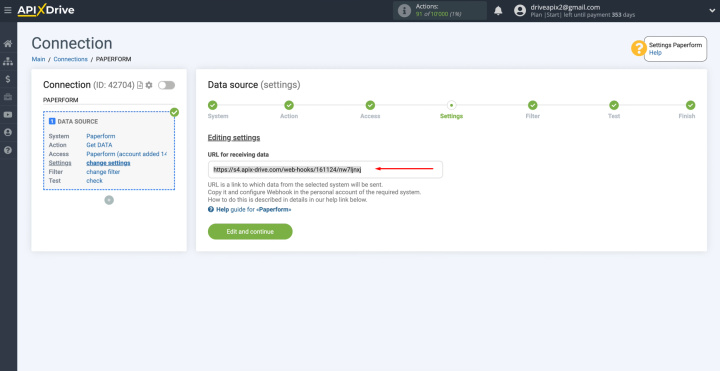
Here you see the URL
for receiving data. It is to this link that new data will be sent from the
Paperform system. Copy this URL.
To continue setting up, go to
your personal account on Paperform.
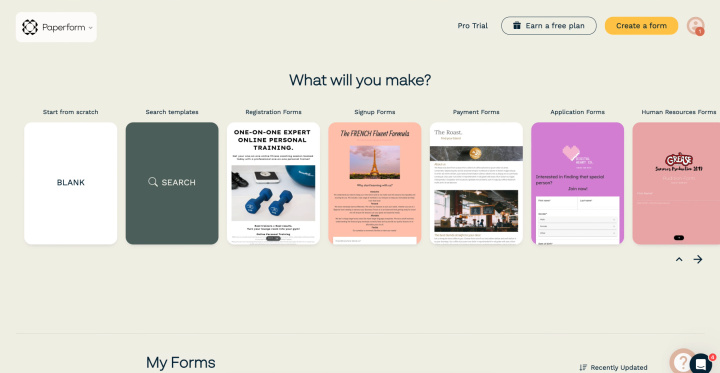
Go to the form from which you
want to receive data.
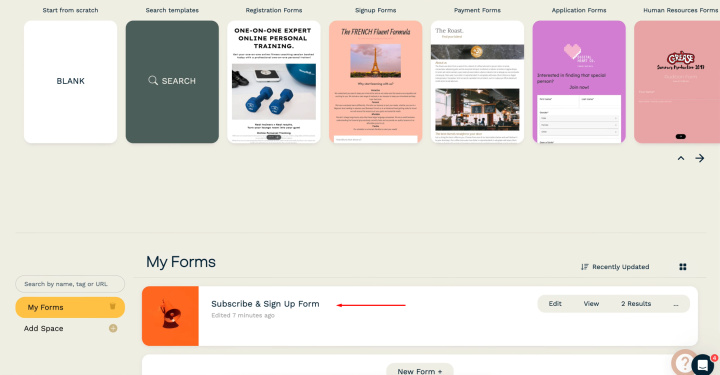
Go to the “After
Submission” section.
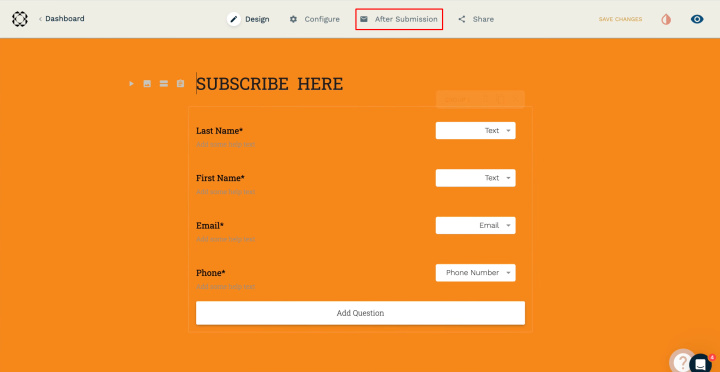
Select “Integrations
and Webhooks”.
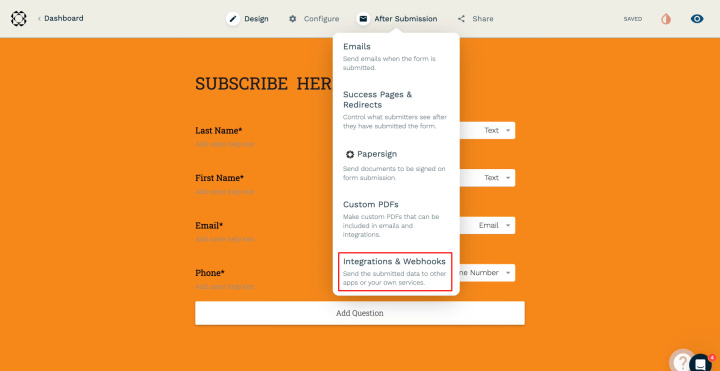
Find the “Webhooks” section.
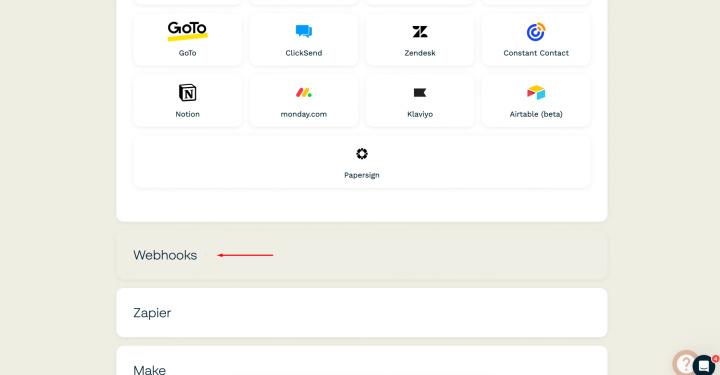
Paste the
copied link in the ApiX-Drive system into the appropriate
field, and click “Add Webhook”.
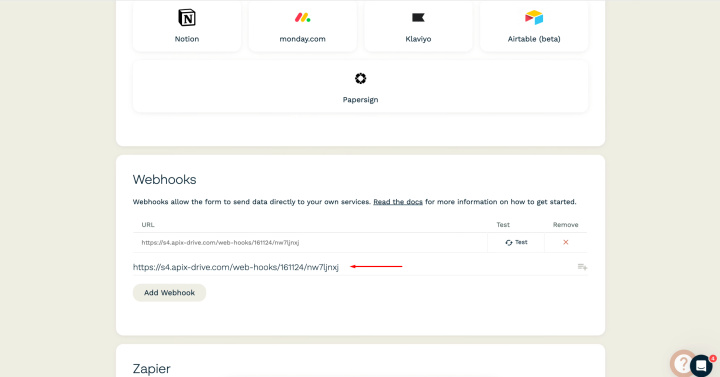
Note that
after setup, there will be no test data in our system immediately because
nothing has arrived at the new URL yet. Therefore,
you have to generate data by executing an event,
such as filling out a form. Click “Submit”.
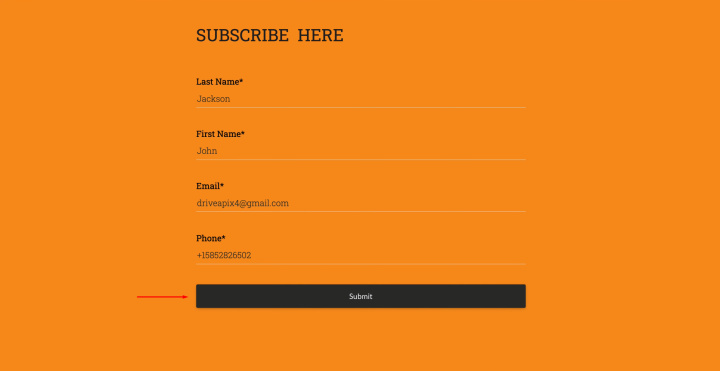
After the data has been
generated, return to the ApiX-Drive
system and continue configuration.
Click “Edit and continue”.
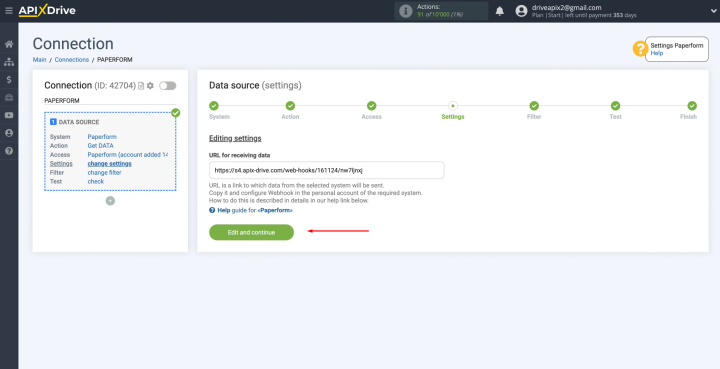
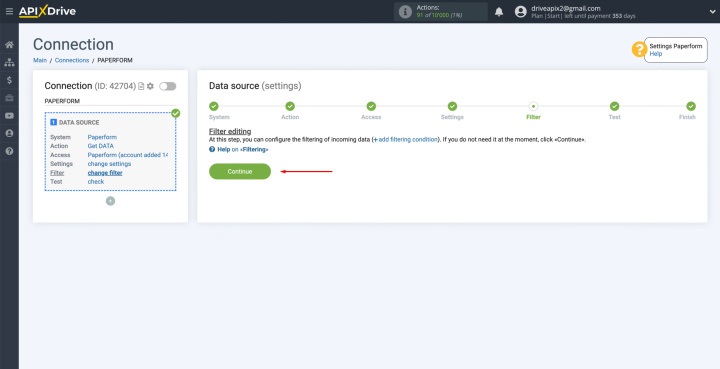
Set up a data filter. In this
case, there is no need for this, so just click “Continue”.
Now, you see
the test data that was just generated.
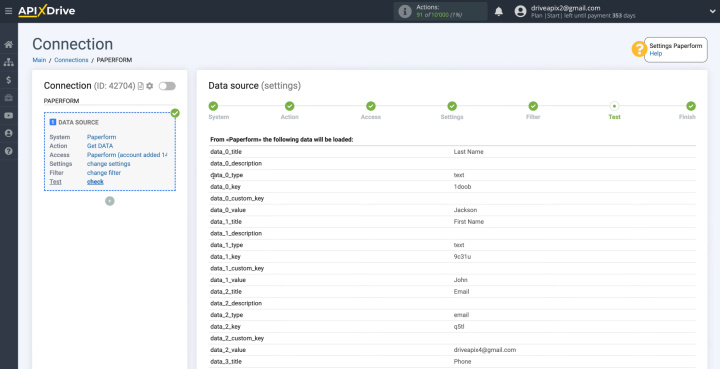
If there is no data at this
stage, try following the steps described earlier.
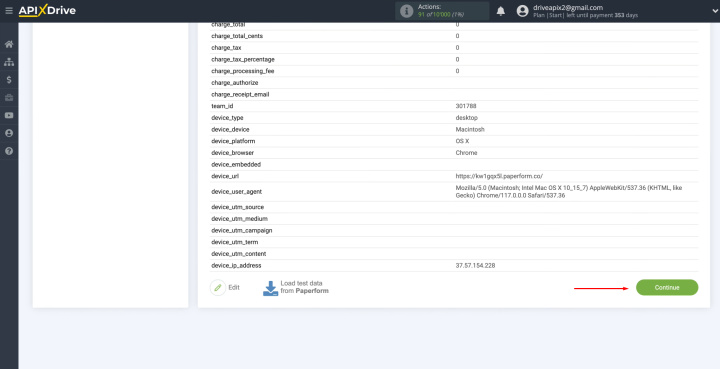
If everything suits you, click “Continue”.
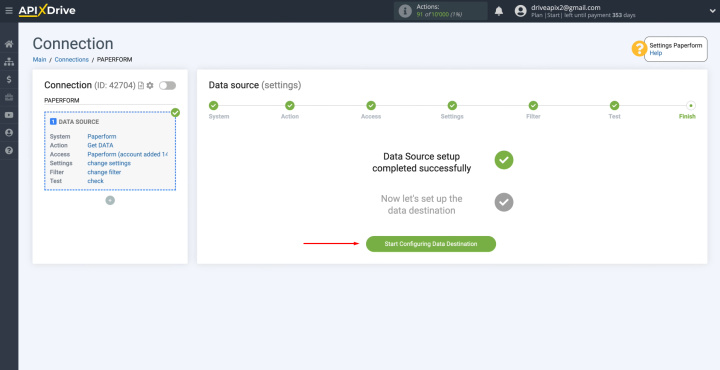
This completes the configuration of the Paperform data source
successfully. Now you have to
move on to setting up the data receiver.
Setting up the Data Receiver – Gmail
To continue to set up Gmail integration with Paperform, click “Start Configuring Data Destination”.
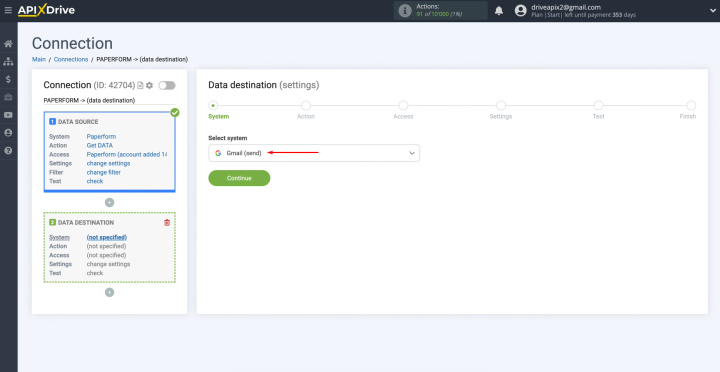
Select “Gmail
(send)” as the data receiving system. Click “Continue”.
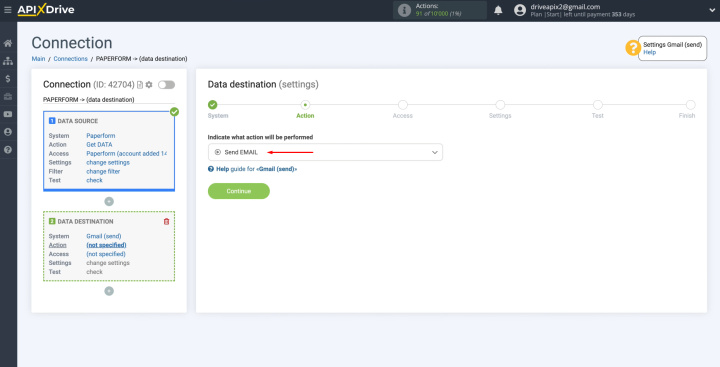
Select the "Send EMAIL" action. Click “Continue”.
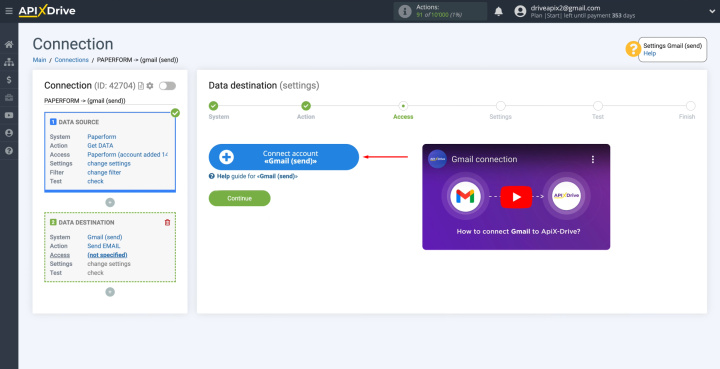
Connect your Gmail account to the ApiX-Drive
service. Click
on the blue button.
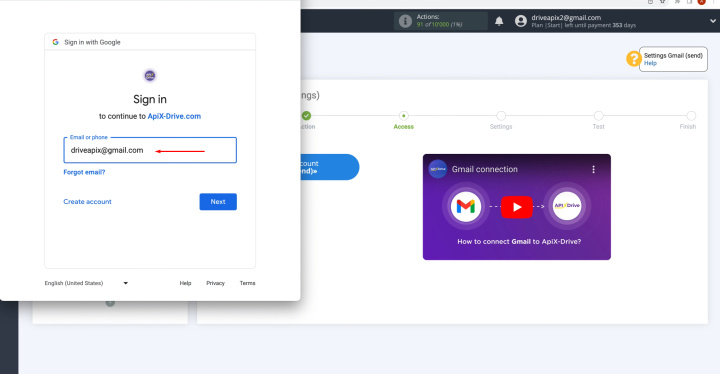
Enter your
username. Click “Next”.
Enter your password. Click
“Next”.
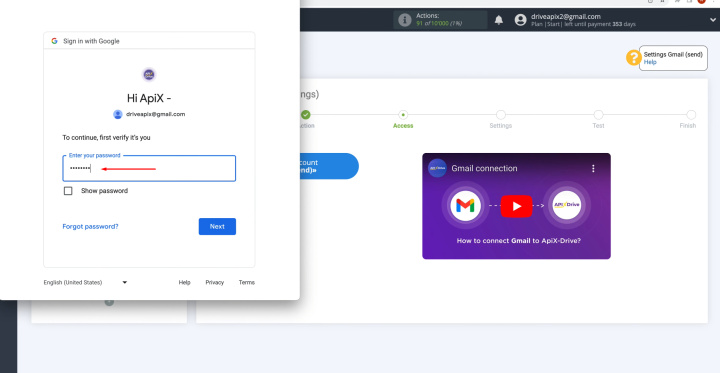
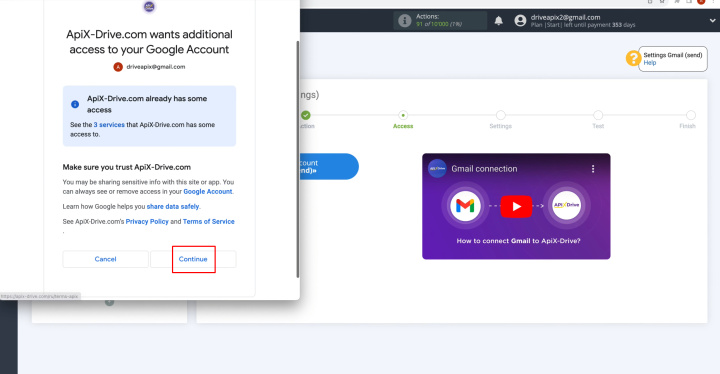
Give
permission to ApiX-Drive to work with your account. Click
“Continue”.
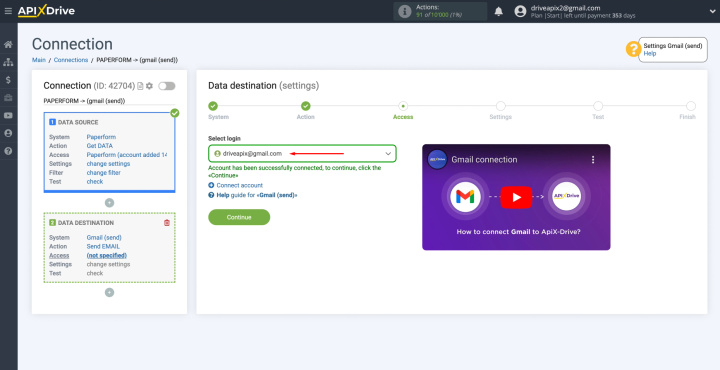
When the connected account
appears in the list, select it and click “Continue”.
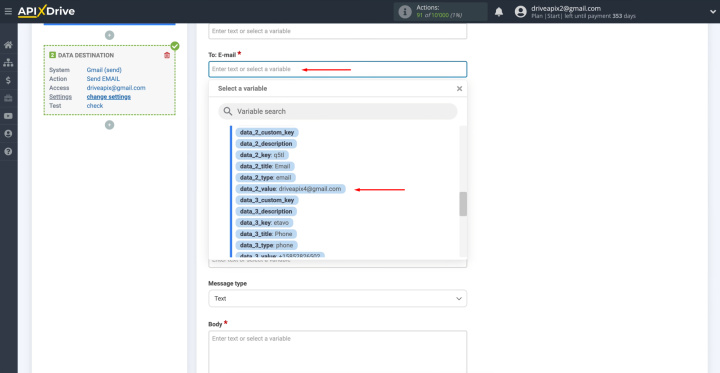
Fill in the fields with
variables from the Paperform. To assign a variable, click on the
field in which you need to transfer data and select the required variable from
the drop-down list.
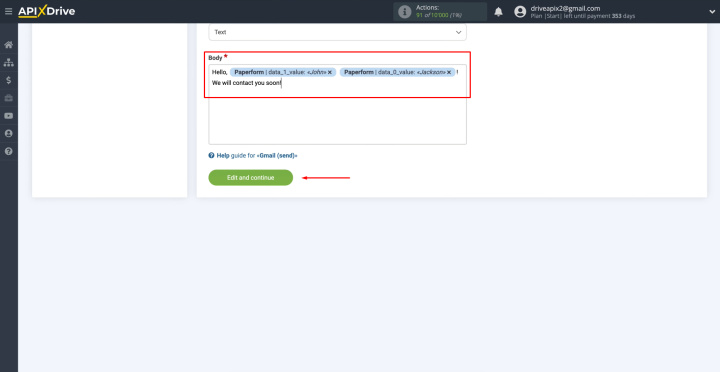
Note that you can add variables and enter
values manually.
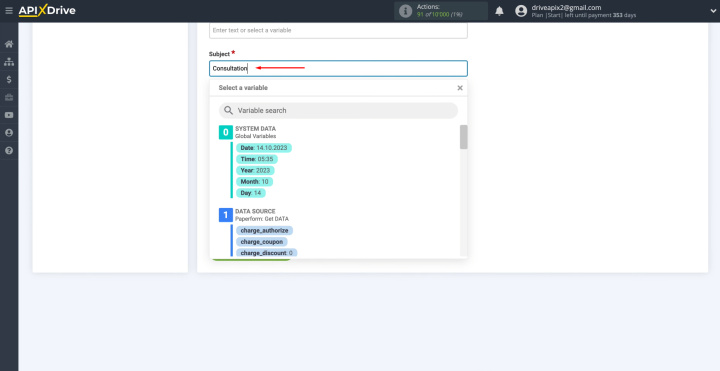
To go to the next line, press “Enter”. When all the
necessary data is assigned, click “Edit and Continue”.
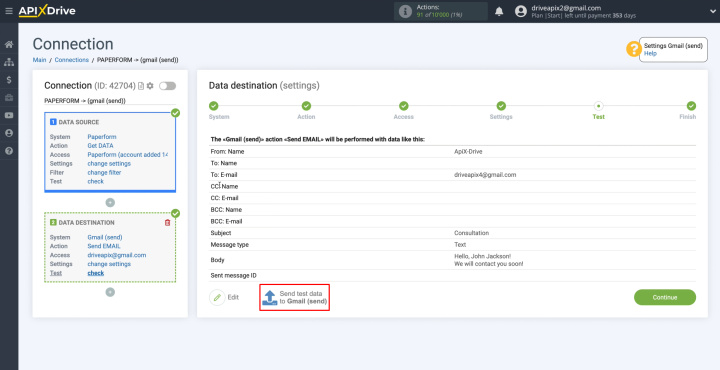
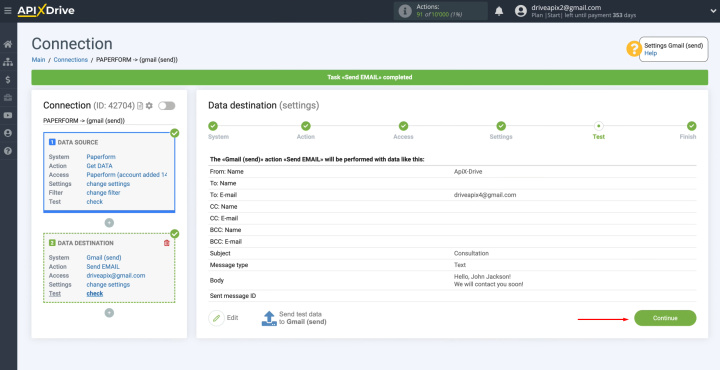
Now,
you see the test data that will be sent to Gmail. To check the correctness of the settings, click “Send Test
Data to Gmail”.
Go to your Gmail account and check the result.
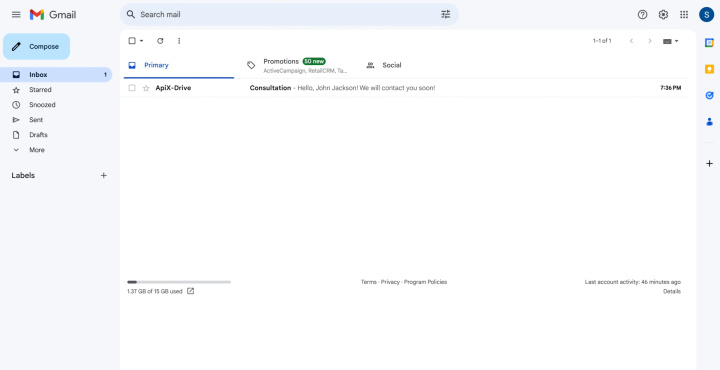
If you are satisfied with everything, return to the ApiX-Drive service
and continue setting up. Click “Continue”.
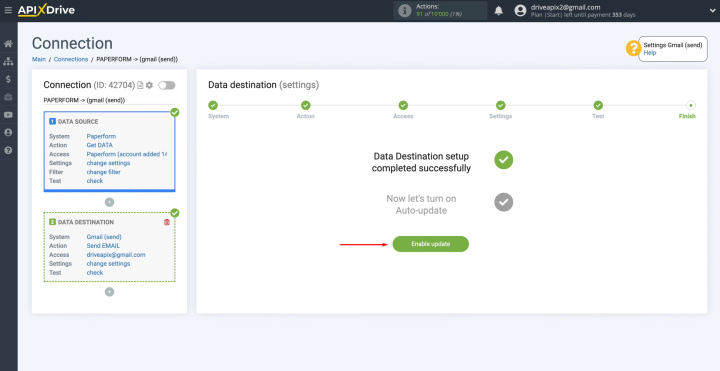
Setting up Auto-update
In order for data transfer to occur automatically, configure auto-update. Click on the green button, “Enable update”.
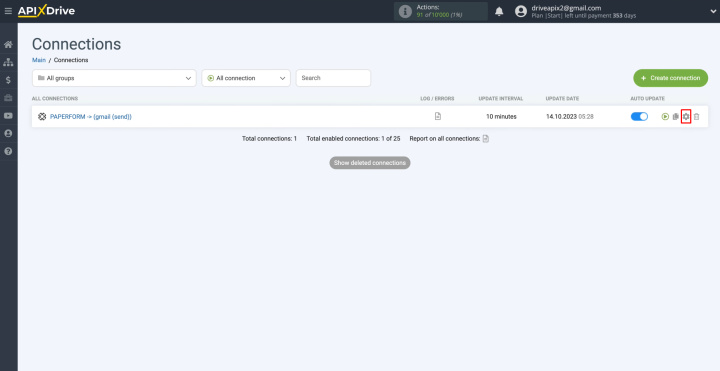
Click on the gear button.
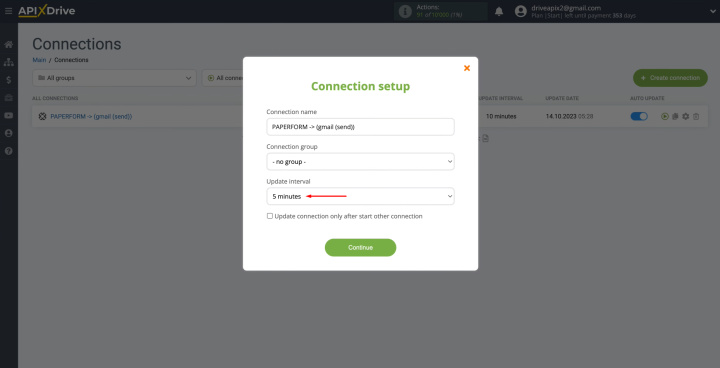
Select the interval for the operation of the connection. For example,
once every 5 minutes. In addition, here you can change the name of the
connection and assign it to the required group. Click “Continue”.
That's all. Gmail Paperform integration was completed. Congratulations! You have done it!
The Result of Paperform + Gmail Integration
You are probably already convinced that special knowledge and skills are not required to create system integration using the ApiX-Drive online connector. Its developers made sure that this task was feasible for the every user. You will spend literally 5–10 minutes setting up the necessary connection.
- Automate the work of an online store or landing
- Empower through integration
- Don't spend money on programmers and integrators
- Save time by automating routine tasks
Having completed all the steps described in our instructions in order, you will see a working Gmail + Paperform integration, which will begin to save your time and benefit your business from the very first minutes. Correctly configured connection of these systems significantly speeds up the processing of lead data and, accordingly, makes your work easier by removing routine manual information entry. After submitting the completed form, a potential client or buyer immediately automatically receives an email with feedback. So, as you can see, the benefits of automation in this case are multifaceted.
Time is the most valuable resource in today's business realities. By eliminating the routine from work processes, you will get more opportunities to implement the most daring plans and ideas. Choose – you can continue to waste time, money and nerves on inefficient solutions, or you can use ApiX-Drive, automating work processes and achieving results with minimal investment of money, effort and human resources.
