Webflow and Brevo Integration: Automatic Data Transfer
Webflow is a popular builder for any type of website. It significantly accelerates the creation process by providing ready-made blocks from which you can assemble web pages, like LEGO. Brevo is an email marketing and SMS marketing service provider. With its help, companies can communicate and interact with their customers through various channels: email, SMS, chats, and many others. If you work with both platforms, you will probably be interested in the opportunity to improve the speed and efficiency of their use. How can you do this? We offer you detailed instructions on setting up Webflow and Brevo integration. By following all the steps described, you can easily and quickly automate the transfer of new leads from the website to the marketing platform.
Benefits of Automated Data Transfer from Webflow to Brevo
Automation of data transfer will completely free you from one of the routine manual processes. Its main advantage is saving time and labor resources. An important bonus is reducing the probability of errors to zero. In addition, the connection of the website builder and the platform for conducting marketing communications with clients will allow you to significantly speed up data processing. This will increase your personal productivity, as well as improve the performance indicators of your department and the company as a whole.
You will see the results immediately after setting up Brevo and Webflow integration via our codeless online connector, ApiX-Drive. New leads from the website created in Webflow will be automatically transferred to the service for multichannel marketing as new contacts. This eliminates the need to manually transfer customer data such as names, surnames, phone numbers, email addresses, etc. In this way, you optimize your workflows, improve the customer experience with your company, and ensure a quick response. This will give you an advantage over competitors who have not yet applied automation in their sales.
ApiX-Drive – the Optimal Solution for Setting Up Integration
To perform Webflow & Brevo integration, you do not need to delve into programming or API details. You also do not need to look for third-party support. All necessary specific actions will be taken care of by our online connector, ApiX-Drive.
Here are the main advantages of our service:
- Large selection of integrations. The platform offers hundreds of ready-made solutions for connecting systems.
- Intuitive interface. The developers have done everything possible to ensure that even beginners can easily use the connector.
- Universality of application. The service is ideal for department directors and companies in various fields, managers of all levels, online store owners, marketers, IT specialists, copywriters, and many others.
- Save time. Full setup and launch of integration will take no more than 10 minutes, even if you have never done such tasks before.
- Detailed instructions. The materials created by the ApiX-Drive team will help you connect accounts and perform settings.
- Customer trust. More than 100,000 people have already chosen our service to develop their business.


How to Set Up Webflow + Brevo Integration
Let's start with the preparatory stage – registration on the official website, apix-drive.com. If you have already done this, you can proceed to the settings for Brevo & Webflow integration.
Setting Up the Data Source – Webflow
To set up the Webflow integration with Brevo, first create a new connection. To achieve this, click on the appropriate button.
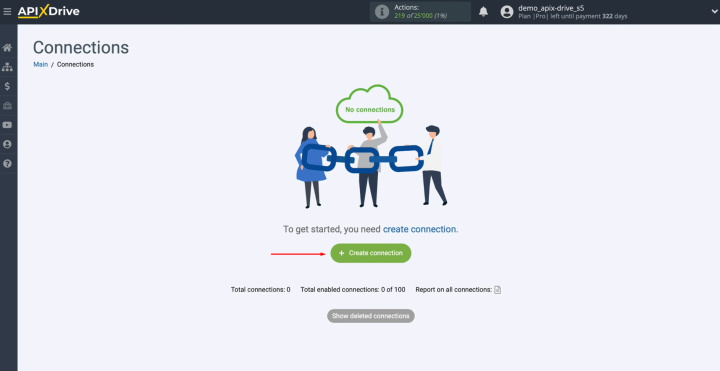
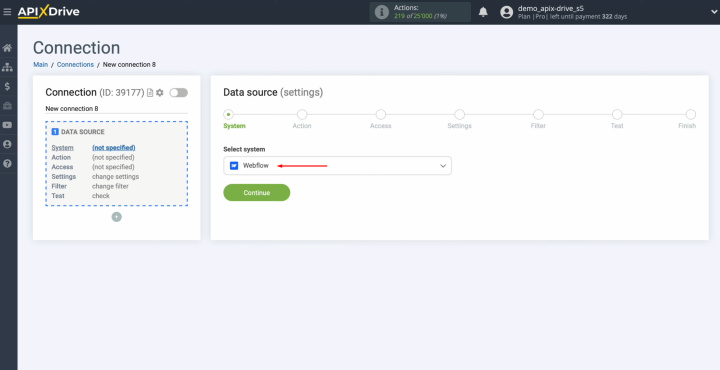
Select the
data source system. You need Webflow. Click “Continue”.
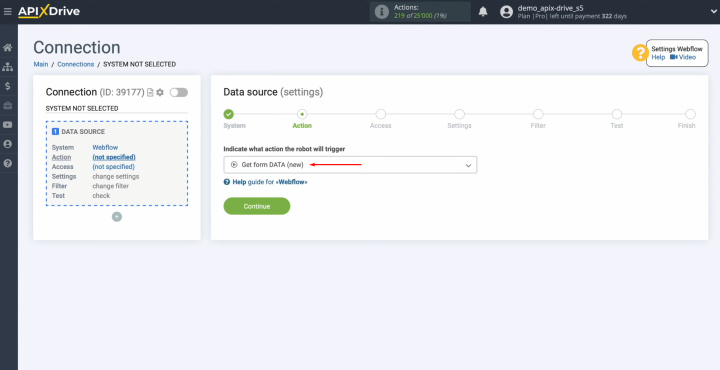
Choose the action “Get form DATA (new)”. Click
“Continue”.
Сonnect your
Webflow account to ApiX-Drive.
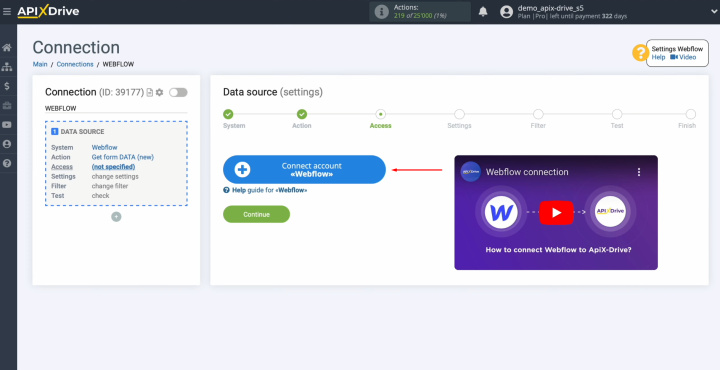
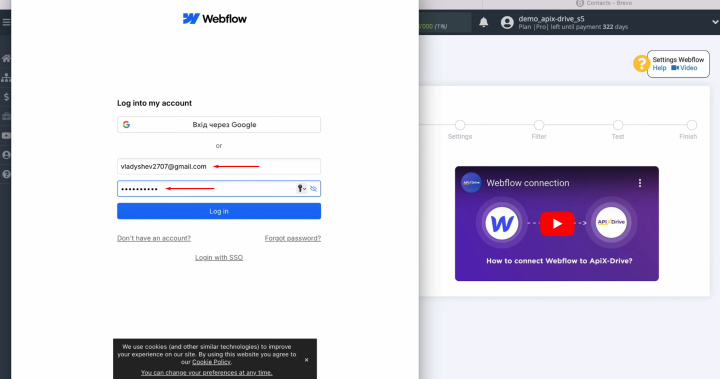
Specify the
login and password of your Webflow personal account. Click “Log
in”.
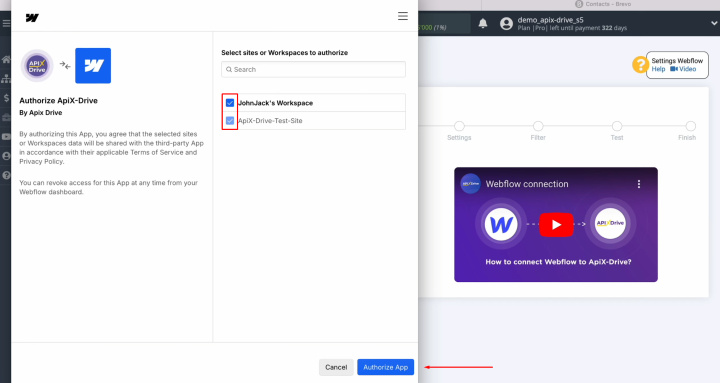
Provide ApiX-Drive access to your Webflow
Workspace and click “Authorize App”.
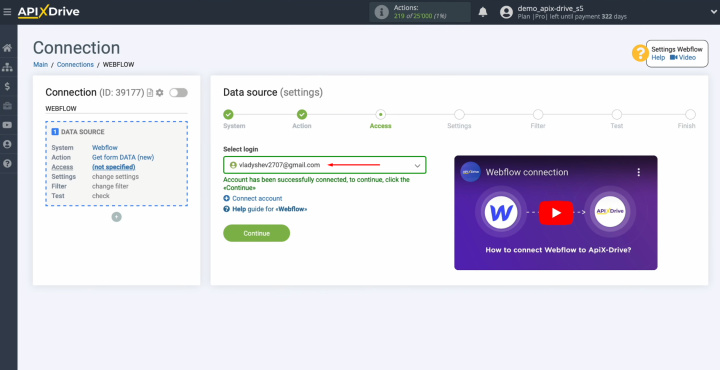
When the
connected login is displayed in the list of active accounts, select it and
click “Continue”.
Select the
website from which you will receive new leads.
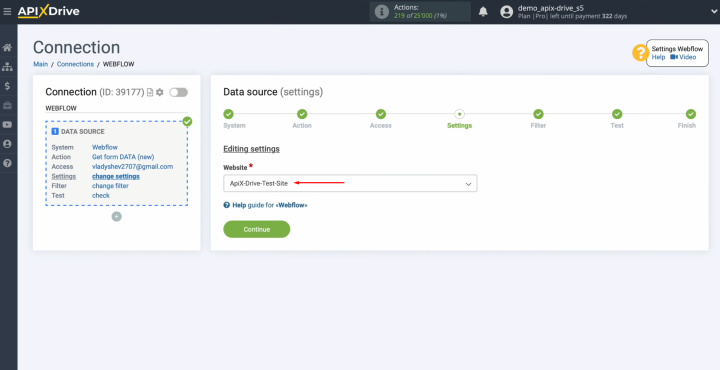
Here, you can
set up a data filter. In this case, this is not necessary, so also click “Continue”.
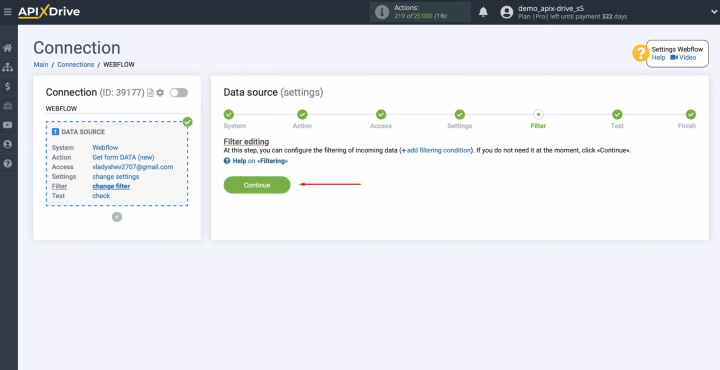
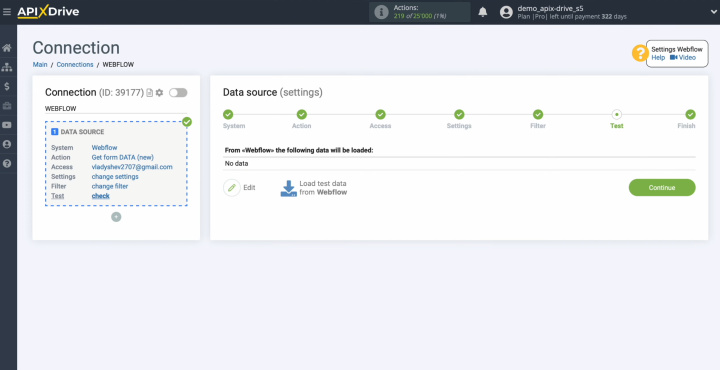
Now, you should
see data on one of your Webflow leads. If there is no data at this stage,
you need to fill out the form on the website.
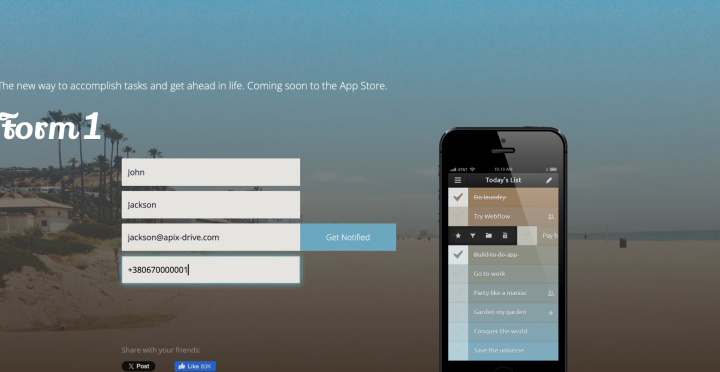
Go to your Webflow personal account and fill out the form. Click “Get
Notified”.
Return to ApiX-Drive and continue setting up. Click “Load
test data from Webflow”.
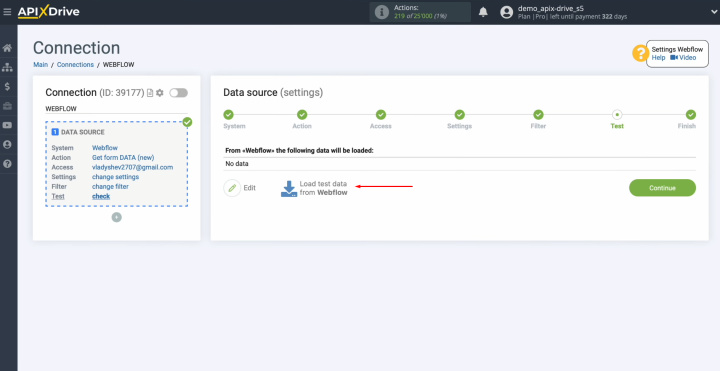
When the
Webflow Lead is displayed, click “Continue”.
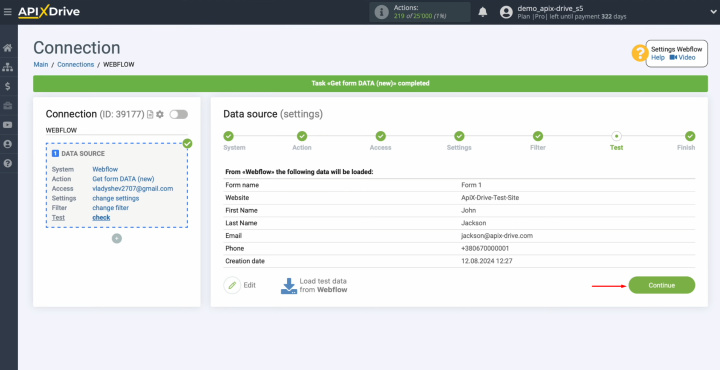
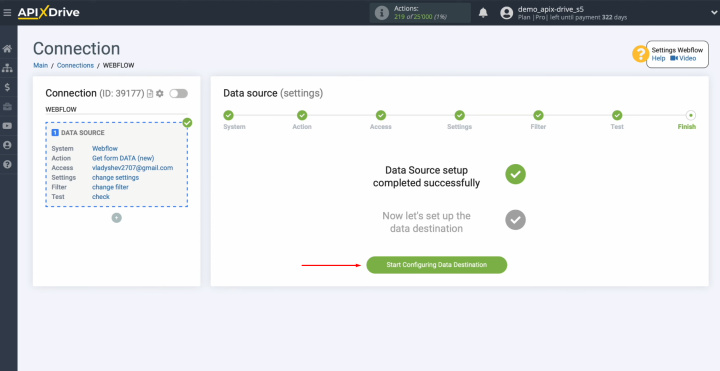
The
Webflow data source setup is successfully completed.
Setting Up the Data Receiver – Brevo
Now, you can proceed to setting up the data receiver. For this, click on the appropriate button.
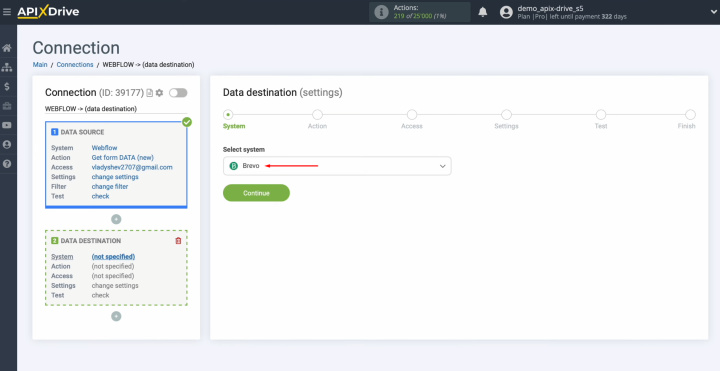
To set up the Brevo integration with Webflow, select the data receiver system. You need Brevo. Click “Continue”.
Choose the action “Add/Update CONTACT”. Click
“Continue”.
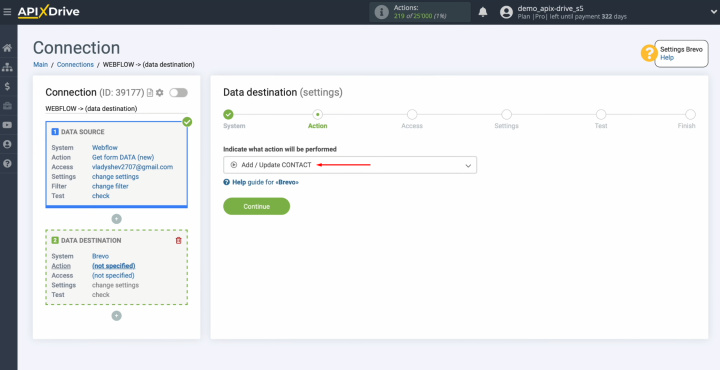
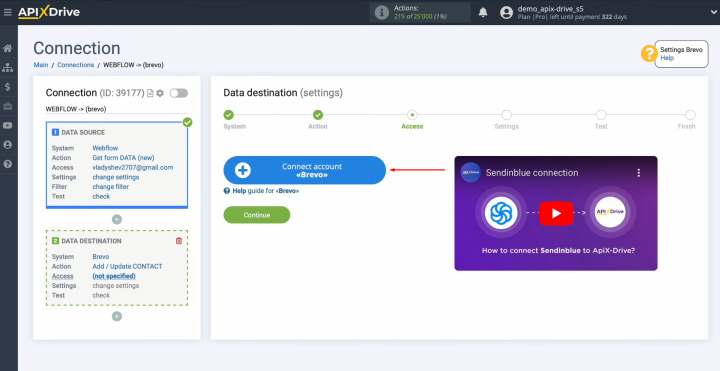
Connect your
Brevo account to ApiX-Drive.
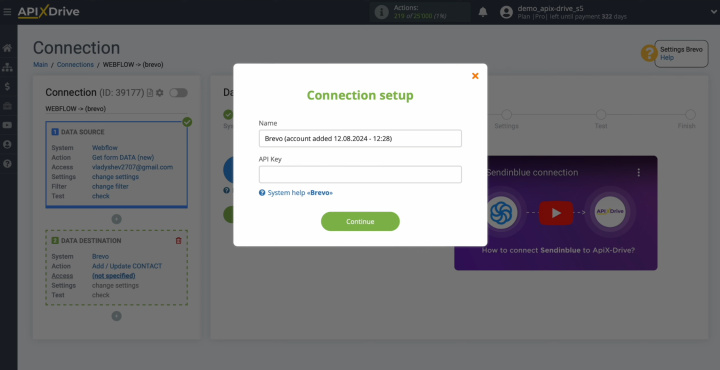
In this
window, you need to specify the API key.
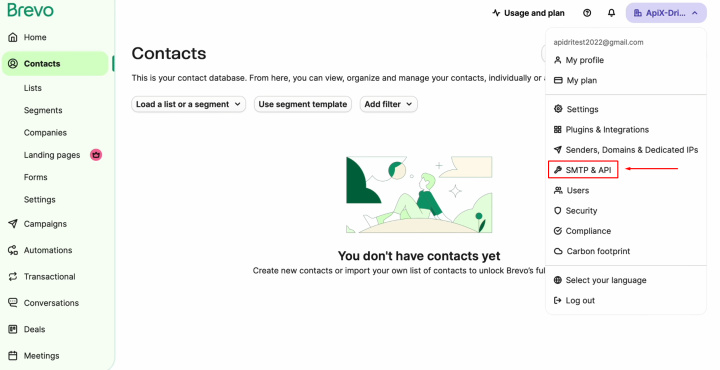
To get the
API key, go to the settings of your Brevo personal account. Then, go to the SMTP & API section.
Find the API
Keys tab and click “Generate a new API key”.
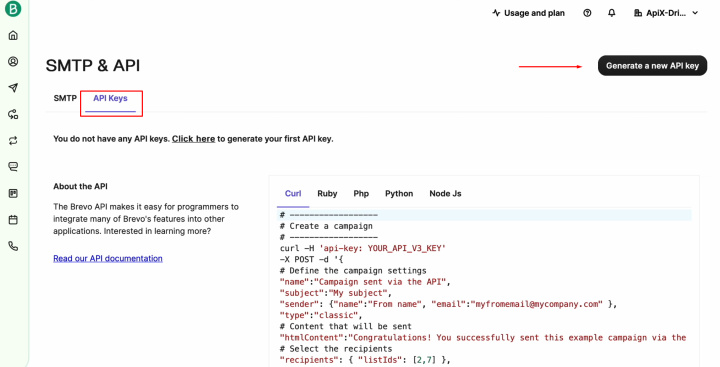
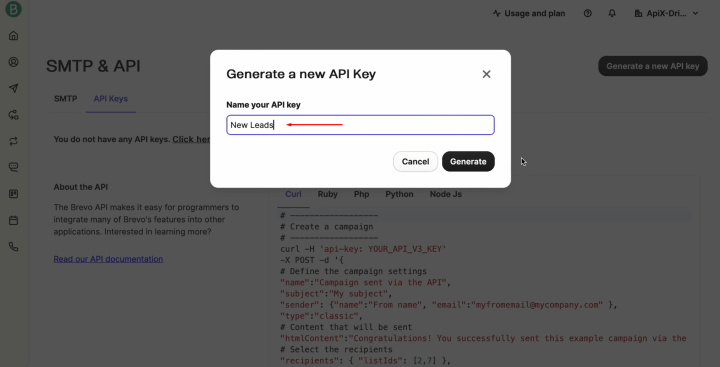
Specify a
name for the new key and click “Generate”.
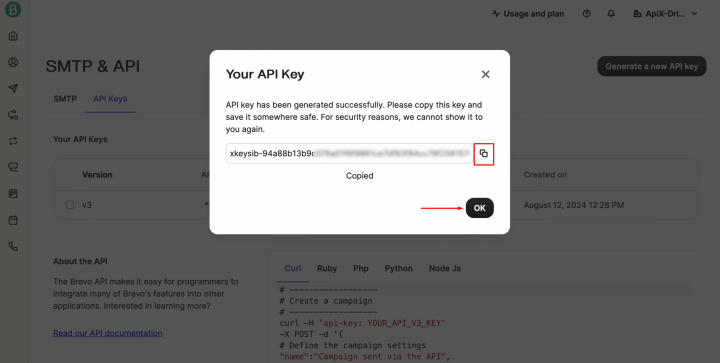
Copy the API
key and click “OK”.
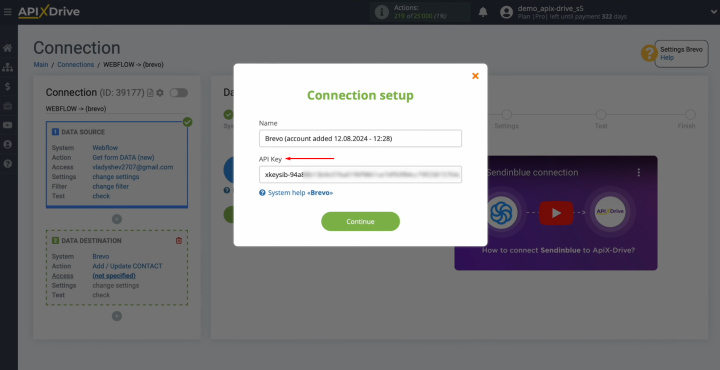
Paste the API
key into the appropriate field in ApiX-Drive. When the required field is filled
in, click “Continue”.
When the
connected login appears in the list of active accounts, select it and click “Continue”.
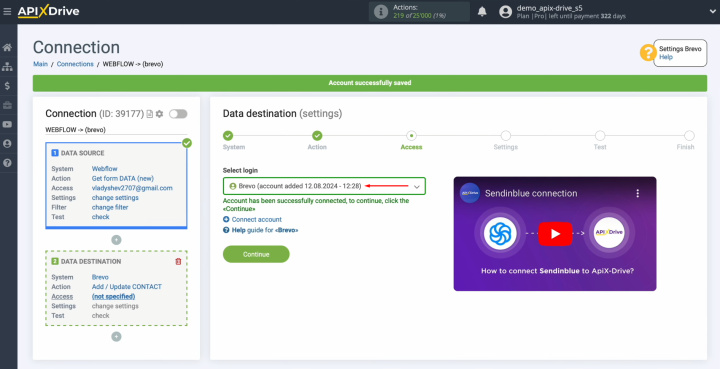
Select the
List to which new contacts will be added with each new lead from Webflow.
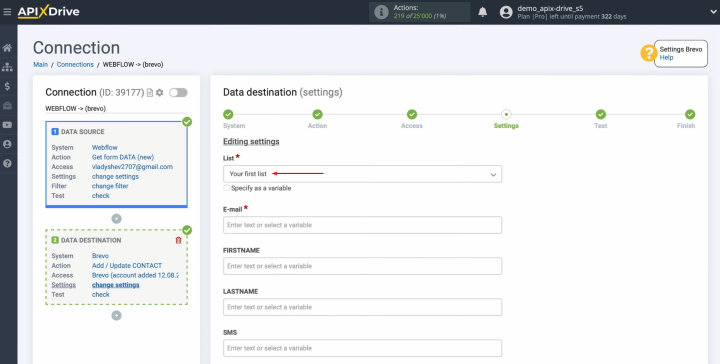
Here, you see the
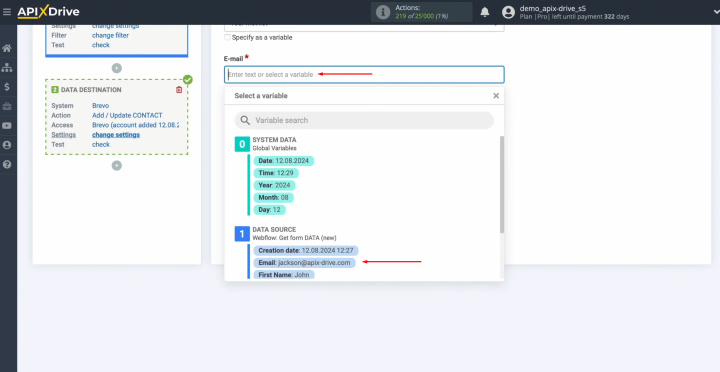
Brevo fields for creating new contacts. You can assign variables from
Webflow to these fields. To do this, click in the field and select a
variable from the drop-down list.
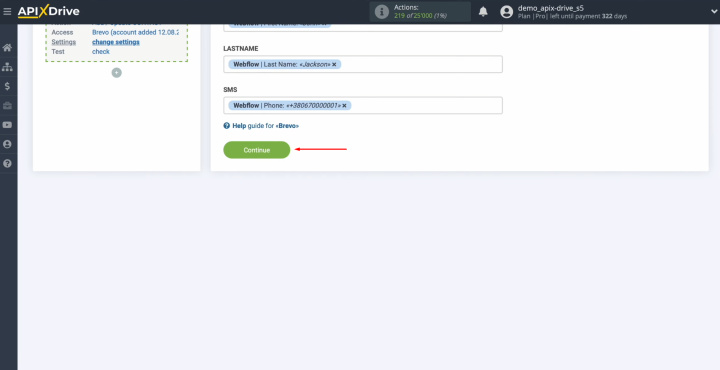
When all the
required fields are filled in, click “Continue”.
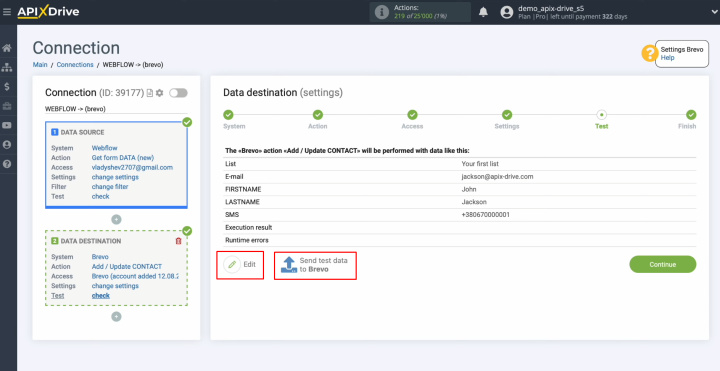
Now, you see an
example of the data that will be sent to Brevo as new contacts for each
new lead from Webflow. If you want to make any adjustments, click “Edit”. This will take you back a step and allow you to make corrections.
To check the correctness
of the settings, click “Send test data to Brevo”.
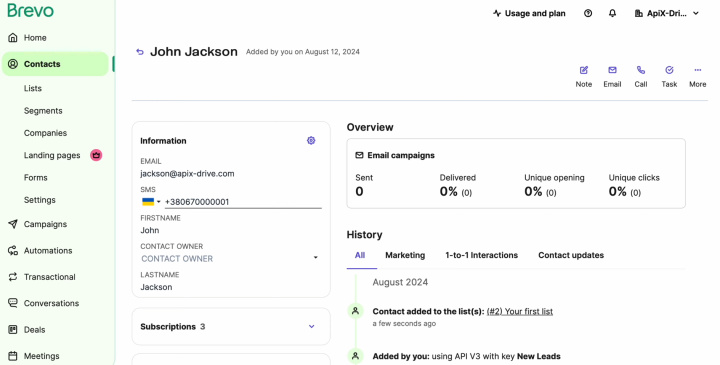
After
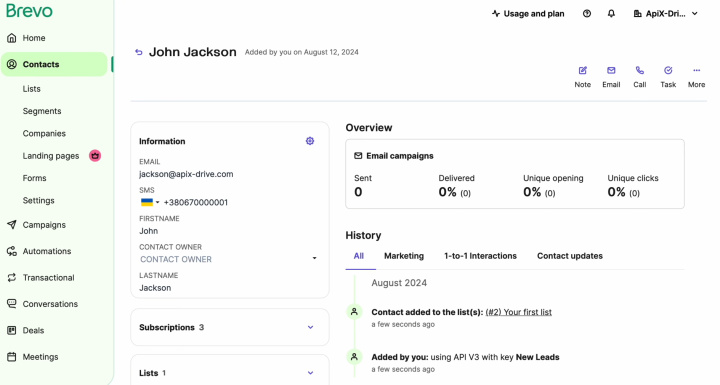
successful sending, go to Brevo and check the result.
Return to ApiX-Drive and continue setting up.
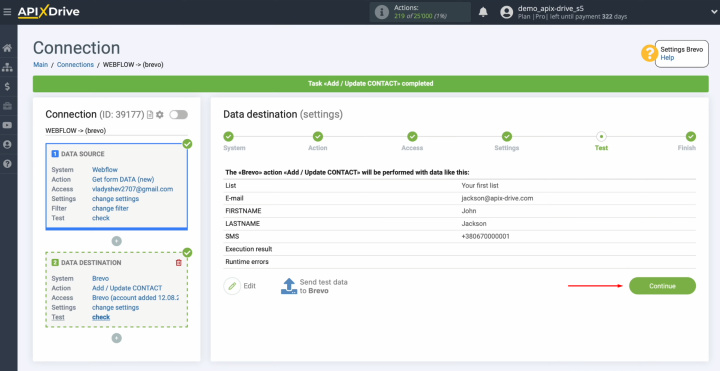
This successfully completes the setup of Brevo as a data receiver.
Setting Up Auto-Update
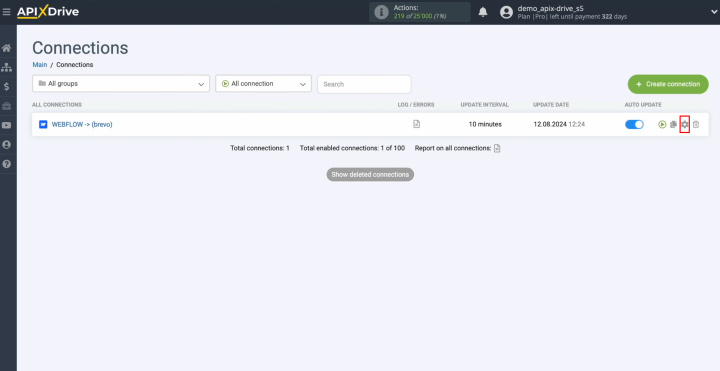
In order for data transfer to occur automatically, configure auto-update. Click “Enable update”.
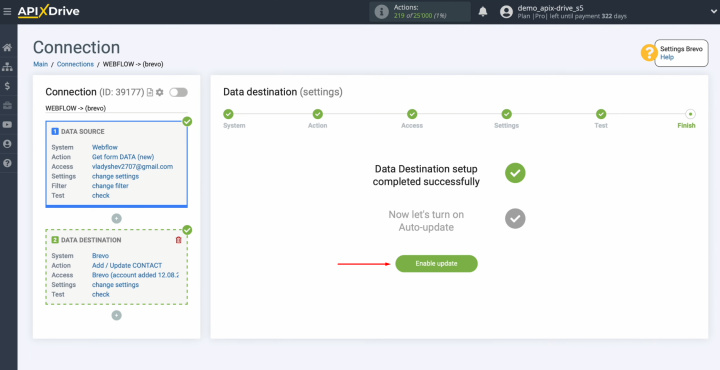
Click on the
gear button.
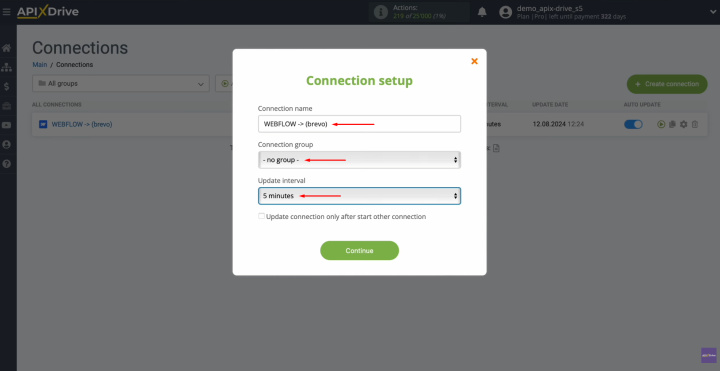
Select the
interval for the operation of the connection. For example, once every 5
minutes. Here, you can also give the connection a different name and include it in the desired group.
Click “Continue”.
That's all. Brevo + Webflow integration is complete. You
did it. Good job!
Results
Automation of transferring lead data from one platform to another is a progressive method of simplifying and accelerating work processes. The ApiX-Drive online connector is a universal solution that helps to implement it as easily and quickly as possible, even for novice users. By following the step-by-step Webflow integration with Brevo according to our instructions and activating auto-update, you will ensure stable interaction between the connected platforms. Data transfer will begin immediately and without your participation.
Brevo integration with Webflow will free you from boring manual "copy-paste" of data. You will no longer have to manually transfer leads' contacts, as this process will be fully automated. All routine tasks will be taken over by our online connector, ApiX-Drive. You will get additional time to focus on improving customer service, mastering new marketing strategies, and other important aspects that will help your business develop and grow.
