Agile CRM and Airtable Integration: Automatic Transfer of Contacts
Agile CRM is a progressive service for automating sales and marketing tasks, which allows you to conduct e-commerce and manage customer relationships. Airtable is a cloud no-code platform for convenient and efficient work with information, project, and sales management, which is a hybrid of a database and a spreadsheet. The efficiency of working with these tools increases significantly when the process of transferring information between systems is automated. In our article, you will find information on how to set up Agile CRM and Airtable integration.
Automating the routine process of data transfer will free you from one of the most boring work tasks. Its practical benefit is expressed in significant savings of time and labor resources, as well as in eliminating the risk of errors. Moreover, the integration of the CRM platform and the database service significantly speeds up the processing of information. This will help increase your productivity and improve the performance indicators of both a separate department and the company as a whole.
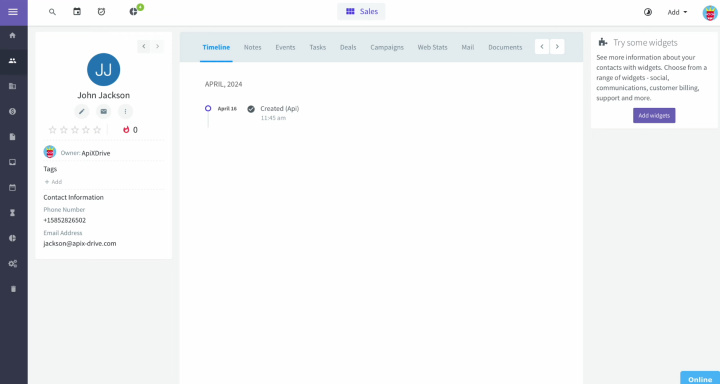
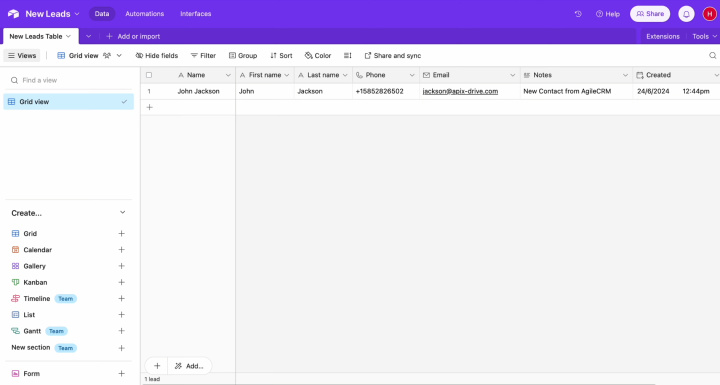
Once you set up and launch Airtable and Agile CRM integration via our online connector ApiX-Drive, you will be able to immediately observe and evaluate its results. New data that comes to the platform for customer relationship management (for example, contacts of potential clients) will be automatically transferred to the database as new rows.
Now you will not have to manually enter the contact information of the customer or buyer (names, surnames, mobile phone numbers, email addresses, etc.). This allows you to optimize your activities and improve interaction with clients, ensuring a high level of feedback. In addition, you will gain an advantage over your competitors who have not yet used such automation in their business.
How to Set Up Agile CRM and Airtable Integration
Successful Agile CRM + Airtable integration does not require programming knowledge or understanding of the API. You also do not need to invite third-party IT specialists for help. All the most complex actions will be performed by our online connector ApiX-Drive. This tool allows you to successfully connect systems without any extra effort. Ease of use and an intuitive interface make it possible to do this quickly. The entire process will take you a maximum of 10 minutes. If you are still wary of doing this yourself because you are afraid of "clicking the wrong thing", we offer step-by-step instructions in text and video format. They will help you correctly connect accounts and perform all settings without errors.
So, let's get started. Take the first step – register on the official website, apix-drive.com. Already done? Great! Let's start Airtable + Agile CRM integration.
Setting Up the Data Source – Agile CRM
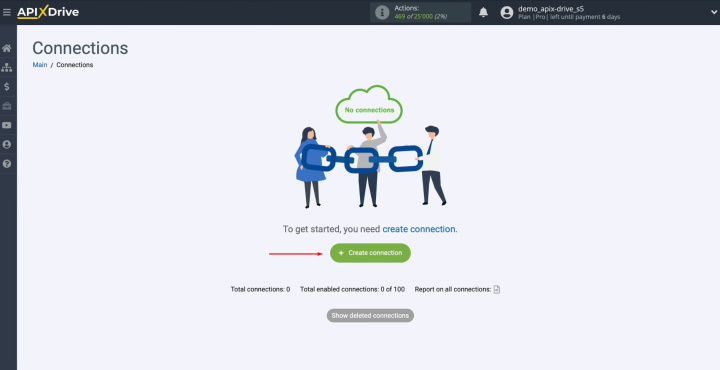
To set up the Agile CRM integration with Airtable, first create a new connection.
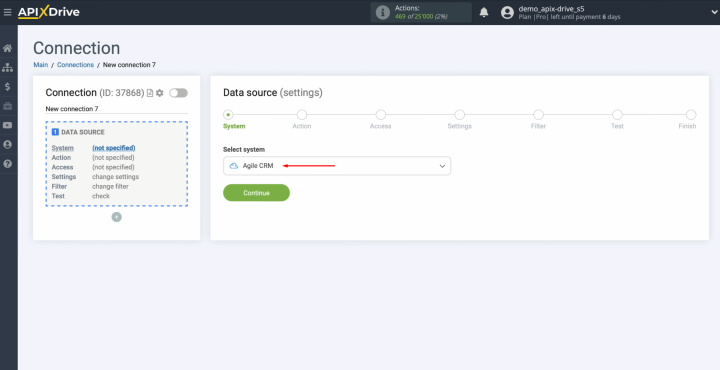
Select the
data source system. You need Agile CRM. Click “Continue”.
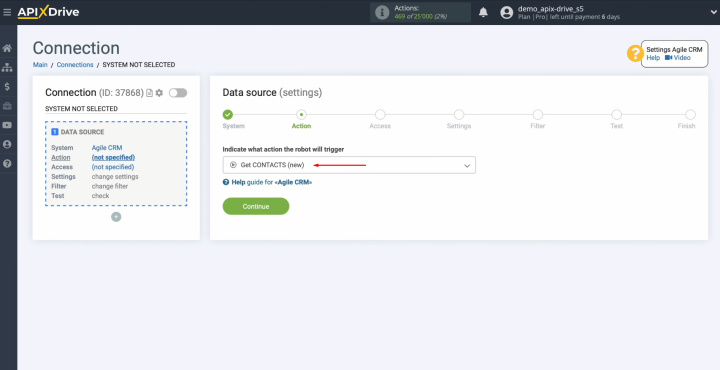
Choose the action
"Get CONTACTS (new)". Click “Continue”.
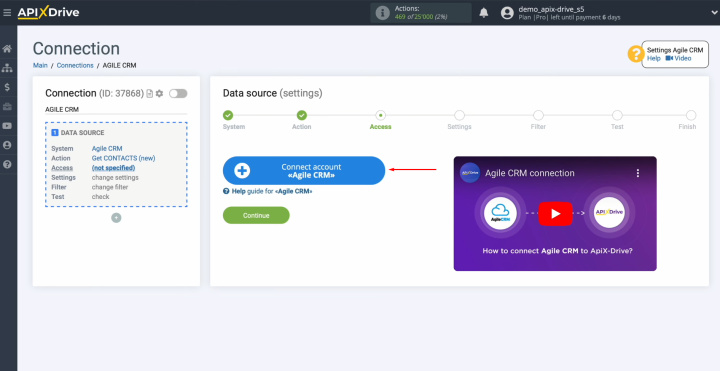
Connect your
Agile CRM account to ApiX-Drive.
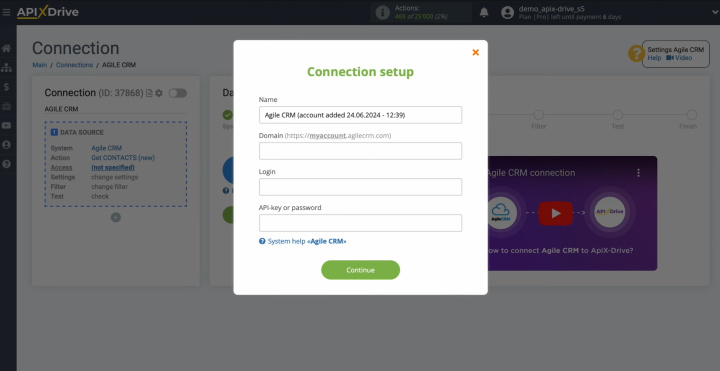
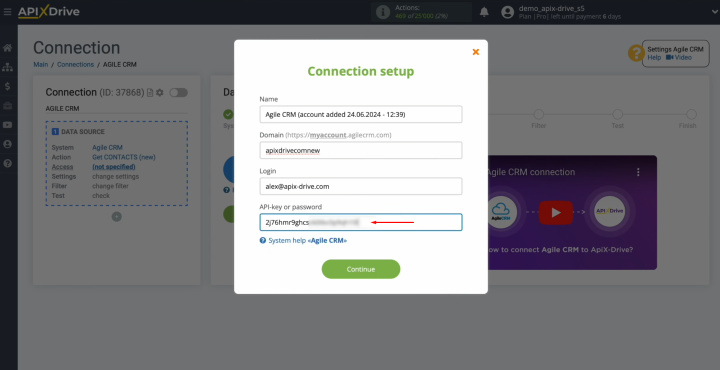
In this
window, you must specify
the domain, login, and API key.
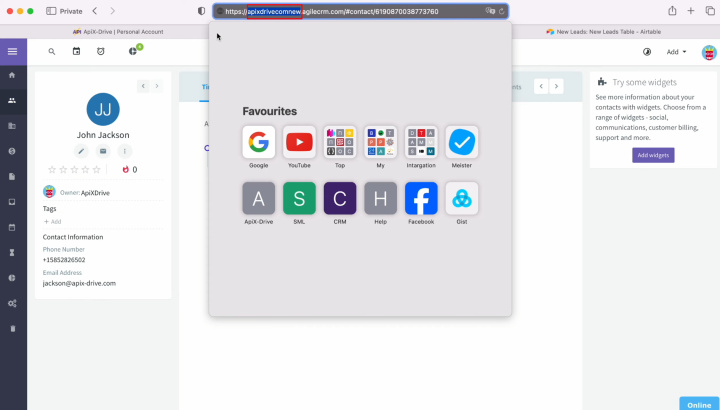
To get this
data, go to your Agile CRM personal account. Copy the domain from the address bar
without additional characters.
Paste the domain into the appropriate field in
ApiX-Drive.
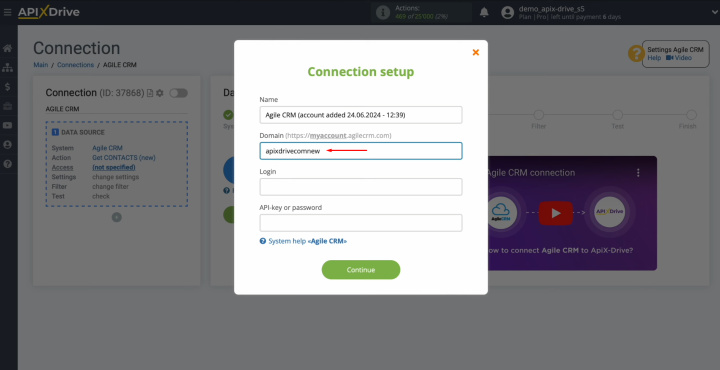
Specify the
Agile CRM user login.
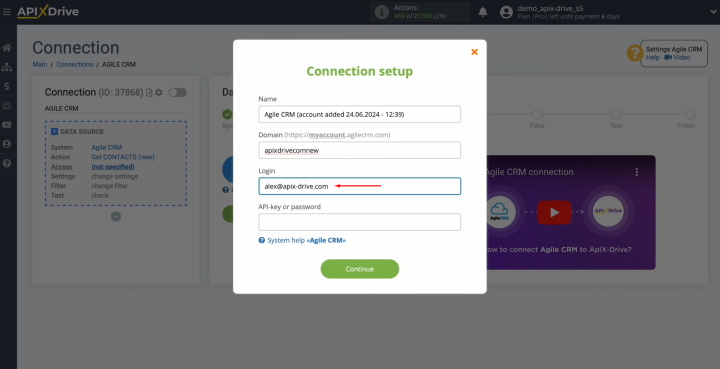
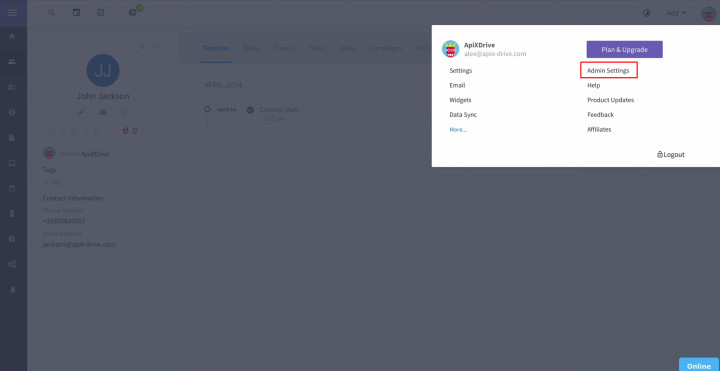
To get an API
key, return to your Agile CRM personal account. Here, go to your account settings. Click on “Admin Settings”.
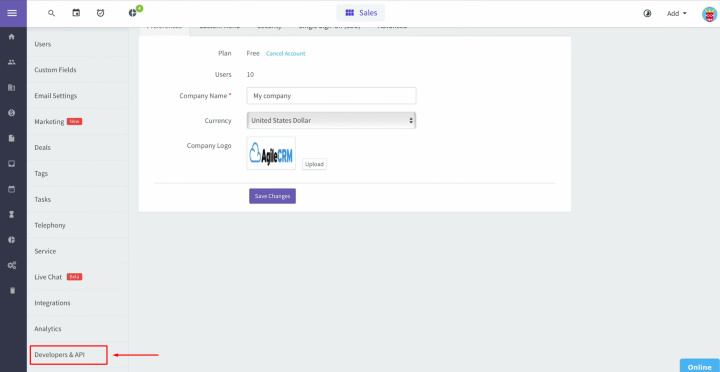
Find the
"Developer API" section.
Copy the REST
API key.
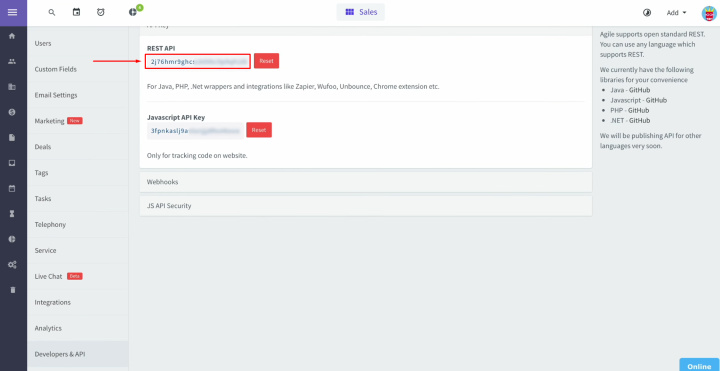
Paste the API
key into the appropriate field in ApiX-Drive. Then click "Continue".
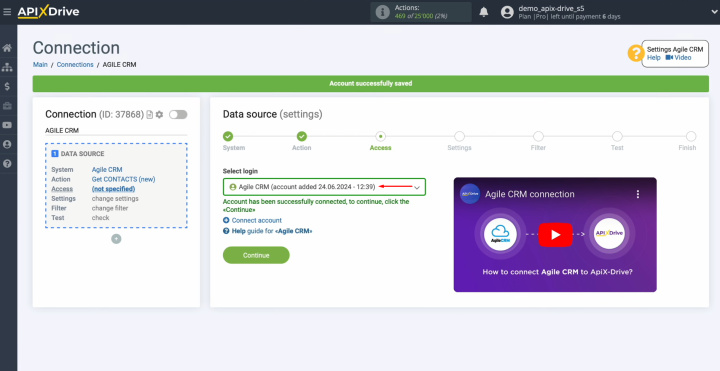
When the
connected login appears in the list of active accounts, select it and click
"Continue".
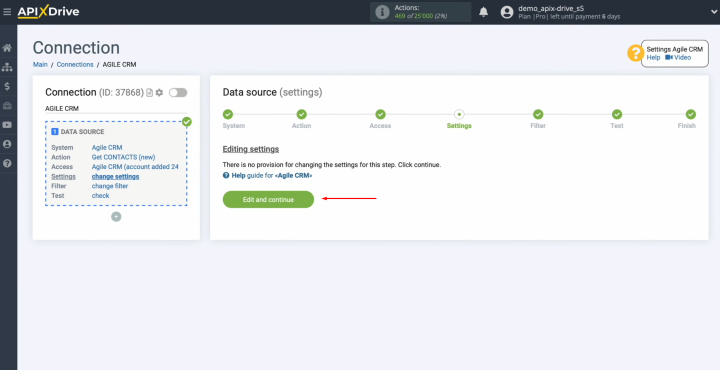
There are no
additional settings provided for the Agile CRM system, so just click "Edit and continue".
Here, you can
set up a data filter. In this case, there is no need for this, so you can also click "Continue".
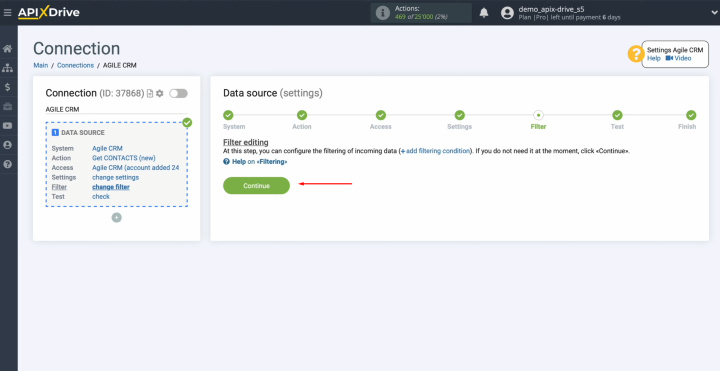
Now you see
data for one of your Agile CRM contacts. Click "Continue".
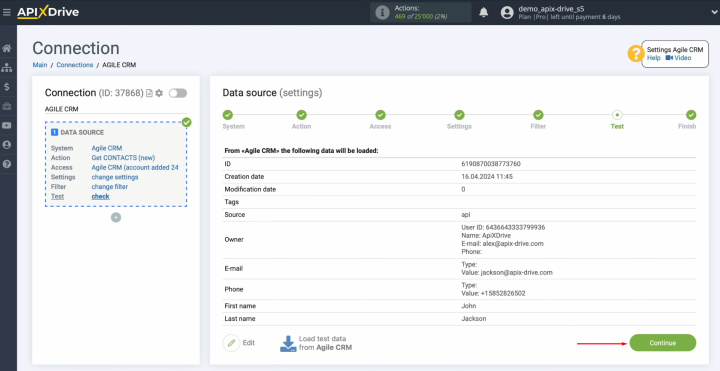
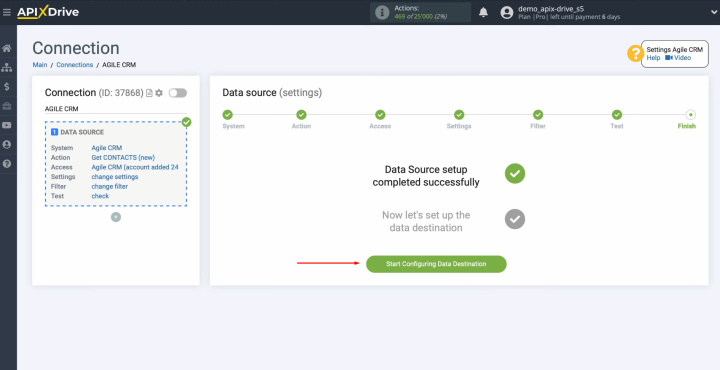
Setting up
the Agile CRM data source has been successfully completed.
Setting Up the Data Receiver – Airtable
Now, you can proceed to setting up the data receiver. For this, click on the appropriate button.
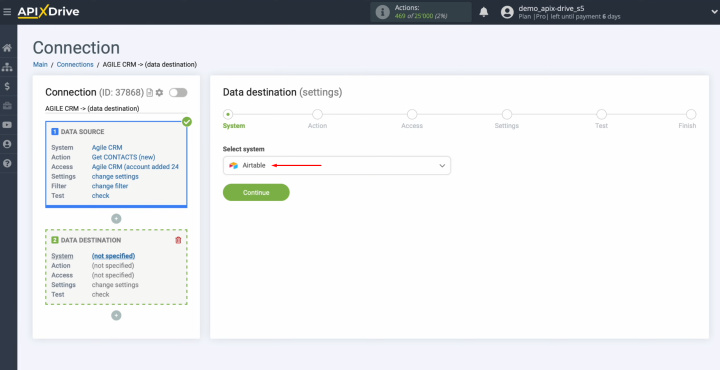
To set up the Airtable integration with Agile CRM, select the data receiver system. You need Airtable. Click
“Continue”.
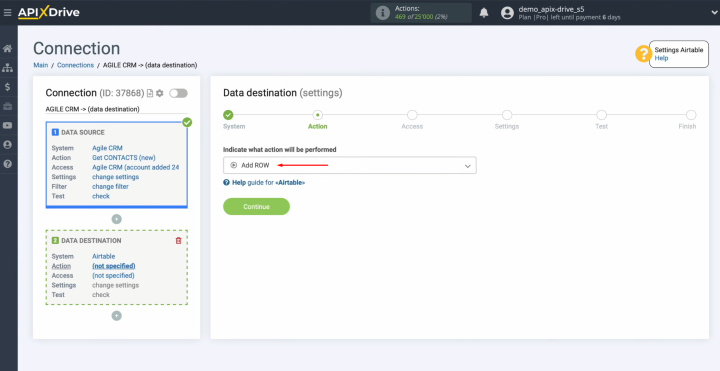
Select the
action "Add ROW". Click “Continue”.
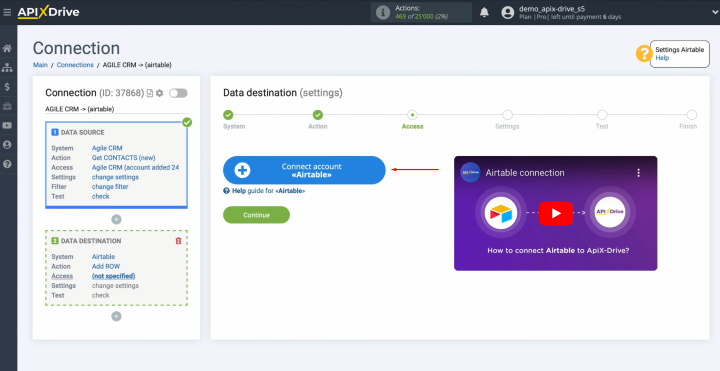
Сonnect your
Airtable account to ApiX-Drive.
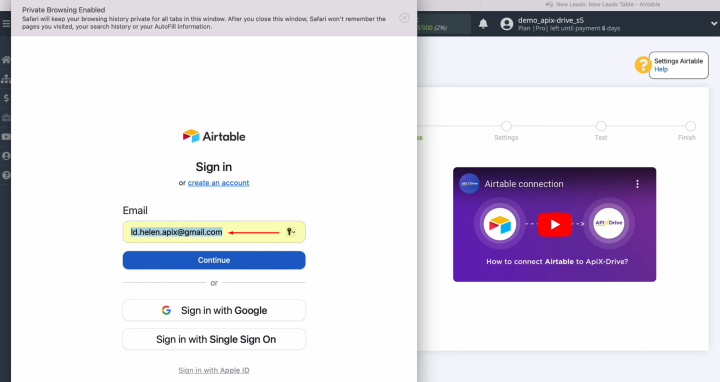
Specify the
login (email) of your Airtable personal account. Click
“Continue”.
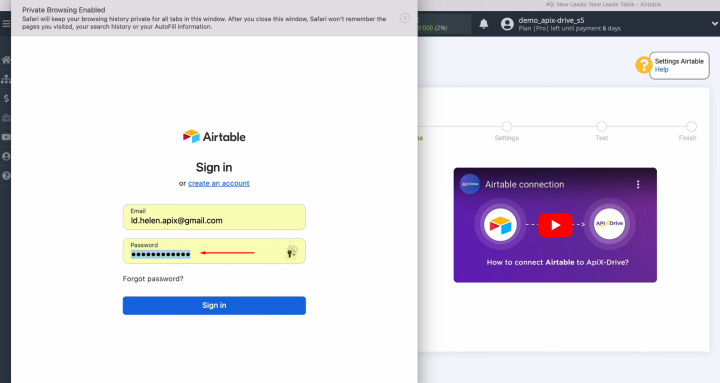
Specify the password
of your Airtable personal account. Click “Sign in”.
Provide
ApiX-Drive access to work with your Airtable databases. To do this, click "Add a Base".
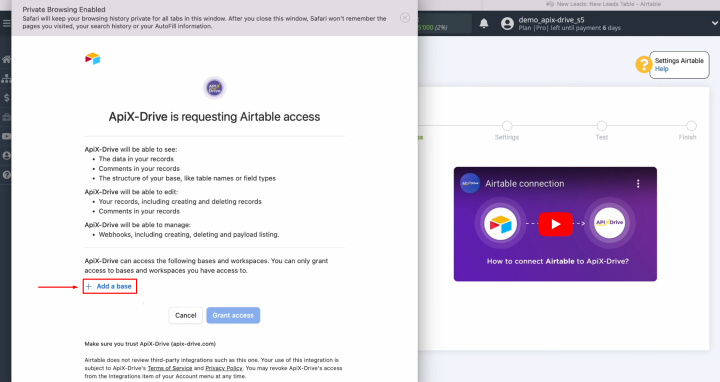
We recommend
providing access to all databases at once in order to be able to work with
them in the future. Then, click “Grant access”.
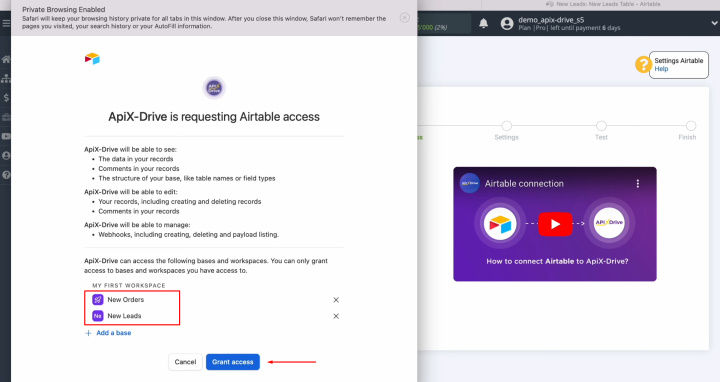
When the
connected login appears in the list of active accounts, select it and click
"Continue".
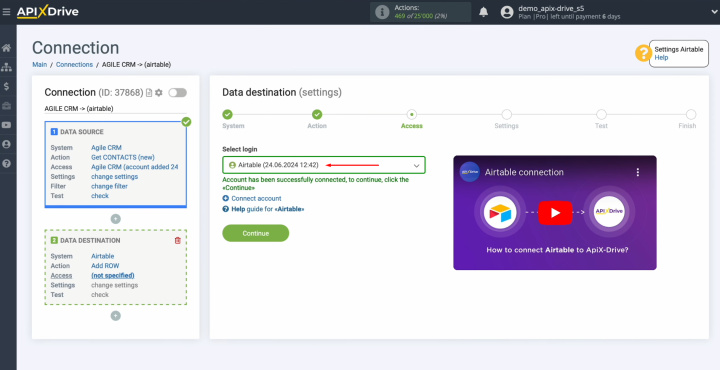
Select the
base in which new rows will be created. Also, select the table.
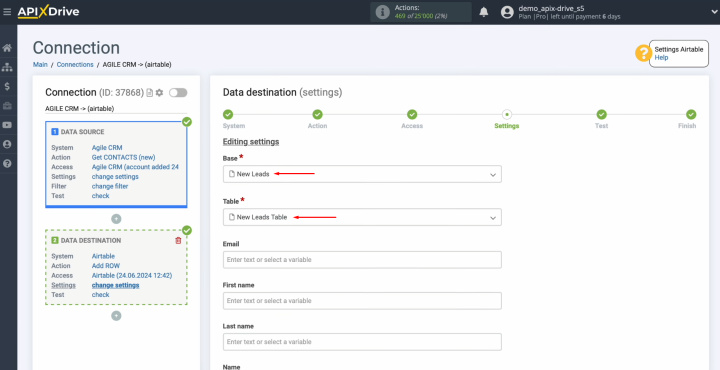
Now, you see
the Airtable fields for creating new rows. You can assign variables from Agile
CRM to these fields. To do this, click in the field and choose a variable from the drop-down list.
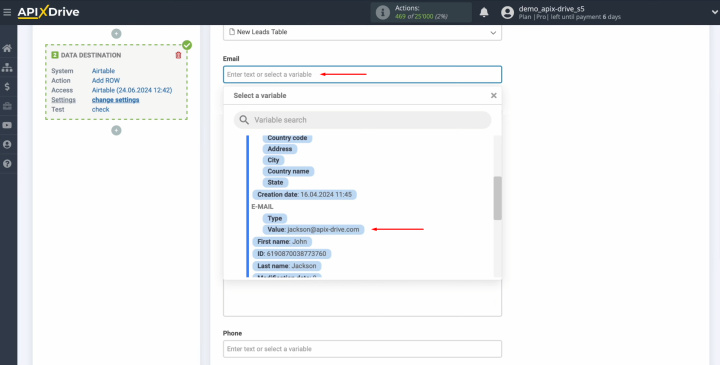
Please note
that you can use not only variables from the drop-down list but also
enter data manually.
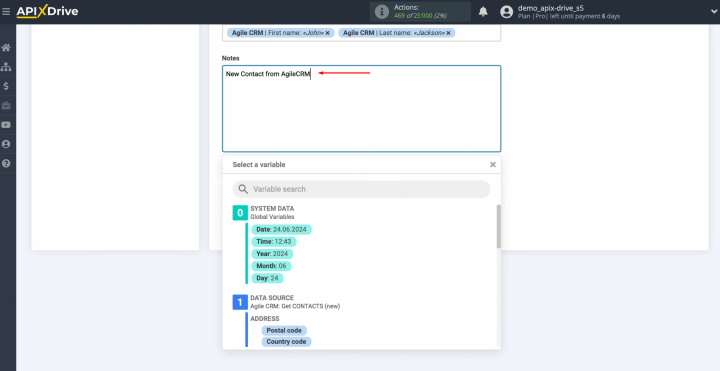
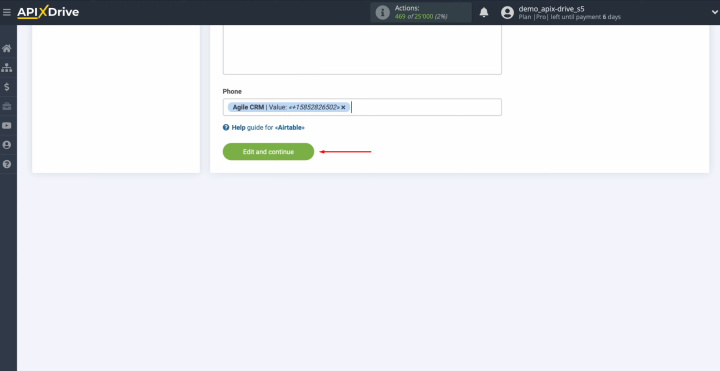
When all
required fields are filled in, click "Edit and continue".
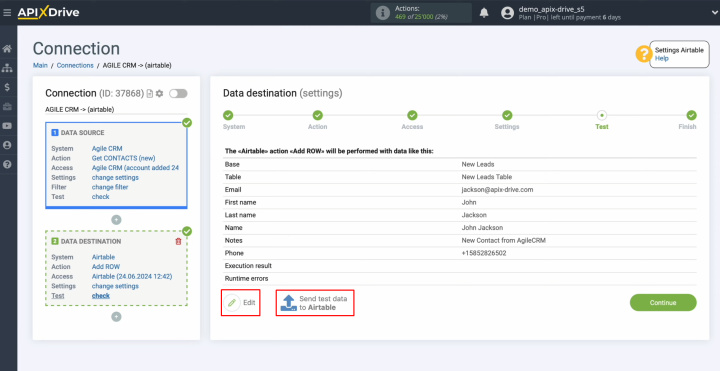
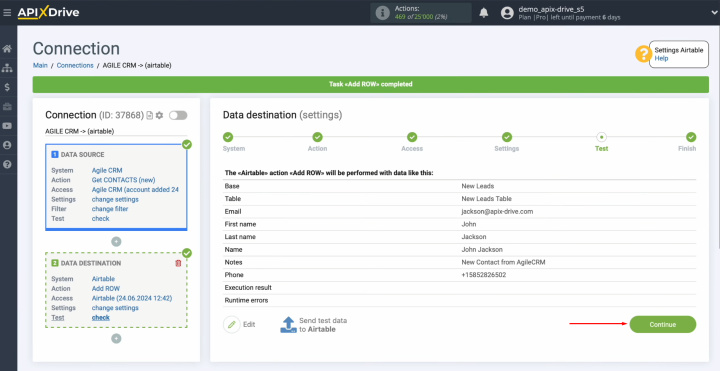
Now, you see an
example of the data that will be transferred to Airtable as new rows with
each new contact from Agile CRM. If you are not satisfied with
something, click "Edit", and you will go back a step. To check the correctness of the
settings, click "Send Test Data to Airtable".
After
successful sending, go to Airtable and check the result.
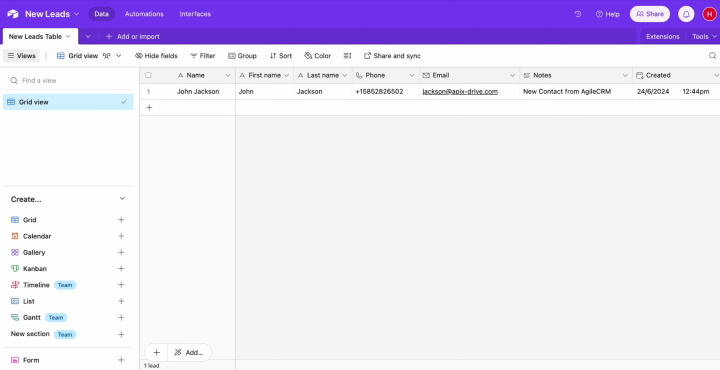
Return to ApiX-Drive and continue setting up the Airtable & Agile CRM integration.
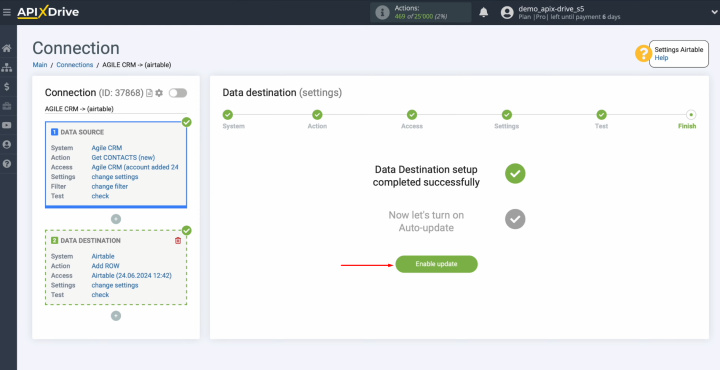
Setting Up Auto-Update
In order for data transfer to occur automatically, configure auto-update. Click “Enable update”.
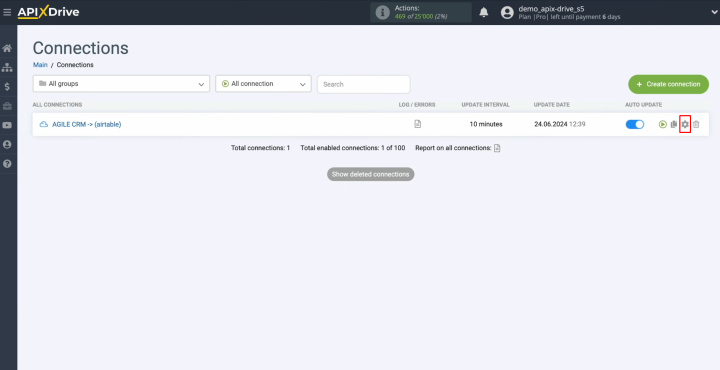
Click on the
gear button.
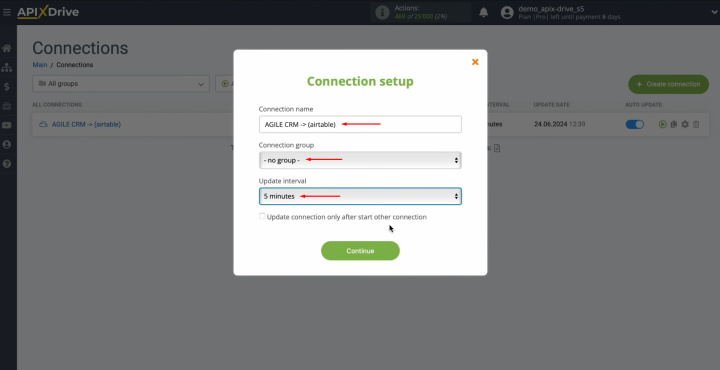
Select the
interval for the operation of the connection. For example, once every 5
minutes. Moreover, here you can give the connection a different name and assign it to a group.
Click “Continue”.
Agile CRM & Airtable integration was completed. Congratulations!
What's the Result?
By setting up Agile CRM integration with Airtable following our instructions and activating automatic updates, you have received a stable and efficient working connection between these systems. You have probably already seen the real results of the connection – the automatic transfer of data.
Airtable integration with Agile CRM will save you from monotonous and tedious manual work. Thanks to this integration, you will not have to transfer data yourself. This process will be fully automated. Our online connector ApiX-Drive will handle routine tasks. You will have additional time to focus on improving the quality of customer service, learning new marketing strategies, and other important aspects that contribute to the growth of your business.
Read also about other integrations:

