How to Integrate JetFormBuilder and Notion: Step-by-Step Instruction
JetFormBuilder is a powerful tool for lead generation. This universal WordPress plugin allows you to create various forms without programming skills. Notion is a multifunctional service for organizing work and managing projects. Using these platforms, you can successfully optimize your business processes. But did you know that you can get even more from them? Do you want to automate work as much as possible? Connecting these services and seamlessly transferring data between them will help you with this. Now we will tell you how to easily and quickly perform JetFormBuilder and Notion integration using our online connector ApiX-Drive.
JetFormBuilder and Notion Integration – the Highest Level of Automation
Notion and JetFormBuilder integration facilitates increasing the accuracy and speed of work processes in e-commerce. By implementing it, you can take your business automation to a higher level. When these platforms work together, data from each form filled out by a lead is automatically transferred to Notion and becomes new database elements there.
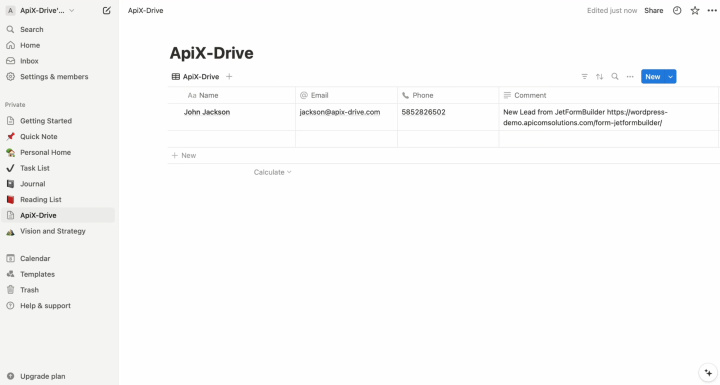
How does this help business? Here are two case studies of the real effectiveness of this integration:
- A construction company uses JetFormBuilder integration with Notion to manage repair requests. It receives numerous repair requests via forms on the website. Information about each client from JetFormBuilder is automatically sent to Notion, where cards with project details are created. This allows the team to instantly distribute tasks between specialists, track the status of work, and store all project information in one place. The integration helps improve communication between departments, speed up request processing, and enhance customer service.
- A real estate agency uses integration to automate work with clients. The company places forms on the website to collect data on interested buyers. Information about each new request from JetFormBuilder is automatically sent to Notion, where personal client profiles are created. This helps agents respond to requests faster, send selections of suitable options, and monitor communication with each client. Integration improves client base management and helps increase the speed of response and closing deals.
How to Set Up JetFormBuilder and Notion Integration
To integrate JetFormBuilder with Notion, you don’t need to delve into programming or learn the intricacies of working with APIs. You don’t have to ask IT specialists for help, either. The main process will be performed for you by the online ApiX-Drive connector. Its functionality will allow you to set up the integration of systems quickly and easily. Thanks to the intuitive interface of the connector, you can complete the setup process in just ten minutes. We suggest using detailed text instructions and video tutorials that will help you connect and set up integration without errors.
Let's get started right now. First, register on the ApiX-Drive website if you haven't done so yet. Now let's move on to setting up the JetFormBuilder + Notion integration.
Set Up the Data Source – JetFormBuilder
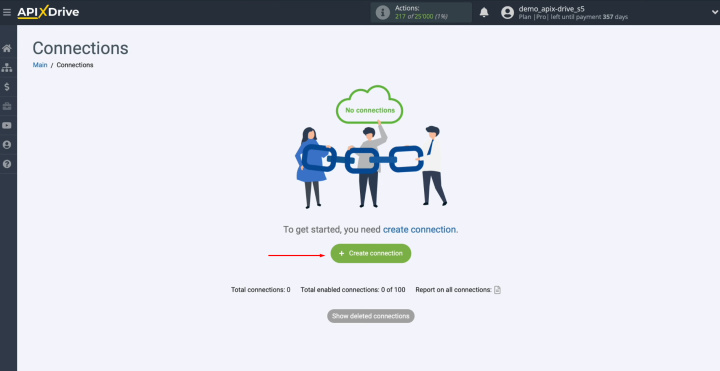
To set up the JetFormBuilder integration with Notion, first, create a new connection.
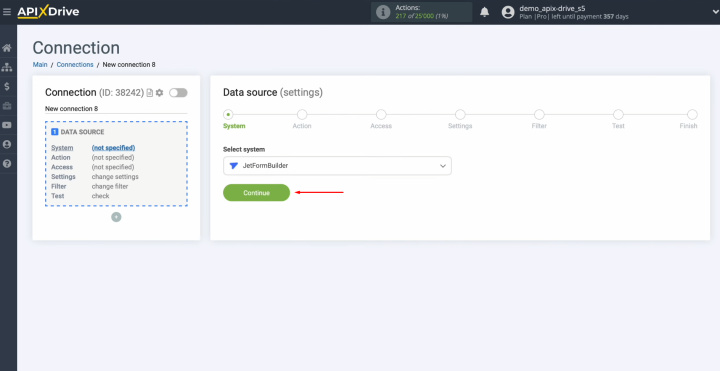
Select the
data source system. You need JetFormBuilder. Click
“Continue”.
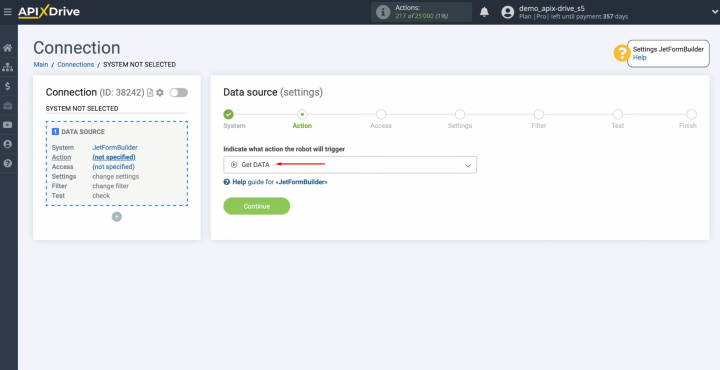
Choose the
"Get DATA"
action. Click “Continue”.
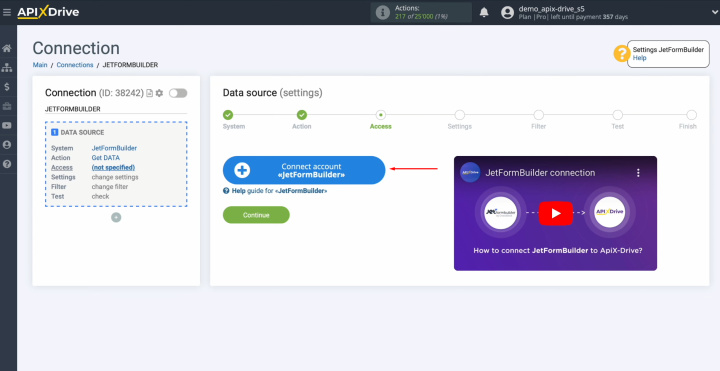
Connect your JetFormBuilder
account to ApiX-Drive.
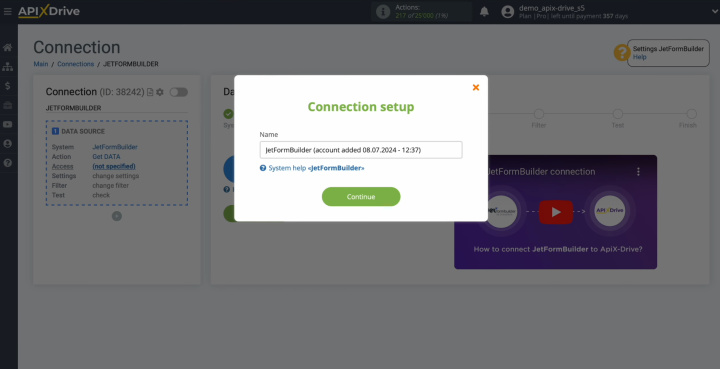
Here, you can
change the connection name, or just click "Continue".
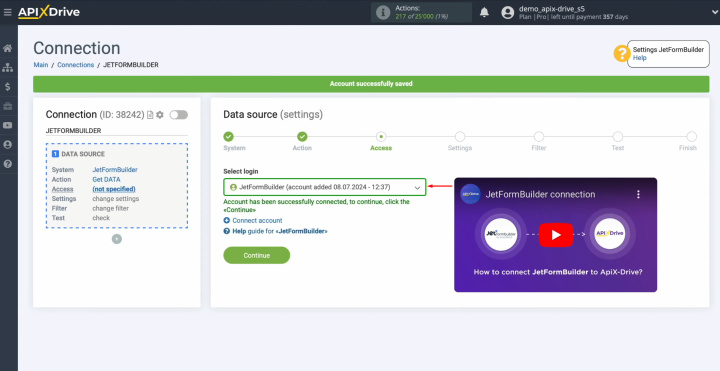
When the
connected account appears in the list, select it and click "Continue".
Now, you see
the URL for receiving data. It is to this URL that new leads from JetFormBuilder will be sent. To continue setting up, copy the
URL.
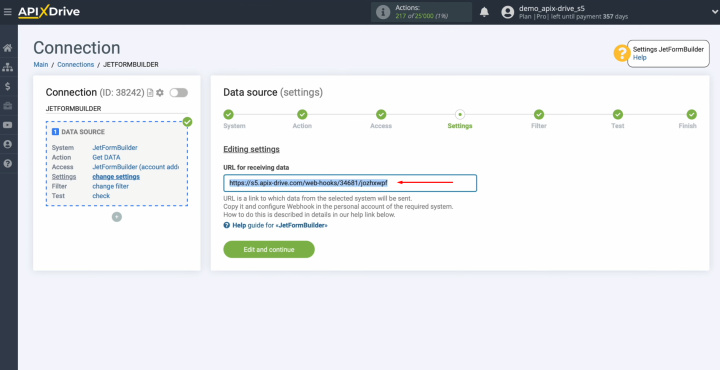
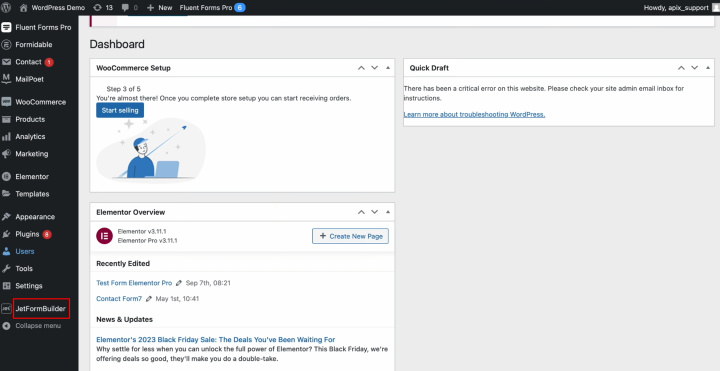
Go to the settings
of the JetFormBuilder plugin for WordPress. First, find the JetFormBuilder plugin.
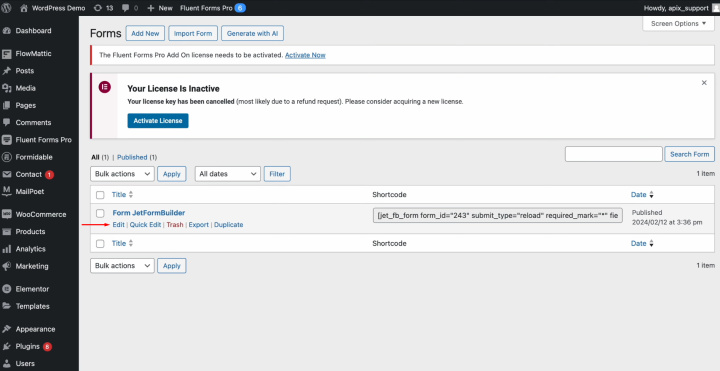
Click “Edit”.
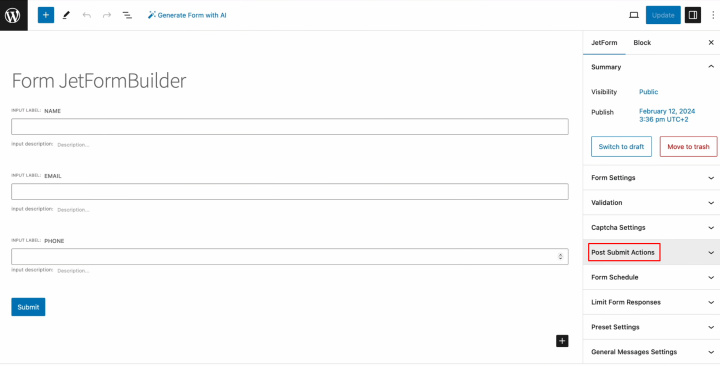
Find the item
"Post Submit Actions".
Add a new
action.
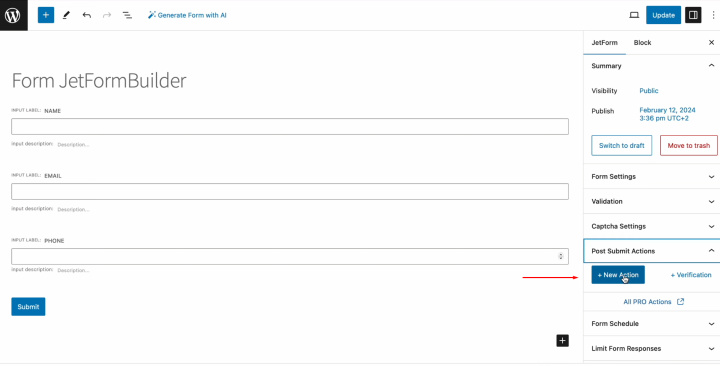
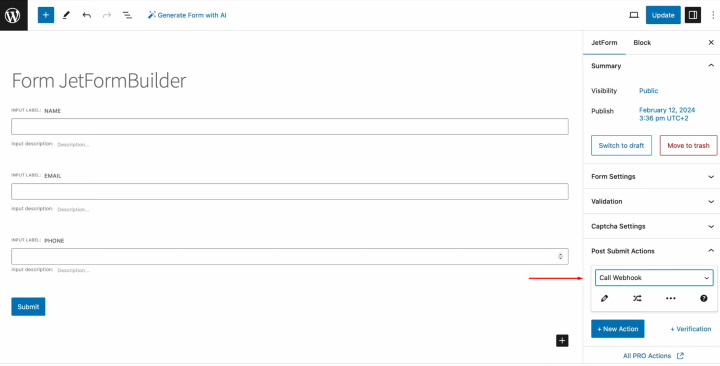
Select the
"Call Webhook" item.
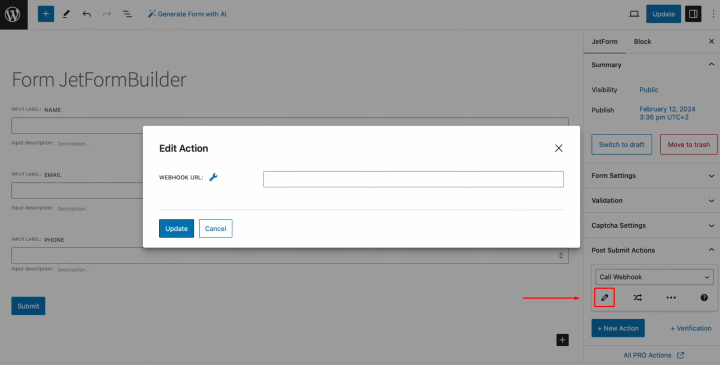
Click on the pencil icon to edit the action and paste the URL for receiving data.
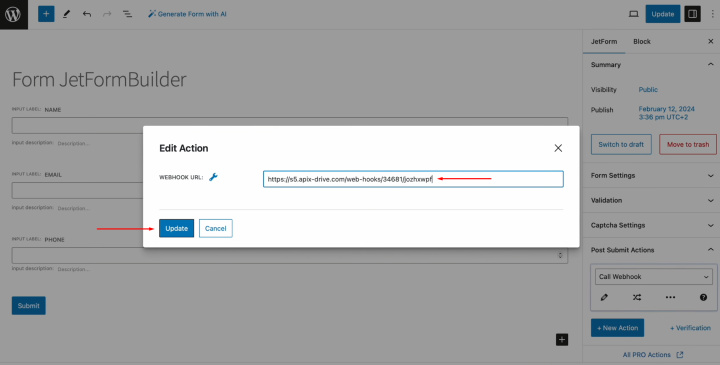
Paste the
copied URL from ApiX-Drive and click "Update".
Don't forget
to click on the "Update" button in the upper right corner of the window.
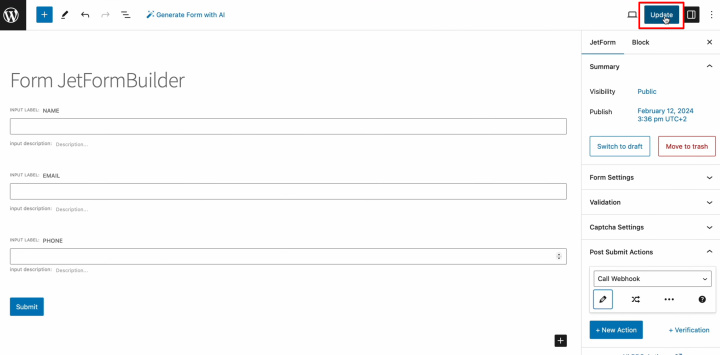
After a
successful update, you need to go to the JetFormBuilder page.
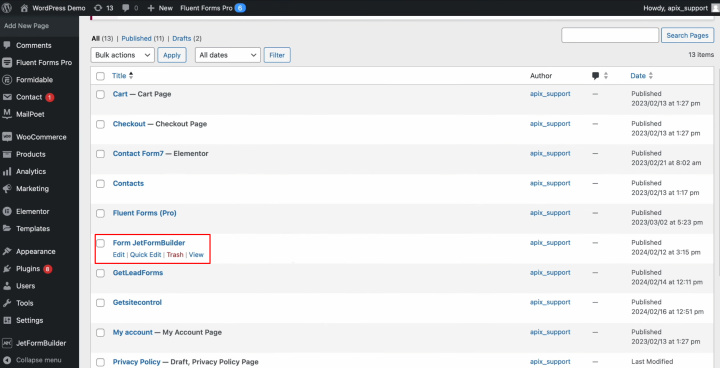
Fill out
the form so that the data is sent to the specified URL. Click
“Submit”.
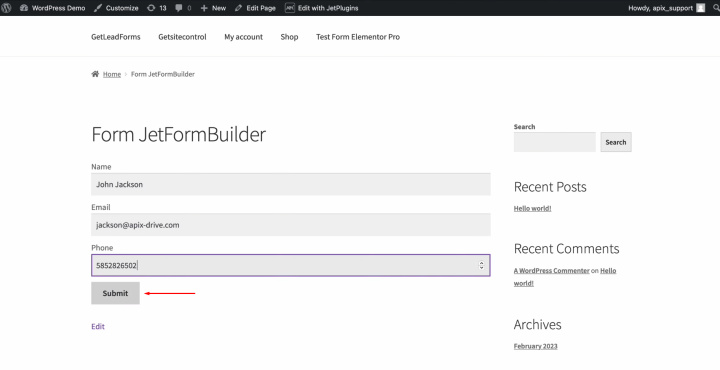
After
successfully filling out the form, return to ApiX-Drive and click “Edit
and continue”.
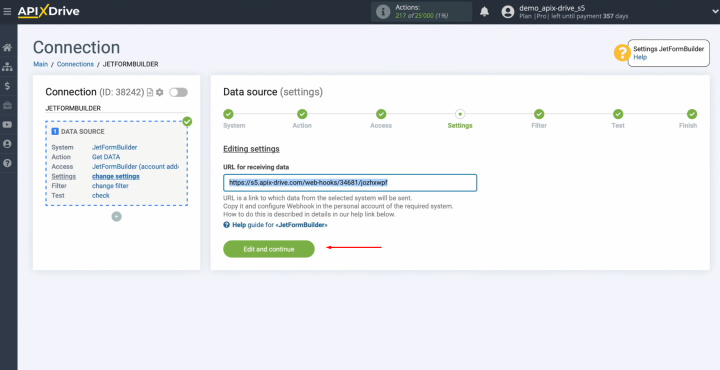
Here, you can
set up a data filter. In our case, this is not necessary, so just click "Continue".
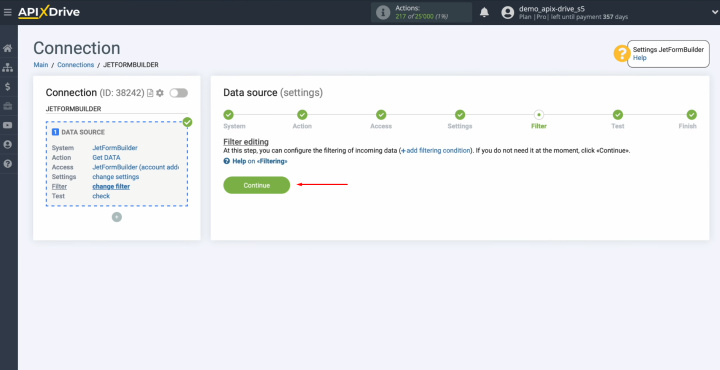
Now, you see
the data we just filled out in the form. Click "Continue".
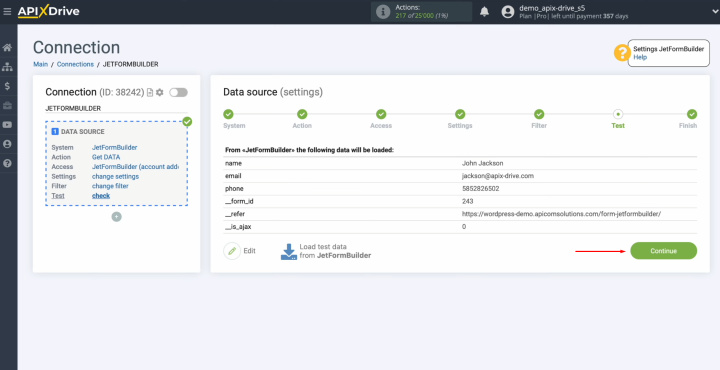
Setting up
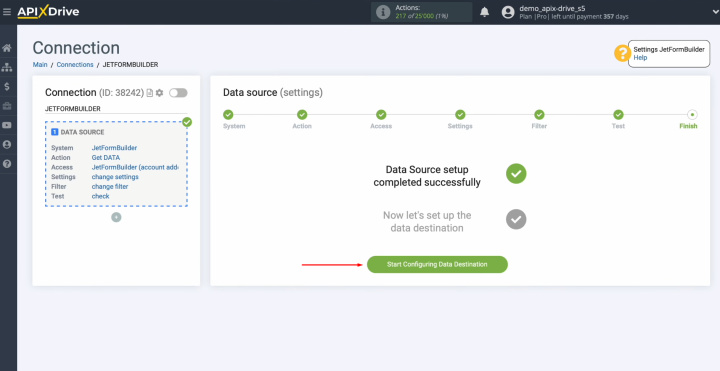
the JetFormBuilder data source has been successfully completed.
Set Up the Data Receiver – Notion
Now, you can start configuring the data receiver.
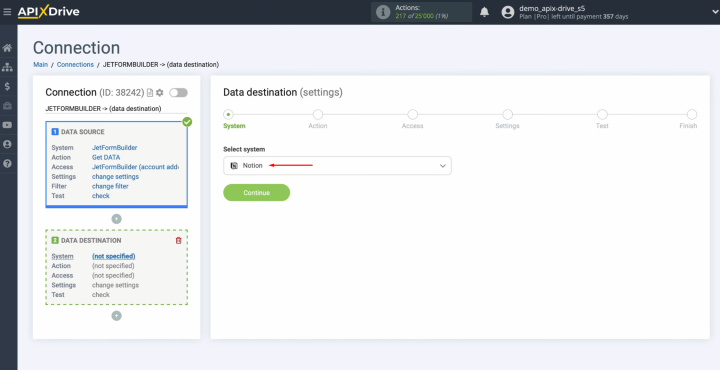
To set up the Notion integration with JetFormBuilder, select the data receiver system. You need Notion. Click
“Continue”.
Select the
action "Add DATABASE ITEM". Click
“Continue”.
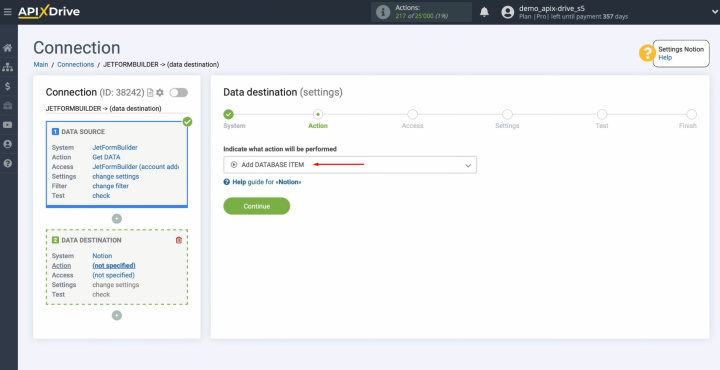
Connect your
Notion account to ApiX-Drive.
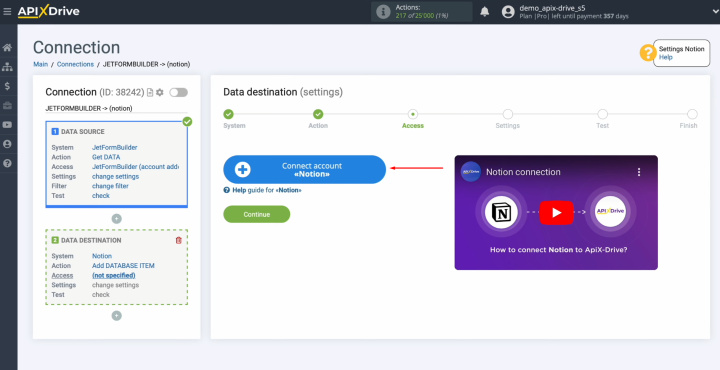
Specify the
login (email) of your
Notion personal account. Click “Continue”.
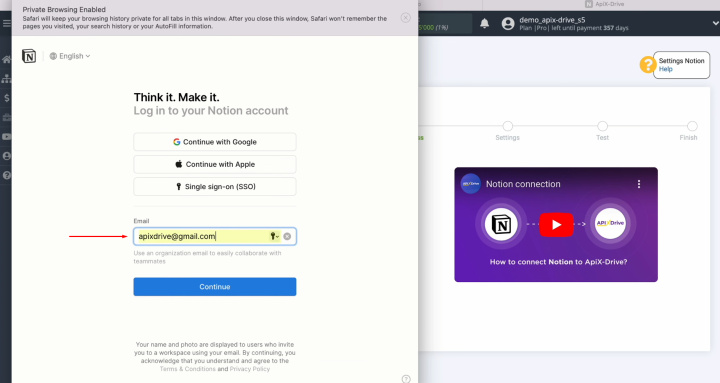
Specify the password
of your Notion personal account. Click “Continue with
password”.
Provide
access to your Notion databases. For this, click “Select
pages”.
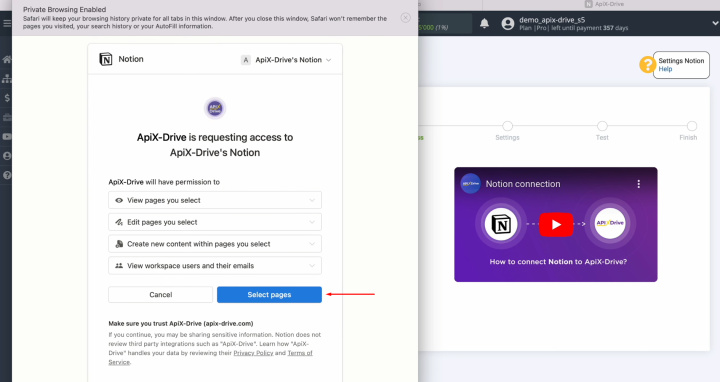
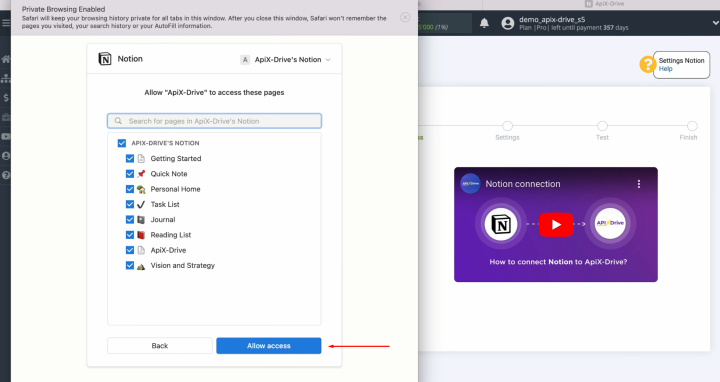
We recommend
providing access to all databases at once in order to be able to work with
them in the future. Make sure all the boxes are checked and click “Allow
access”.
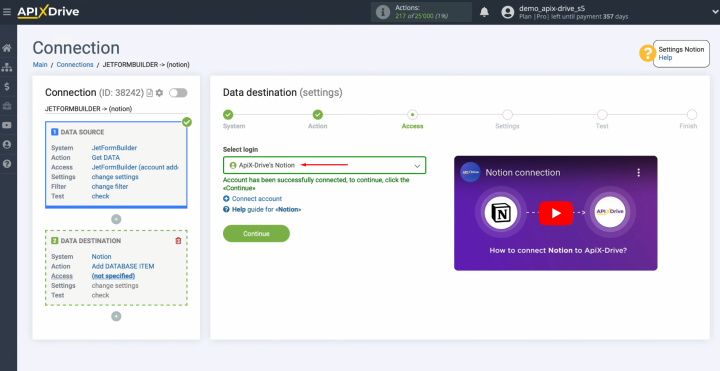
When the
connected account appears in the list of active accounts, select it and
click "Continue".
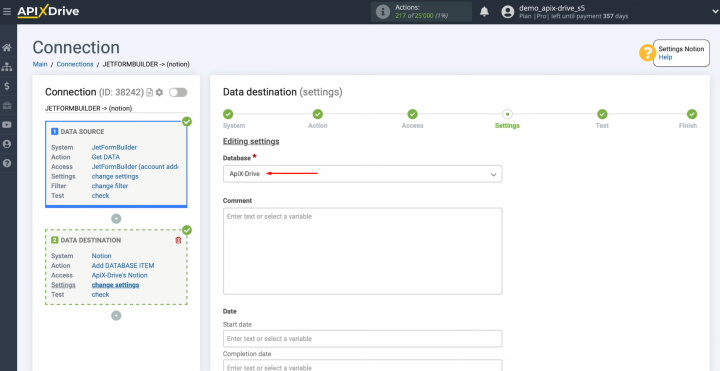
Select the
database in which new items will be created.
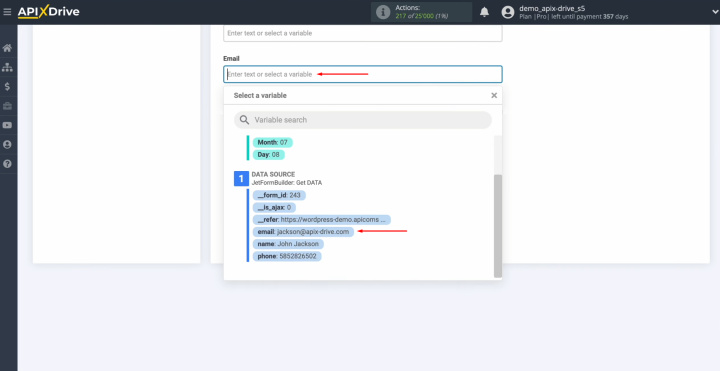
Now, you see
Notion fields for adding new database items. You can assign variables from
JetFormBuilder to these fields. To do this, click in the field and
select a variable from the drop-down list.
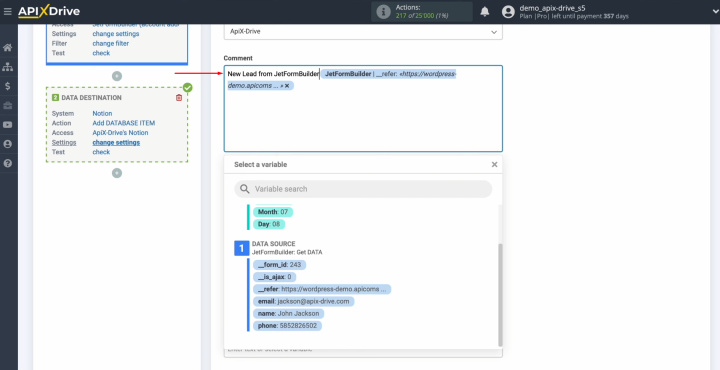
Please note
that you can use not only variables but also enter values manually.
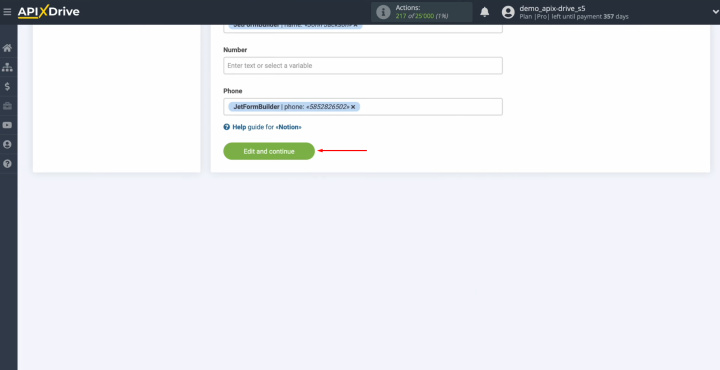
When all
required fields are filled in, click "Edit and continue".
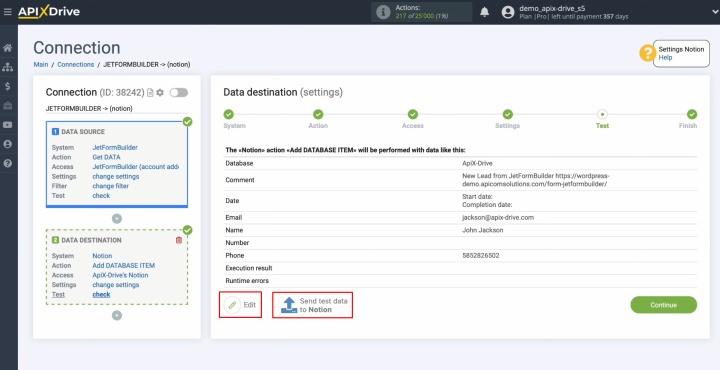
Here, you see an
example of the data that will be sent to Notion with each new lead from JetFormBuilder. If you are not satisfied with
something, click "Edit", and you will go back a step. To check the correctness of the settings,
click "Send Test Data to Notion".
After
successful sending, go to Notion and check the result.
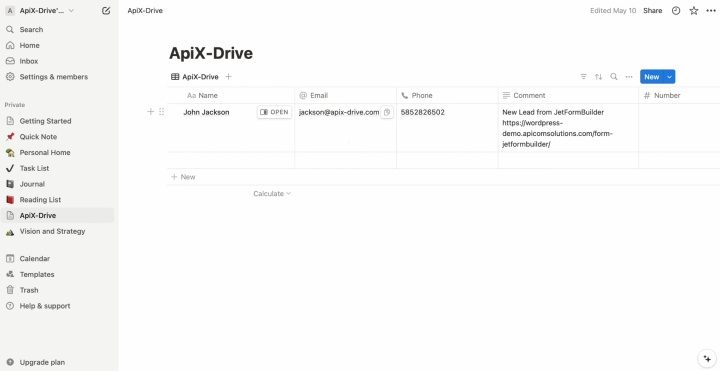
Then, return to ApiX-Drive
and continue setting up.
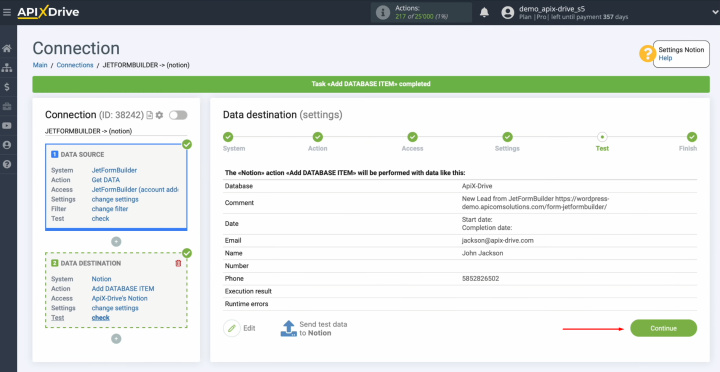
This completes the configuration of Notion as a data receiver.
Set Up Auto-Update
In order for data transfer to occur automatically, configure auto-update. Click “Enable update”.
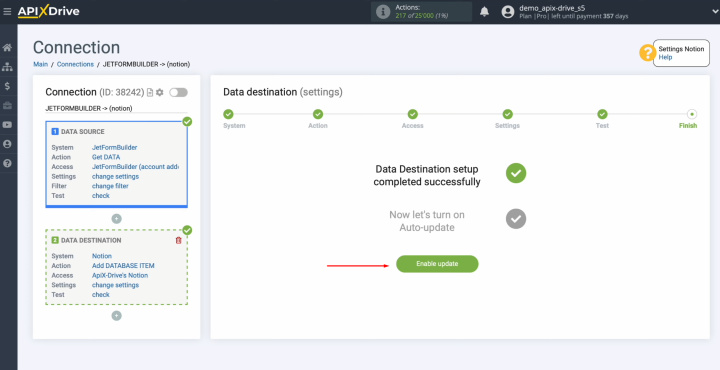
Click on the
gear button.
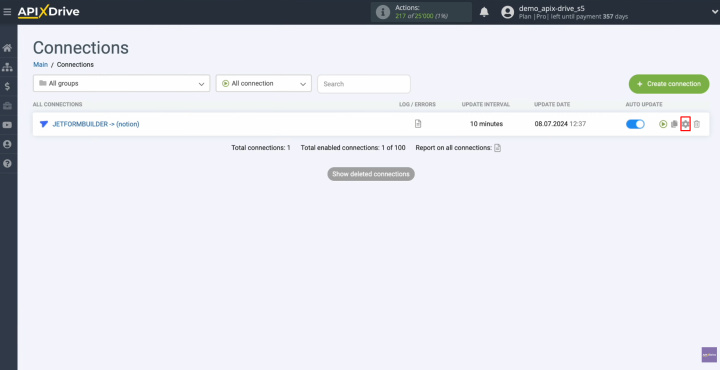
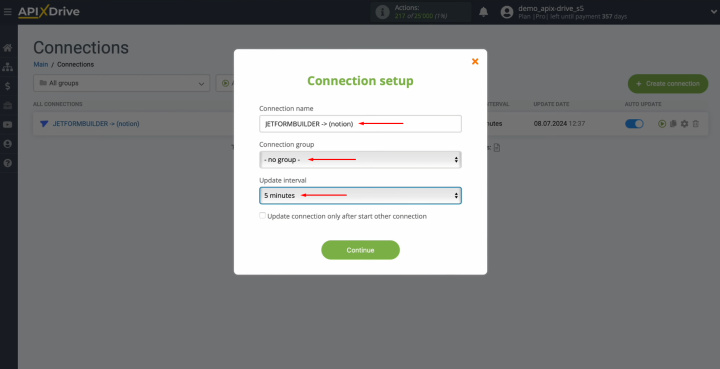
Select the
interval for the operation of the connection. For example, once every 5
minutes. Moreover, here you
can change the name of the connection and assign it to the required group.
Click “Continue”.
That's all. The Notion +
JetFormBuilder integration was completed. Congratulations!
About the Results
Once you have completed the Notion & JetFormBuilder integration setup according to our instructions and enabled the automatic update mode, you can begin to reap the benefits of successfully connecting the systems. Most likely, you have already been able to appreciate them by seeing the automatic data transfer.
With the Notion integration with JetFormBuilder, there is no need to manually transfer lead data – this process is fully automated. Our online connector ApiX-Drive will take care of all the routine work, making it easier to run your business. Now you have the opportunity to focus on improving customer service, developing new business strategies, and other key tasks that will help your company grow and develop.
