Google Sheets and Telesign Integration: Automatic SMS Sending
Telesign is a platform for communication with potential and existing clients that has functionality for identifying them and promptly contacting them through various communication channels (for example, SMS, WhatsApp or Viber). It gives businesses the opportunity to create and maintain a client database, verify phone numbers, identify users, fight scammers, improve interaction with clients, and more. Google Sheets integration with Telesign will allow you to take this interaction to the next level by increasing its speed and quality. Connecting these systems will bring you increased sales and give your customers or clients a positive experience and a high level of satisfaction. You will understand where all this suddenly comes from when you find out what the essence of automation is.
Let's take a look at what happens as a result of the connection between Telesign and Google Sheets. Every time a new row with client data appears in your table, its contents will be automatically entered into the Telesign database in the format of a record, and the client will immediately receive an SMS message with the text that you have written in advance. See how convenient it is? This workflow automation will, first, allow you to save time by eliminating the need to manually enter customer contact information into the communication platform database. Secondly, you can avoid mistakes that can sometimes happen when copying hastily and carelessly. And thirdly, you will be able to increase both personal and team performance, as well as the quality of your work with clients. And another good news: you don't have to look anywhere for information on how to do this. In our article, you will learn how to set up Telesign integration with Google Sheets to automate the transfer of row contents from a spreadsheet to the platform's database.
How to Set up Google Sheets and Telesign Integration
So, we need customer data from Google Sheets to automatically flow into Telesign. Do you think that this is very difficult and that you can’t handle setting up and running this process? It's really not easy to do this yourself, but fortunately, you don't have to quickly master the intricacies of programming. The developers of the ApiX-Drive online connector have already taken care of everything. This no-code tool will help you, easily and literally in a few minutes, set up the integration of two systems, as well as many others, if you have such a need. ApiX-Drive has ready-made solutions for a wide range of programs: CRM systems, task managers, messengers, communication services, Google services and others.
Procedure:
- Decide on a Google spreadsheet from which you are going to transfer data to Telesign.
- Connect your Google Sheets account to the ApiX-Drive online connector and configure it according to the instructions.
- Connect your Telesign account to the ApiX-Drive online connector and make the necessary settings according to the instructions.
- Select the appropriate automatic update mode.
By doing all this in order, you will successfully trigger the automatic conversion of the contents of each new line in Google Sheets into a new entry in the Telesign database, accompanied by sending an SMS message with pre-compiled text to the potential client. Most likely, you already have a worksheet, so let's immediately move on to the next steps of Telesign and Google Sheets integration and consider them in more detail.
How to Set up the Data Source – Google Sheets
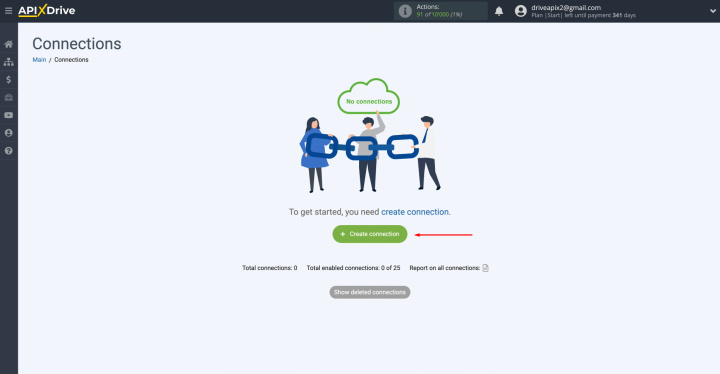
To set up Google Sheets + Telesign integration, create a new connection. Click on the green button.
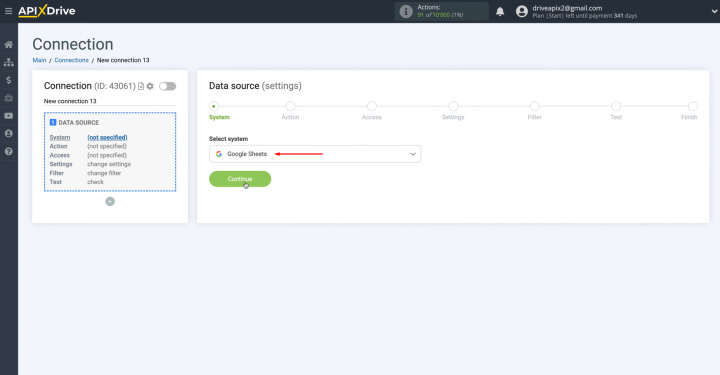
Select Google Sheets as the data source
system. Click “Continue”.
Select the "Get ROWS
(new)" action.
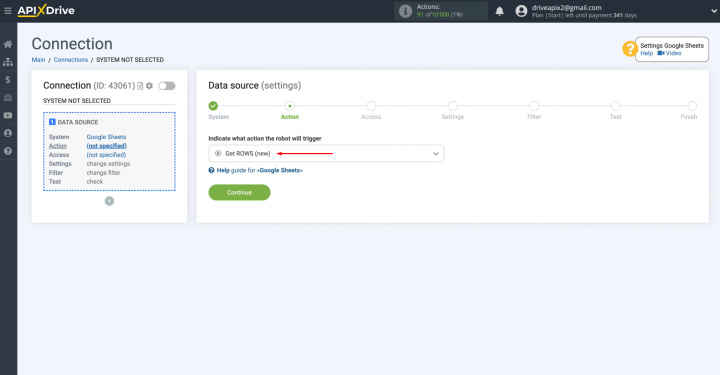
Connect your account in Google Sheets to the service ApiX-Drive. Click on the blue
button.
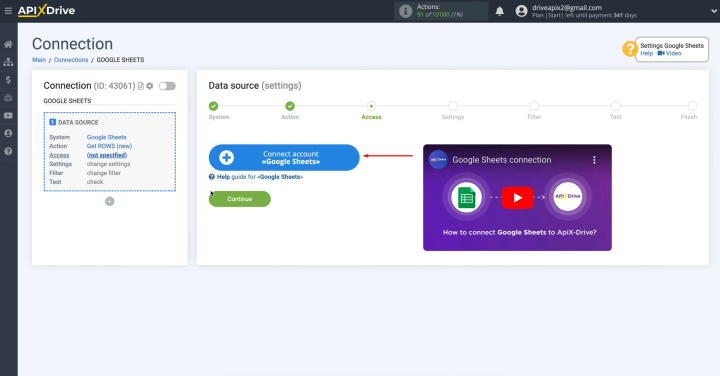
Enter your
username for your Google Sheets account. Click “Next”.
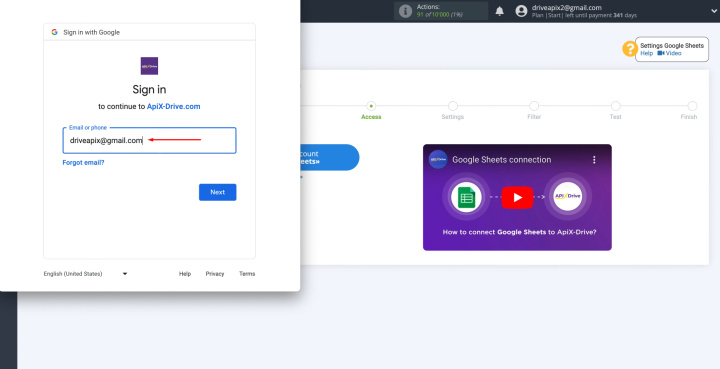
Enter your
password for your Google Sheets account. Click “Next”.
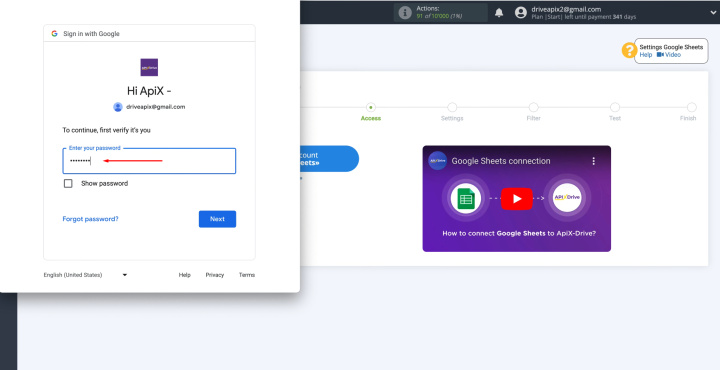
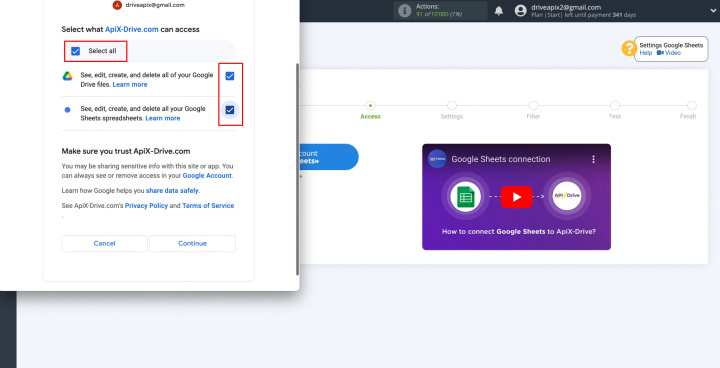
Give ApiX-Drive permission to work with your account.
Click “Continue”.
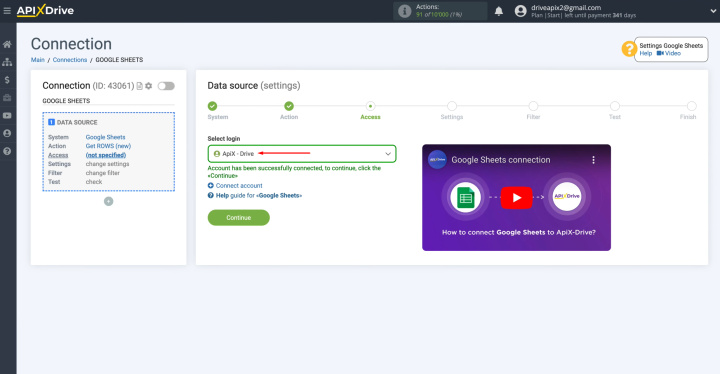
When the connected account is
displayed in the list, select it and
click "Continue".
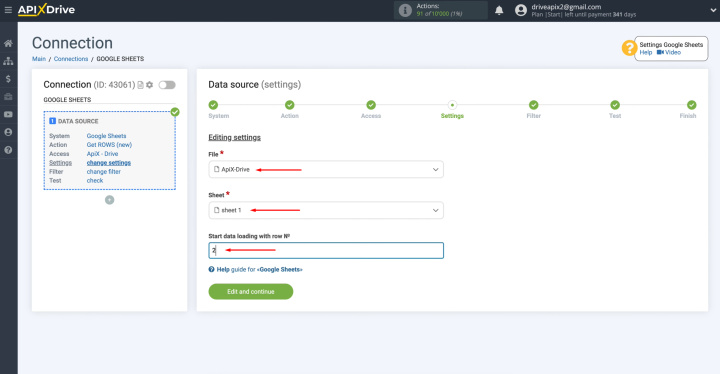
Specify the file and sheet from
which the data will be uploaded. In the field "Start data loading with row
number", specify the row number from which you want to start loading data. Example: If you have 1,000 rows in your
table and don't want to transfer all these rows, specify the number 999 to
start loading from the last one. We have two rows in the table, so we will indicate 2. Click “Edit
and continue”.
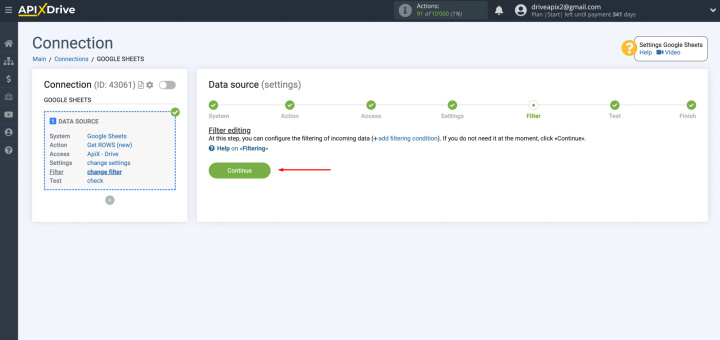
Set up a data
filter. In this case, click "Continue".
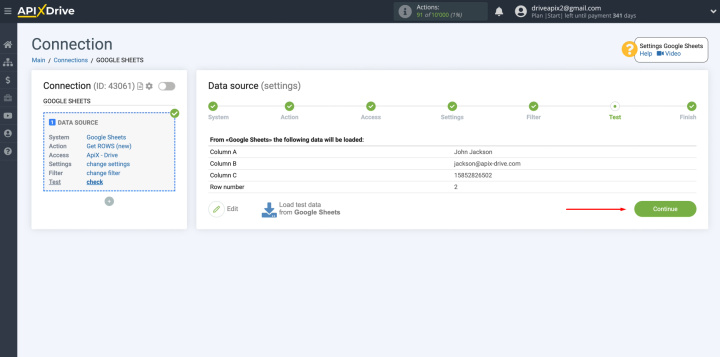
You see the test data that
was just generated. If there is no data, try following the steps
described earlier. If everything suits you, click "Continue".
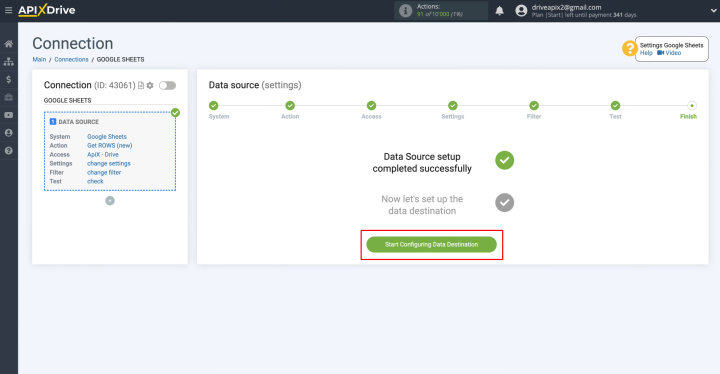
The Google Sheets data source
setup was completed successfully.
How to Set up the Data Receiver – Telesign
To set up Telesign + Google Sheets integration, move on to setting up data reception. Click “Start Configuring Data Destination”.
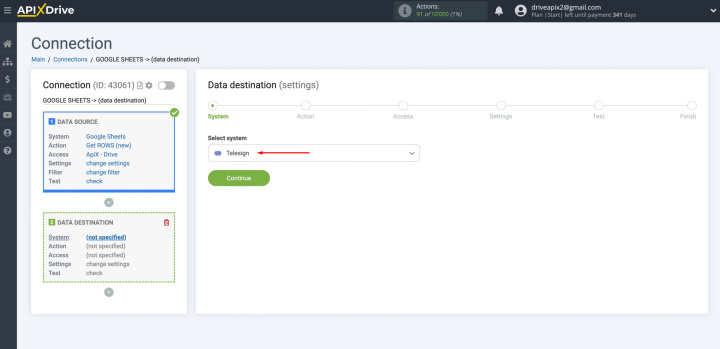
Select Telesign as the data receiving system. Click “Continue”.
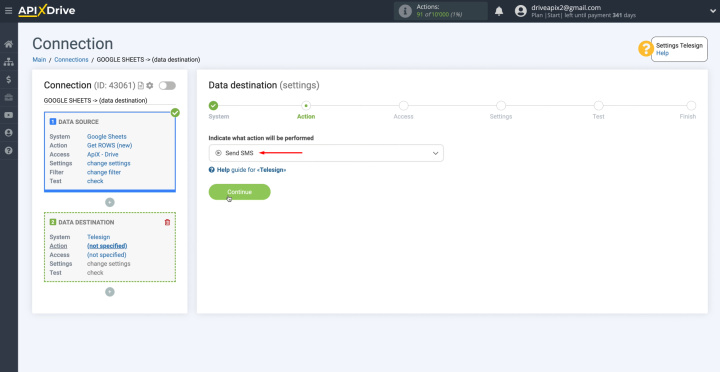
Select the action "Send SMS". Click “Continue”.
Connect your Telesign account to the ApiX-Drive service. Click on the blue
button.
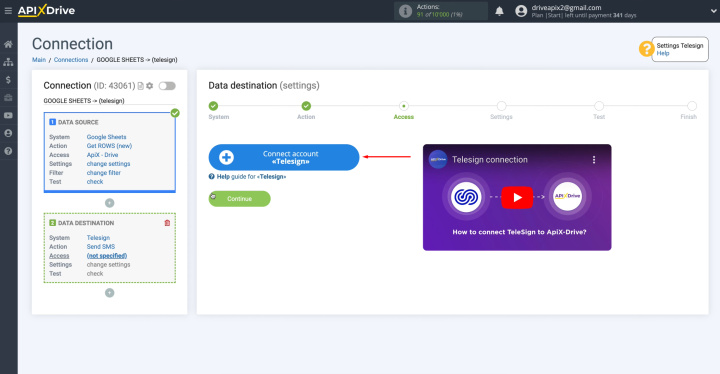
Specify customer ID and API keys.
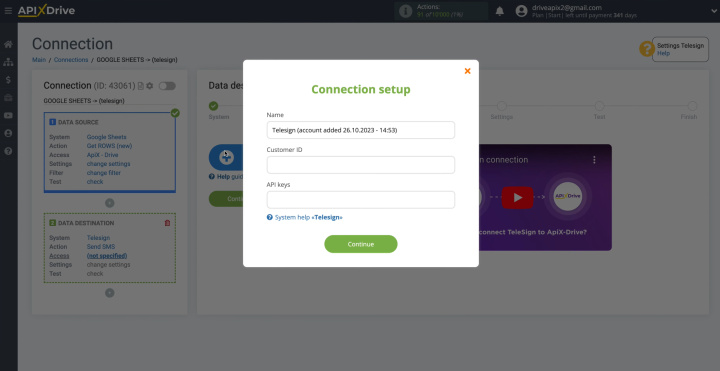
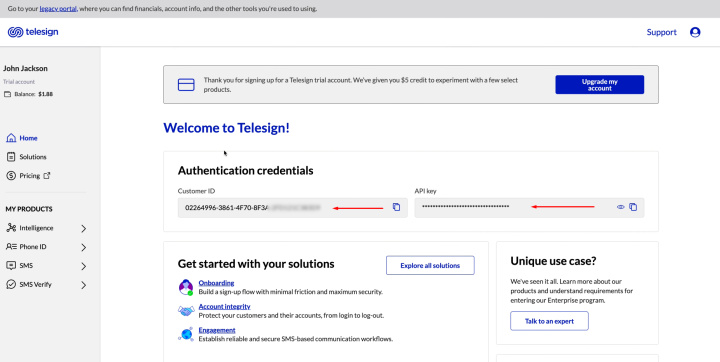
To get them,
go to your personal Telesign account. Copy the customer ID and API keys.
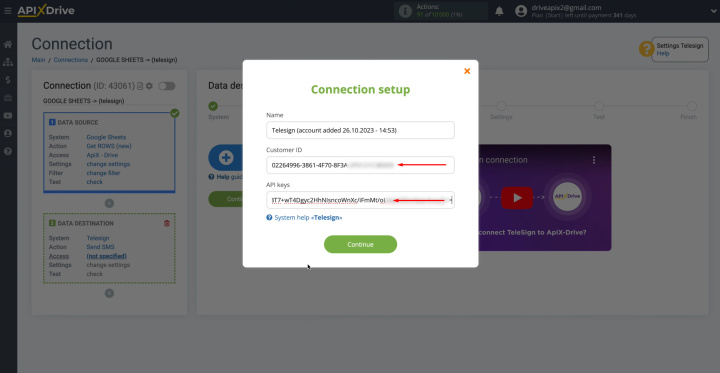
Paste customer
ID and API keys into the appropriate fields in the ApiX-Drive system. When
all fields are filled in, click "Continue".
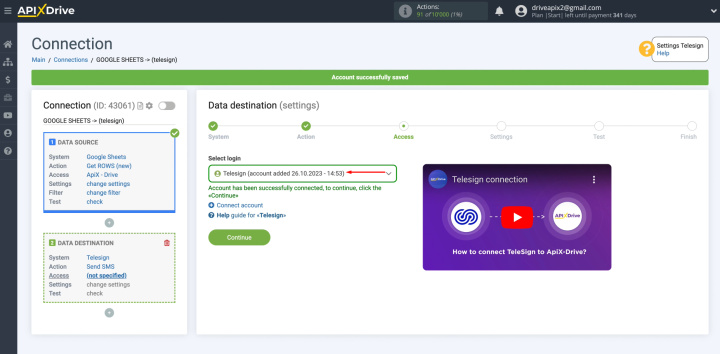
When the connected account is
displayed in the list, select it and
click "Continue".
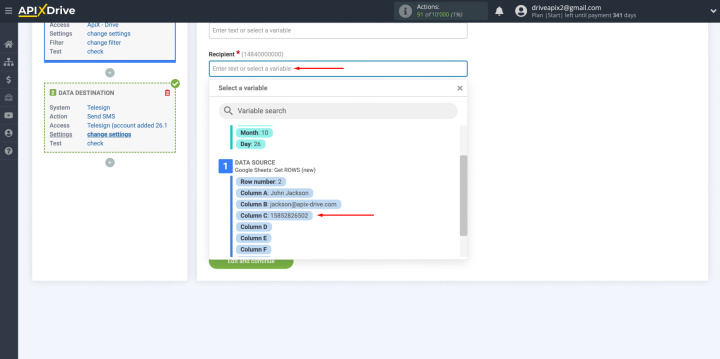
Fill in the fields with
variables from Google Sheets. To assign a variable, click on the
field in which you need to transfer data and select the required variable
from the drop-down list.
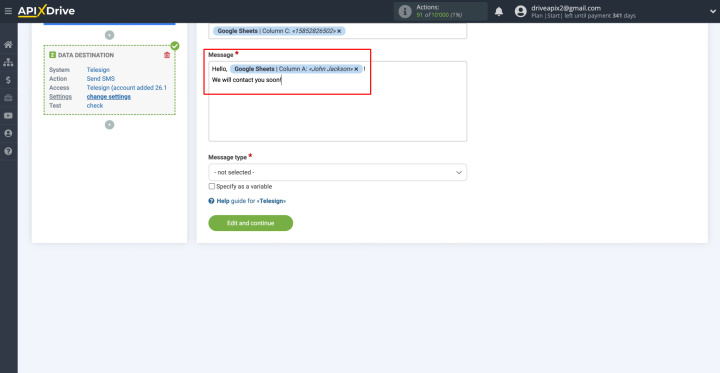
You can add variables
and enter values manually. To go below, press "Enter".
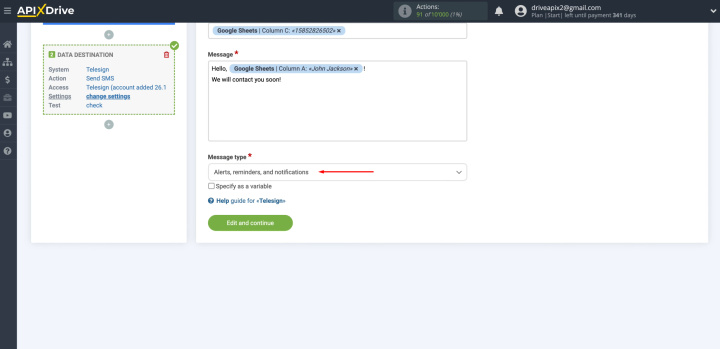
Select the
message type for which SMS will be sent. When
all fields are filled in, click "Edit and continue".
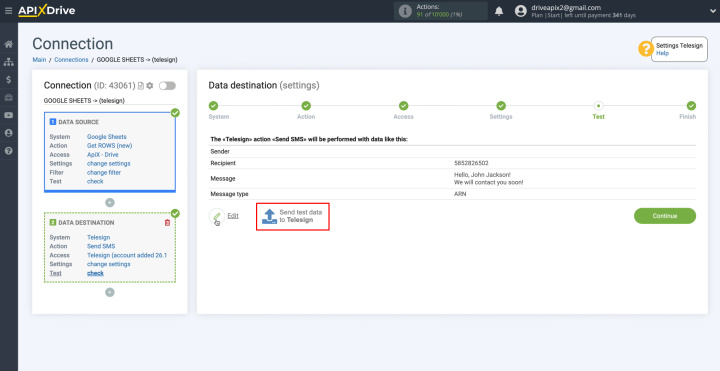
Here you see
the test data that will be sent to Telesign.
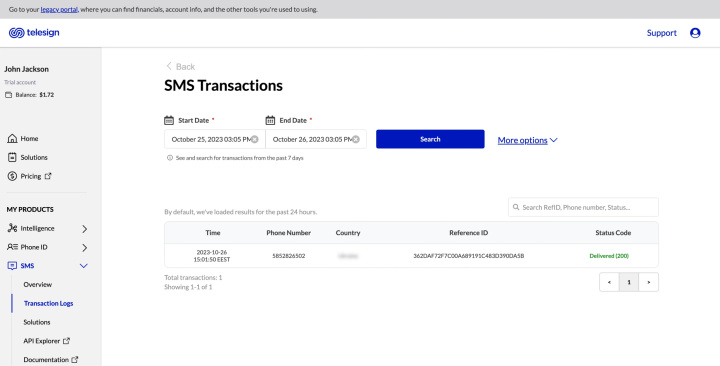
To check if the settings are correct, click "Send test data to Telesign".
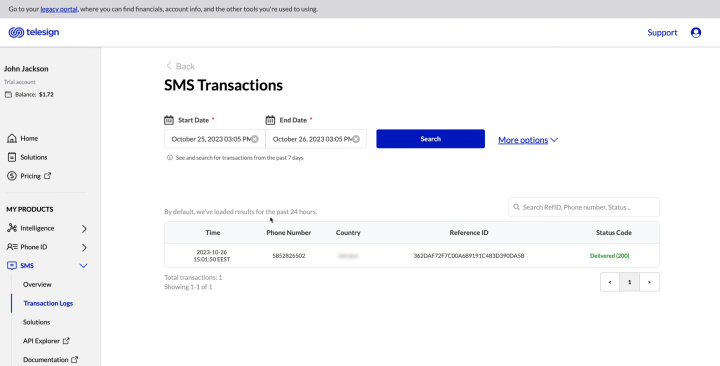
Go to your
Telesign account and check the result.
If you are satisfied with
everything, return to the ApiX-Drive service and click “Continue”.
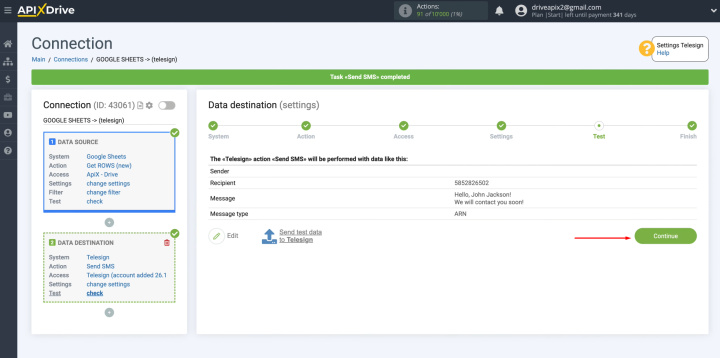
The data reception setup has
been successfully completed.
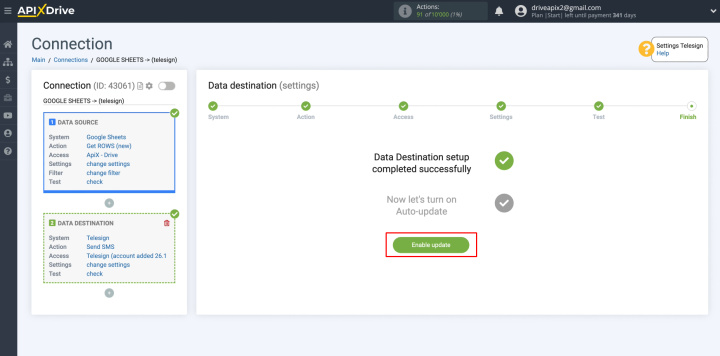
How to Set up Auto-update
In order for data transfer to occur automatically, configure auto-update. Click “Enable update”.
Click on the gear button.
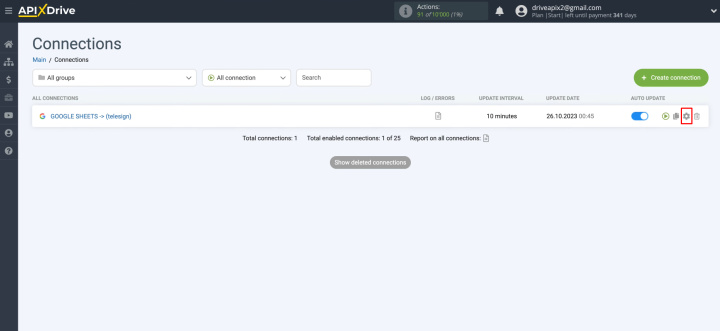
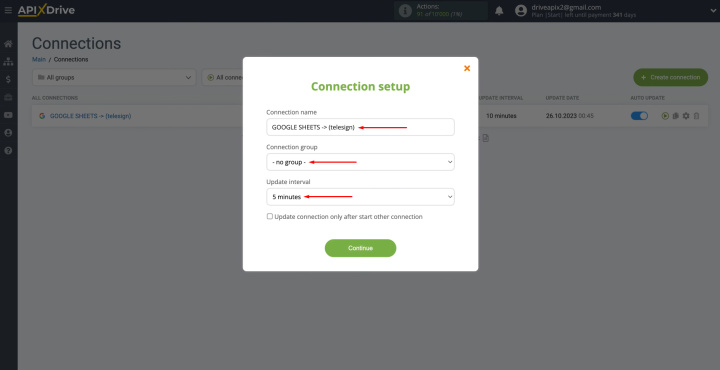
Select the interval for the operation of the connection. For example,
once every 5 minutes. In addition, here you can change the name of the
connection and assign it to the required group. Click “Continue”.
That's all. Congratulations! You have done it!
What will You get as a Result of Telesign and Google Sheets Integration
If you did everything according to our instructions, you should have successfully configured operational automation. Surely, you have already seen that each new line in Google Sheets that you fill out becomes a new contact in the Telesign communication service database, and this contact immediately receives an SMS message. Such automation is not only guaranteed to speed up your interaction with leads and existing clients, but will also make the work of both you and your department employees much easier.


By the way, you will feel relief much earlier, even at the stage of setting up Google Sheets Telesign integration. Thanks to the ApiX-Drive service, with which you set up data transfer and automatic message sending, you will not need the help of third-party specialists or mastering programming. Our online connector will do everything in the best possible way. Its intuitive interface will allow you to connect the necessary systems in just a few minutes. Collect as many clients as possible in Google Sheets, and ApiX-Drive, which tracks them around the clock, will help you speed up your work with them and improve its efficiency.
Apix-Drive is a simple and efficient system connector that will help you automate routine tasks and optimize business processes. You can save time and money, direct these resources to more important purposes. Test ApiX-Drive and make sure that this tool will relieve your employees and after 5 minutes of settings your business will start working faster.
