Mass Generation of Text Content: ApiX-Drive + ChatGPT
Earlier this year, we introduced the AI TOOLS (ChatGPT) block to our service. The new functionality is actively used by our customers to optimize work with the popular chatbot from the OpenAI company. In this article, we will consider one of the most common use cases of the AI TOOLS module, namely, mass generation of text content. If you work as a content manager, copywriter, editor, or simply have the task of creating a series of articles, pay attention to this guide to make your work as easy as possible.
Our Task
You are likely familiar with ChatGPT and may have already used it to generate articles or short stories. Would you like to receive 50, 100 or more texts automatically? Such mass generation of content can be ensured thanks to our ApiX-Drive service.
So, let's formulate the problem. For example, we need to create articles about various musical styles. What we need:
- OpenAI account.
- ApiX-Drive account.
- List of topics for articles.
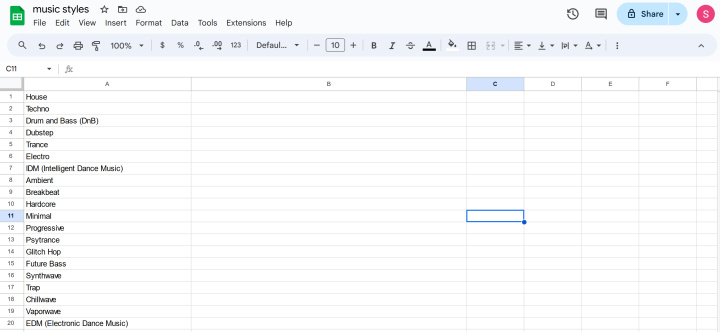
The ApiX-Drive online connector offers many systems and services in its catalog. The list of topics can be created in various services. We chose the simplest option and created a list of topics for articles in a Google Sheets table. Now all we have to do is configure the integration to get all the necessary texts automatically.
The Principle of Setting Up Integration in ApiX-Drive
The simplest integration consists of a data source and receiver. For example, you need automatic transfer of leads from Facebook to CRM. In this case, the FB account is connected as a source, and the required CRM is connected as a receiver. After connecting such an integration, the ApiX-Drive algorithms come into play. The system tracks new leads and automatically transfers data to CRM.
The functionality of our online connector allows you to use additional blocks between the source and the receiver (IF/ELSE logic, data search, formatting, mathematical operations) in order to maximally customize the integration for your task. In our example, we will use the AI TOOLS (ChatGPT) block.
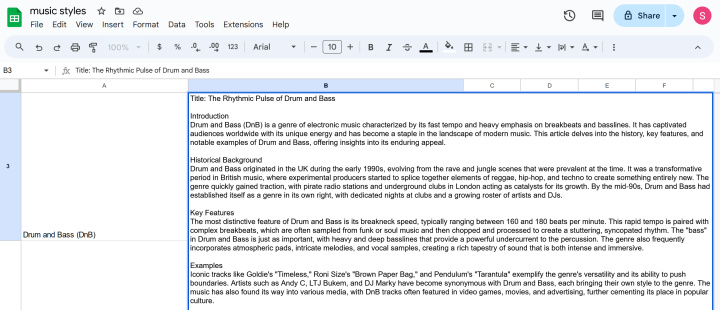
So, at the entrance, we have a table with topics for articles. As a result, we will get all the texts that will be added to the same table.
Open your ApiX-Drive and OpenAI accounts. Now, let's put theory into practice and see how it works.
Connect the Data Source
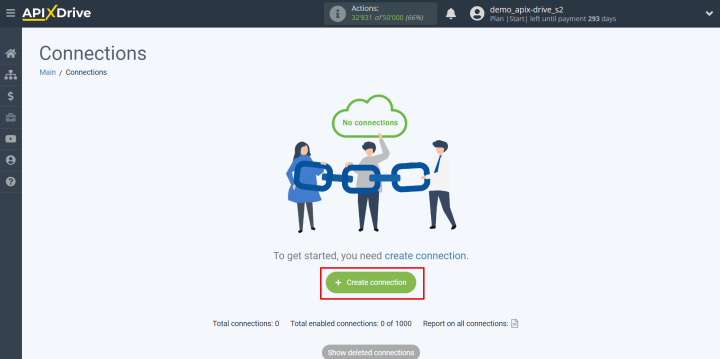
In the ApiX-Drive cabinet, we create a new connection.
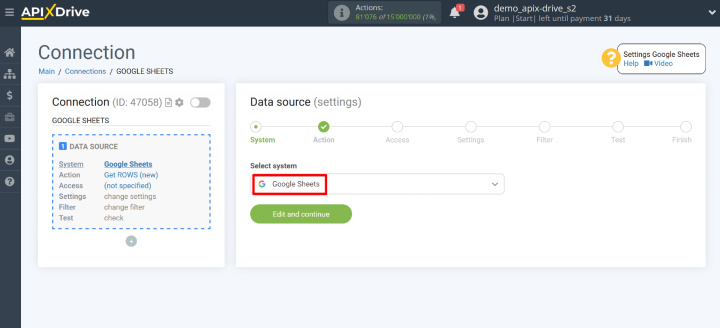
We choose the data source – Google Sheets.
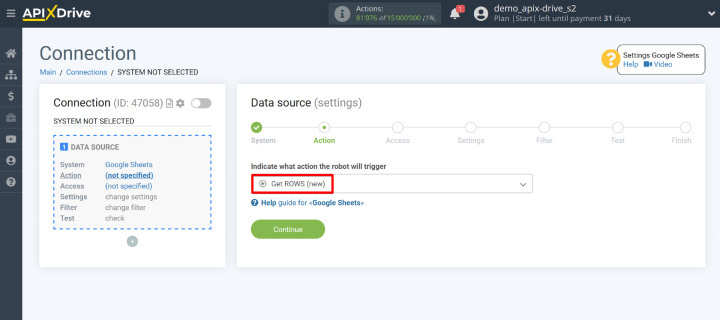
Select the Get ROWS (new) action. We will receive new rows.
Please note that if you accidentally choose the action "Get ROWS (all)"
and enable auto-update, the system will continuously load all data from
the table at the specified update interval, restarting articles
generation. For our task, select the "Get ROWS (new)" action, which will
only work with new rows. Also, regularly check your balance on OpenAI
and the number of available actions in ApiX-Drive.
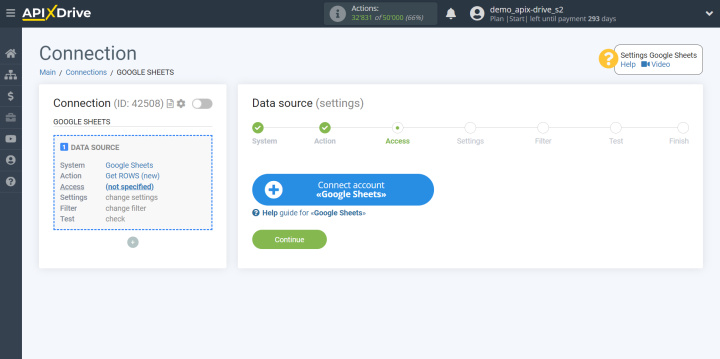
Connect the Google Sheets account to the ApiX-Drive service.
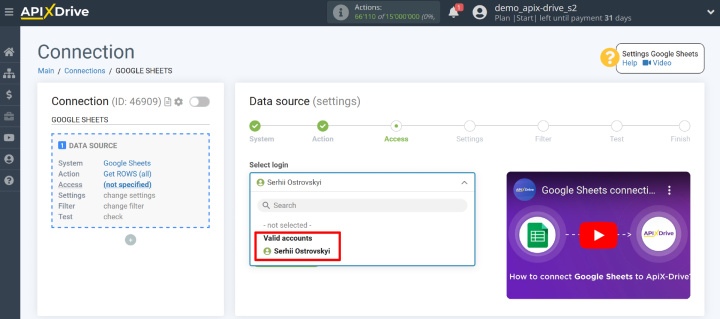
To connect an account, you must enter a login/password and provide the necessary permissions to the ApiX-Drive system. The account appeared in the list of active logins. Select it and continue the settings.
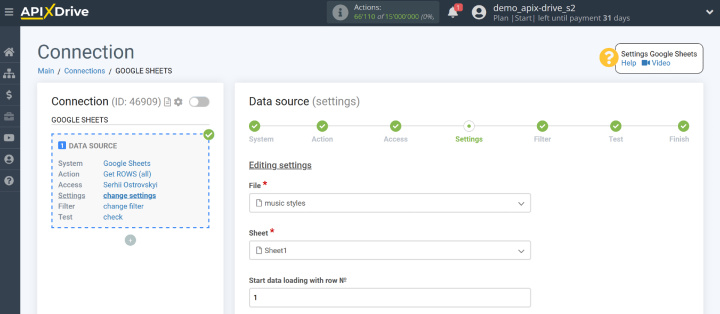
Select the table, sheet and row from which we will start loading data.
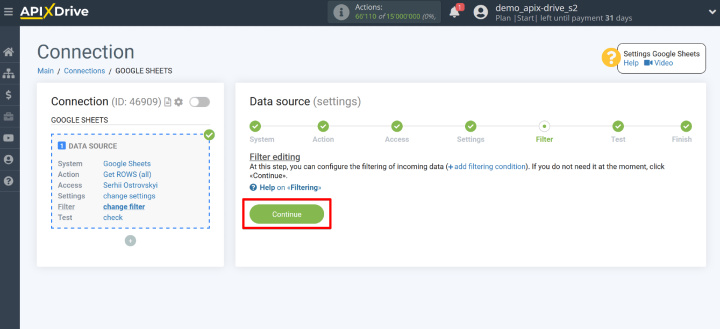
In the next step, you can add a filter for the input data. In our case, filters are not needed, so click "Continue".
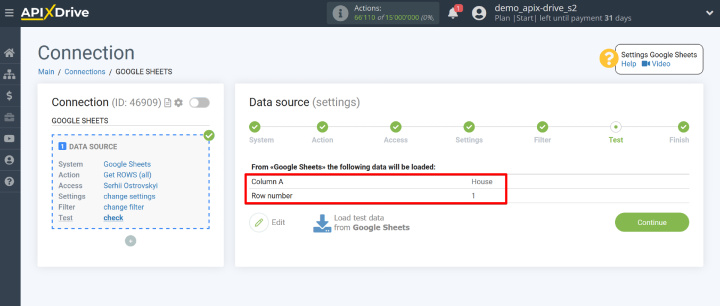
Now we can see an example of the data that will be loaded. Check and continue the settings.
This completes the data source setup.
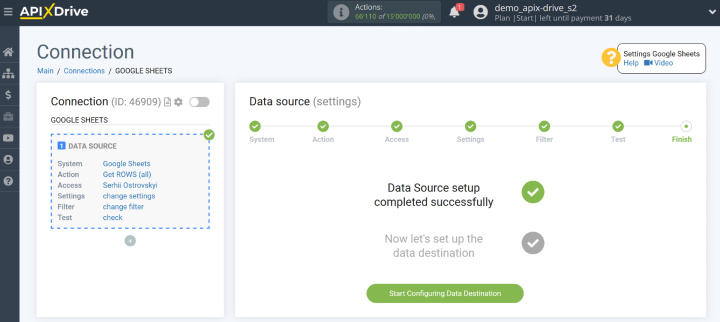
For simple integrations, we would go straight to configuring the receiver, but in our case, we need to add the AI TOOLS (ChatGPT) block first.
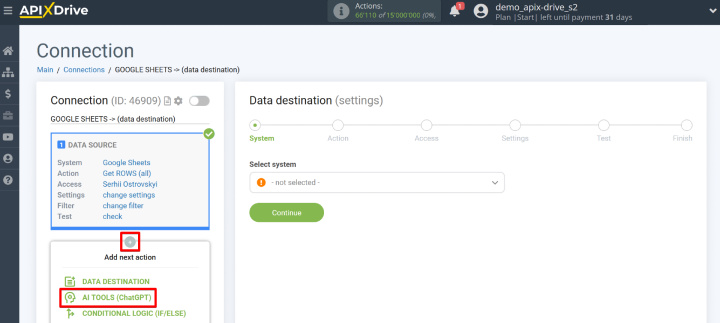
Setting Up the AI TOOLS (ChatGPT) Block
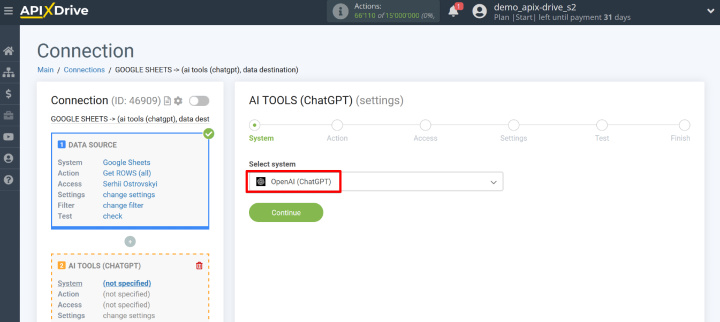
Select the OpenAI (ChatGPT) system.
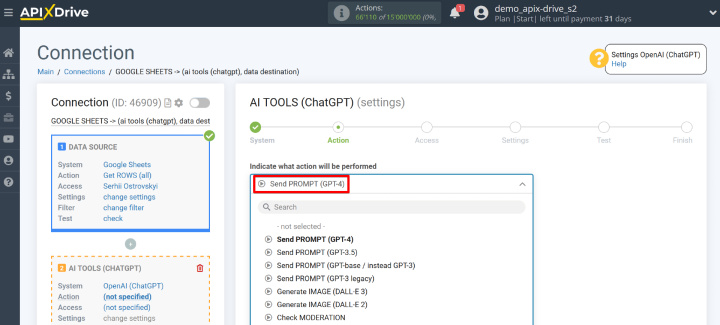
Now we need to choose an action. In our case it is "Send PROMPT (GPT-4)". Read more about the nuances of connection and the choice of actions in our help.
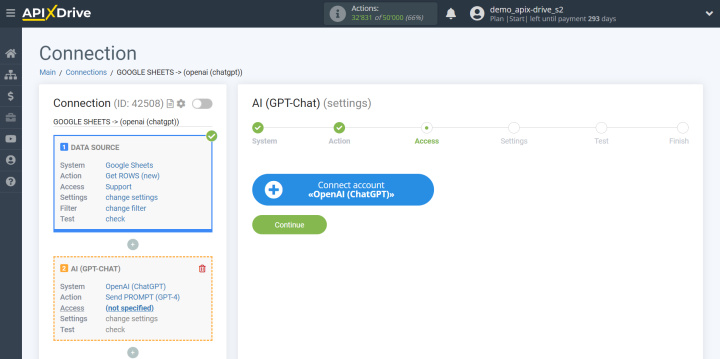
Now connect the OpenAI account.
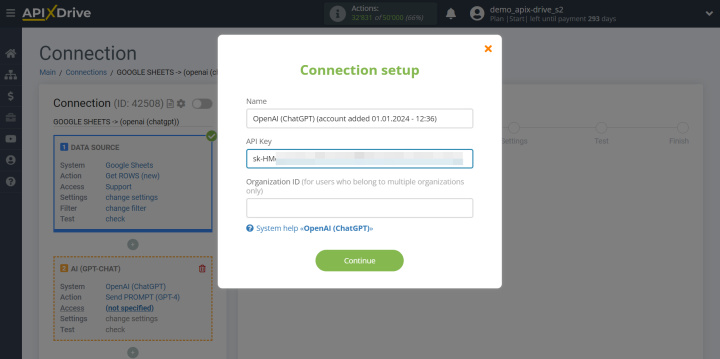
We need to fill in the "API Key" field.
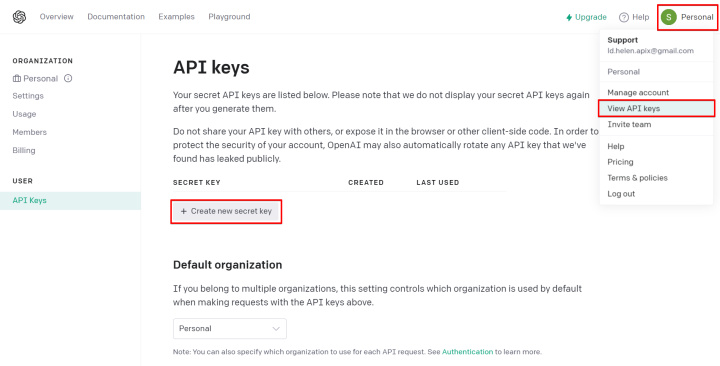
Go to the settings in your OpenAI account ("View API keys" section). Click "Create new secret key".
Copy the API key.
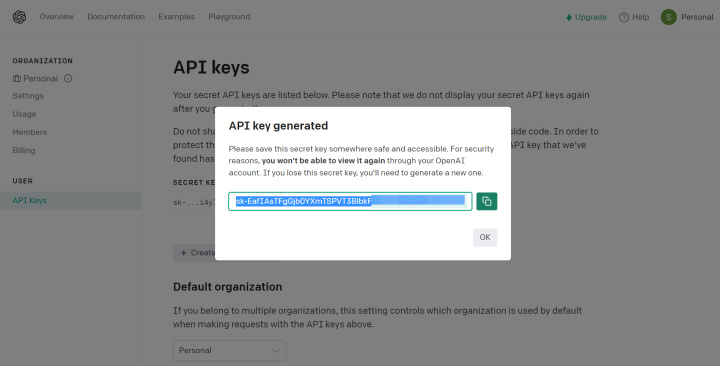
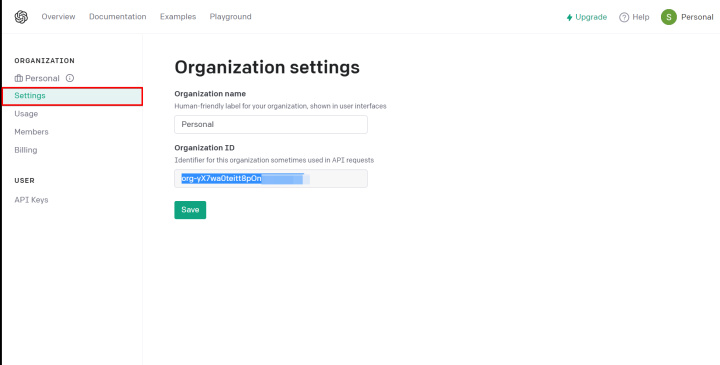
Return to the ApiX-Drive system and fill in the required field. If your OpenAI (ChatGPT) account belongs to multiple organizations, you must also specify the Organization ID.
To do this, go to "Settings" and copy the Organization ID.
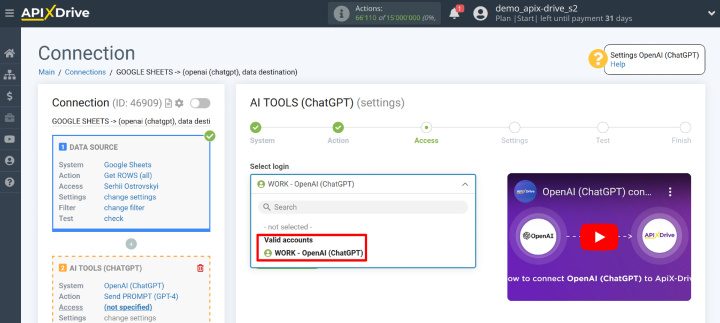
We continue the settings. The connected account will appear in the list of available logins. Select it and click "Continue". If you have problems connecting your OpenAI account, please review our help again or contact our experts for help. Also, don't forget to check your OpenAI account balance and check the current token prices when using the API.
We are confident that you have successfully reached this stage. So the fun begins. We set the prompt that will be sent to the chatbot. We recommend testing different options for requests directly in ChatGPT so that you get exactly the format of the article you need. We chose the following prompt option:
1. Introduction; 2. Historical Background; 3. Key Features; 4. Examples; 5. Conclusion.
Please ensure the article is well-organized, with clear headings for each section. Use concise and accessible language suitable for a general audience, and avoid jargon without explanation. Incorporate internal coherence within paragraphs and logical transitions between sections to maintain the flow of the article.
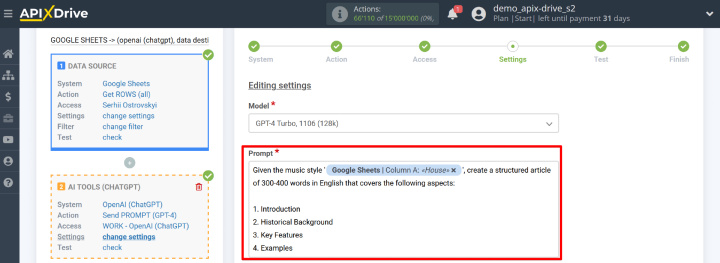
If necessary, configure additional parameters, or simply click "Edit and Continue". We can see the parameters of the request to ChatGPT, as well as the result.
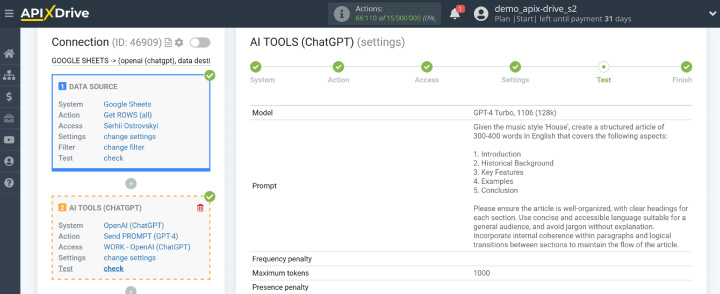
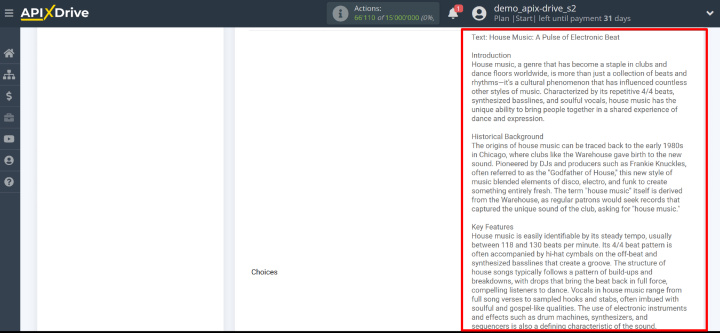
Check the result. If everything suits you, continue with the integration settings.
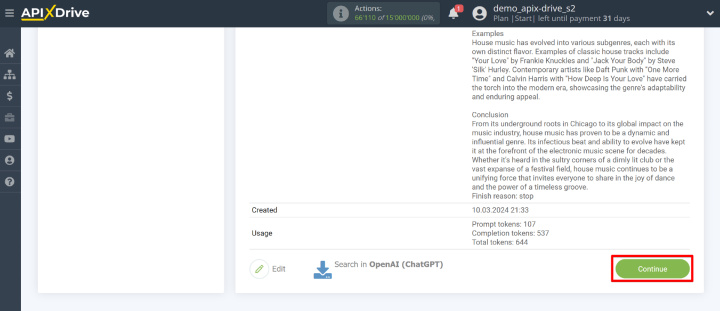
We have successfully configured the AI TOOLS (ChatGPT) module. Now it's the turn of the data receiver.
Settings of the Data Receiver
We may transfer generated articles to various systems. But in our case, it was decided to add articles to the same file where the topics are located. It will be quite convenient. Add the receiver block to our integration.
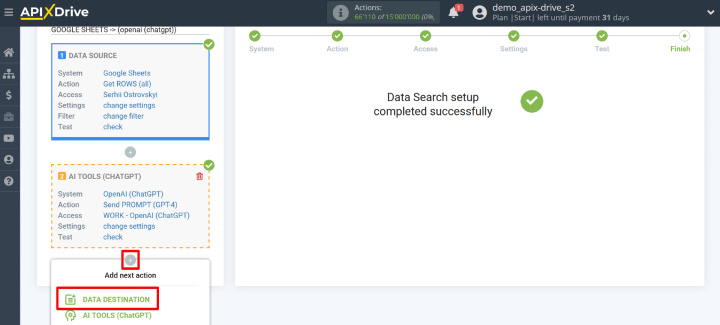
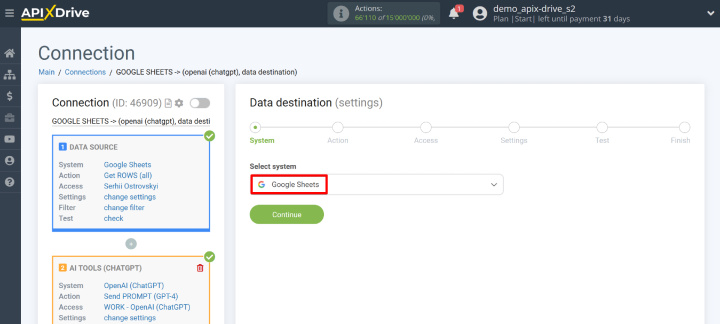
Select Google Sheets.
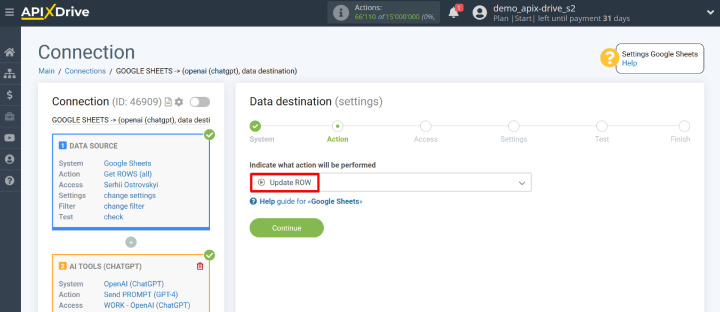
We will add the text of the article in the same row as the title of the topic. Therefore, we choose the "Update ROW" action.
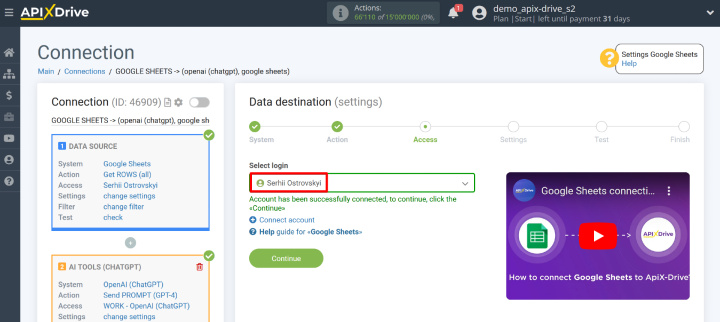
Select the previously connected Google Sheets account.
Select a file and a sheet.
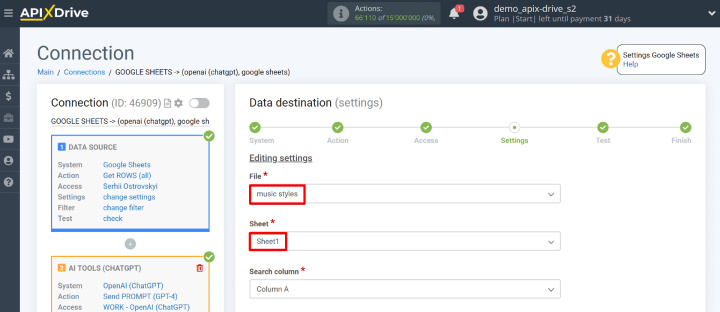
We will look for the first match in the table with a variable (the name of the music style in our case) and update this row by adding the text of the article. To use variables, click in the field and select the required variable from the drop-down list.
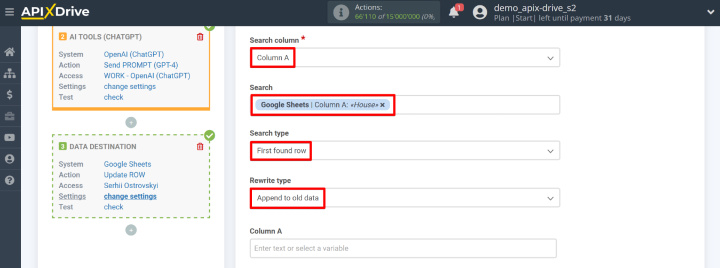
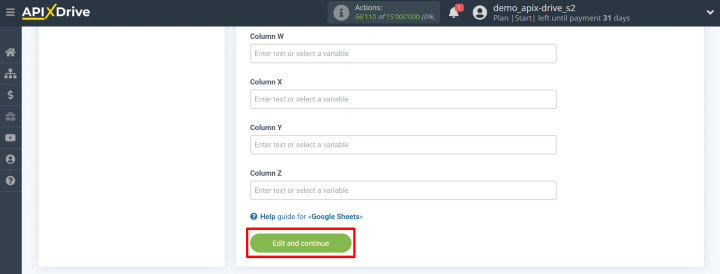
Now, for the "Column B" field, select the variable that corresponds to the generated article. Thus, we set the following algorithm: the system will search for the first match by the title of the article and add the text to the adjacent cell.
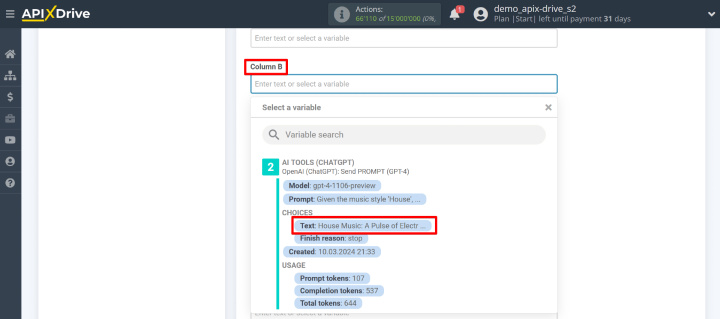
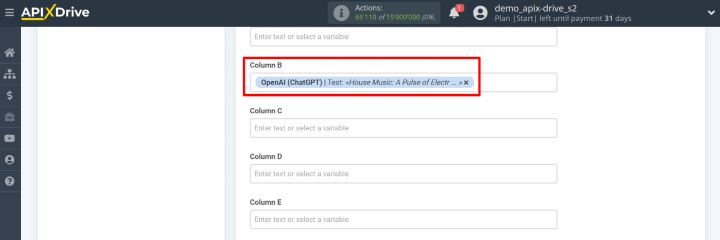
Click "Edit and Continue".
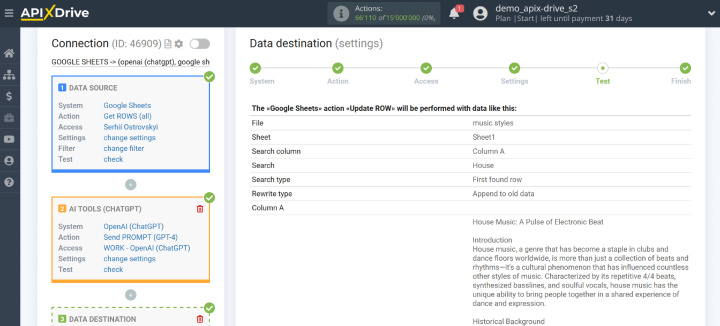
Check the data at the "Test" stage and click "Continue".
Automatic Data Update and Additional Settings
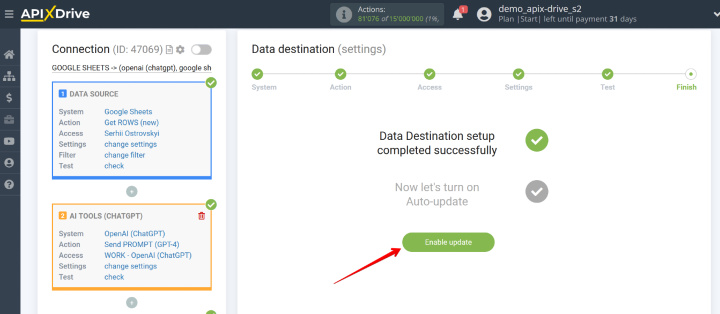
To start the integration, you need to activate the automatic data update. To do this, click "Enable update".
We can change the name of the integration, choose the data update interval, and add it to a folder. To do this, go to the settings.
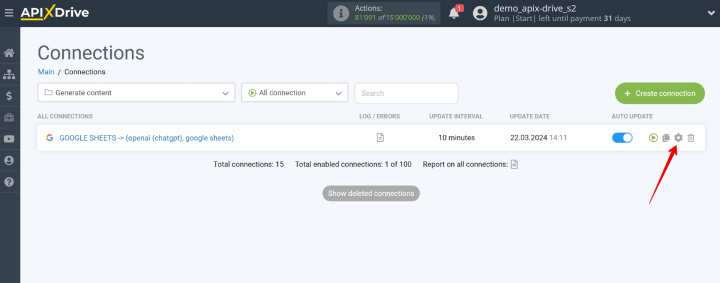
If necessary, change the name, select the data update interval and the folder.
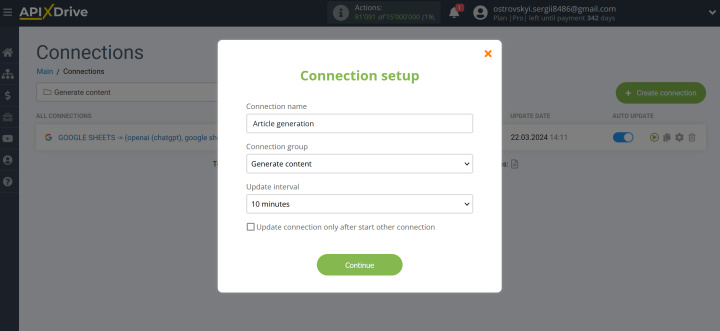
Note that we have selected the "Get ROWS (new)" action. With auto-update enabled, the system will check the table for new rows. If new rows appear in the table, ApiX-Drive will automatically start the article generation process.
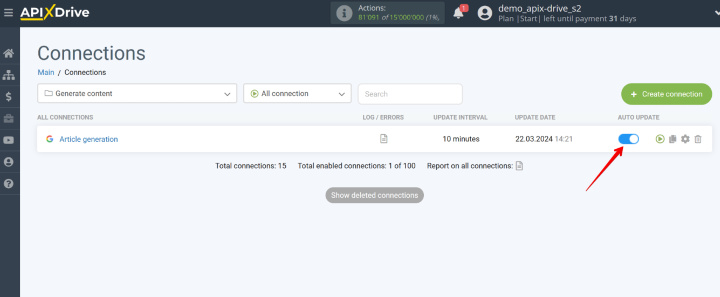
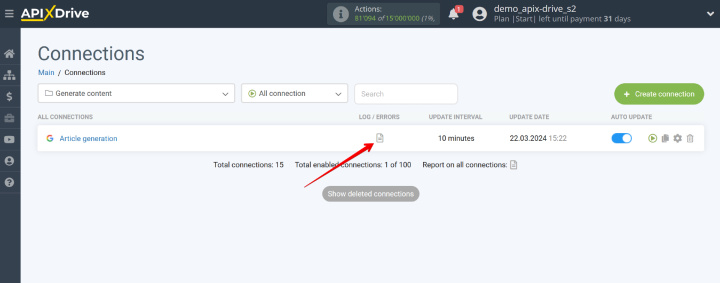
You can also learn how the integration works by reading the logs.
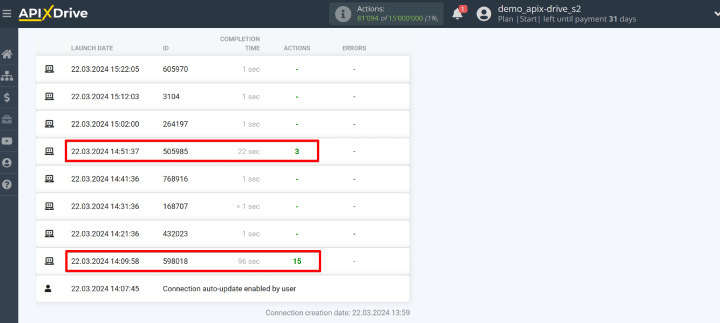
How to read logs? Everything here is quite simple: the date, ID and time of the start of the integration, as well as the number of actions performed and errors. For example, the table originally had five rows. The system downloaded the data, sent it to ChatGPT, received a response and added texts to the table (15 actions). Then later we added another topic for the article. The system worked for a new row (3 actions).
Please note that if you accidentally select the "Get ROWS (all)" action for the data source and enable auto-update, the system will constantly load all the data from the table and start the integration. So pay attention to this moment. For our task, choose the "Get ROWS (new)" action, which will work only with new rows. Also, regularly check the logs, the balance on OpenAI and the number of available actions in ApiX-Drive.
The Result of Integration
So, we looked at the procedure for setting up the integration with the AI TOOLS (ChatGPT) unit. As a result, we have an automatic article generation process. With the help of the ApiX-Drive service, you have the opportunity to significantly increase your efficiency. Set up a similar connection and receive text materials from the ChatGPT chatbot quickly, in large quantities and in a convenient format.
Automatic article generation is a popular, but not the only, option for using our AI TOOLS (ChatGPT) module. In the following articles, we will tell you how else you can use this functionality.
Time is the most valuable resource in today's business realities. By eliminating the routine from work processes, you will get more opportunities to implement the most daring plans and ideas. Choose – you can continue to waste time, money and nerves on inefficient solutions, or you can use ApiX-Drive, automating work processes and achieving results with minimal investment of money, effort and human resources.
